Analyzing Responses
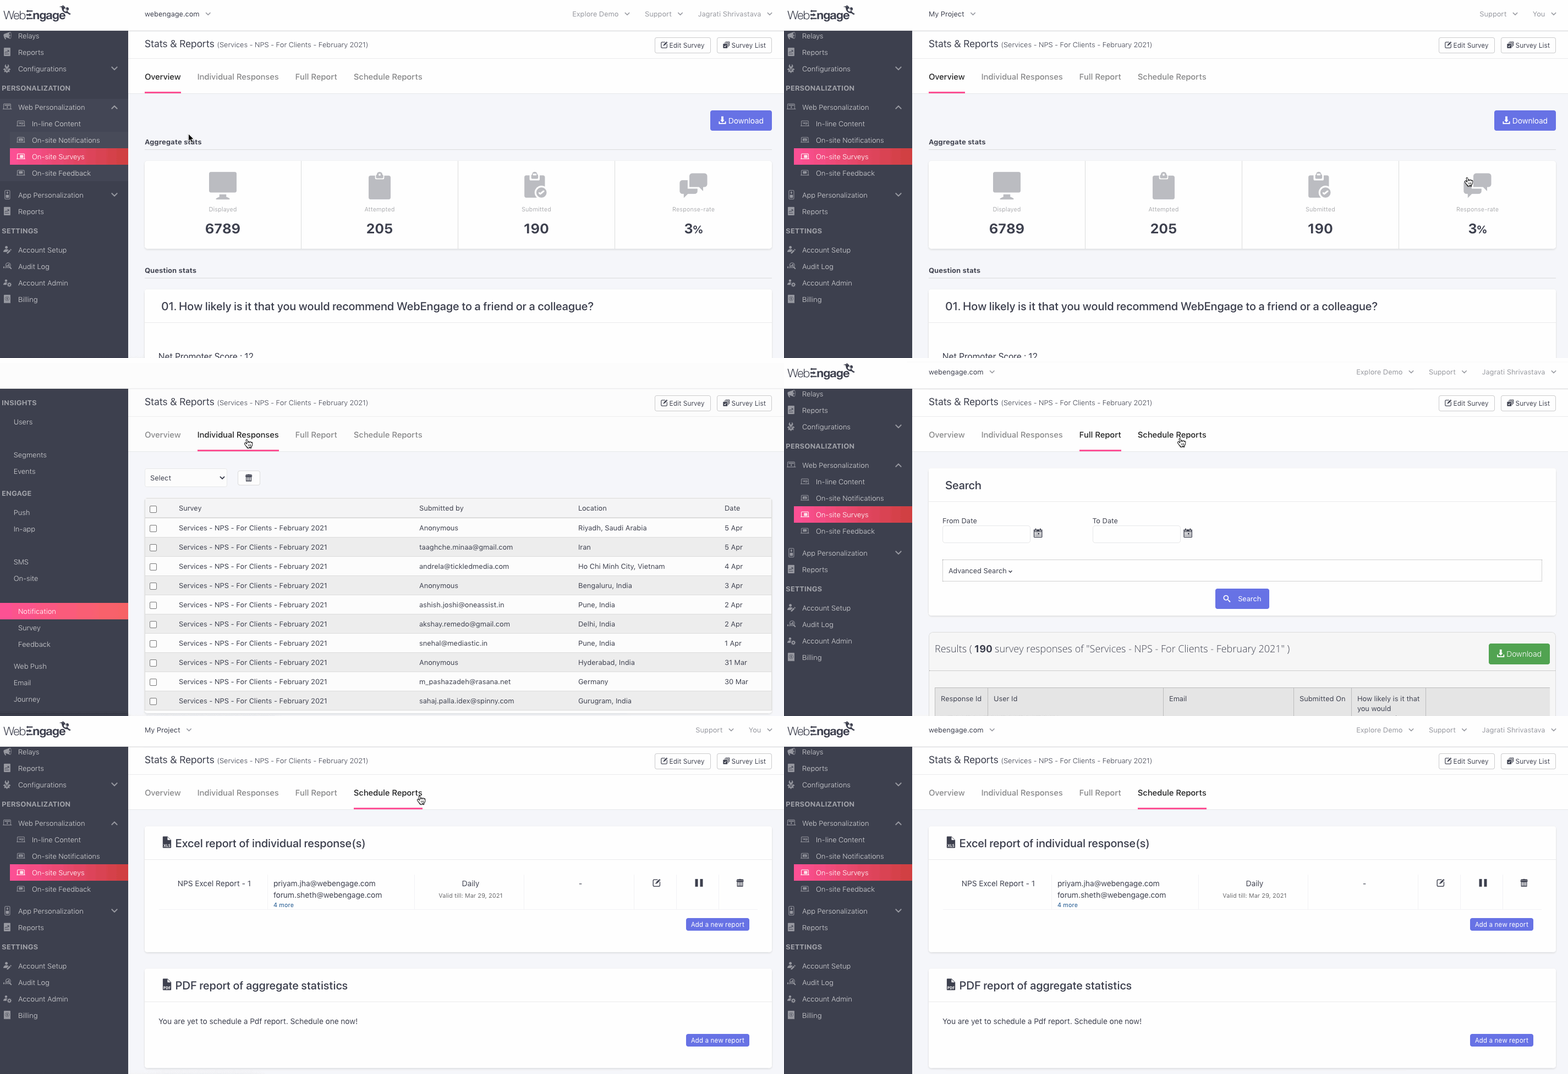
Once you activate a Survey, you can access user responses and analyze its performance by accessing Stats & Reports from the Survey Card, as shown below.
Click to enlarge
Here, you will find a detailed engagement report against key performance indicators and user details like Response, Name, Email Address, Location, User ID, Date of submission, and so on.
Let's walk you through each section:
Overview
Click to enlarge
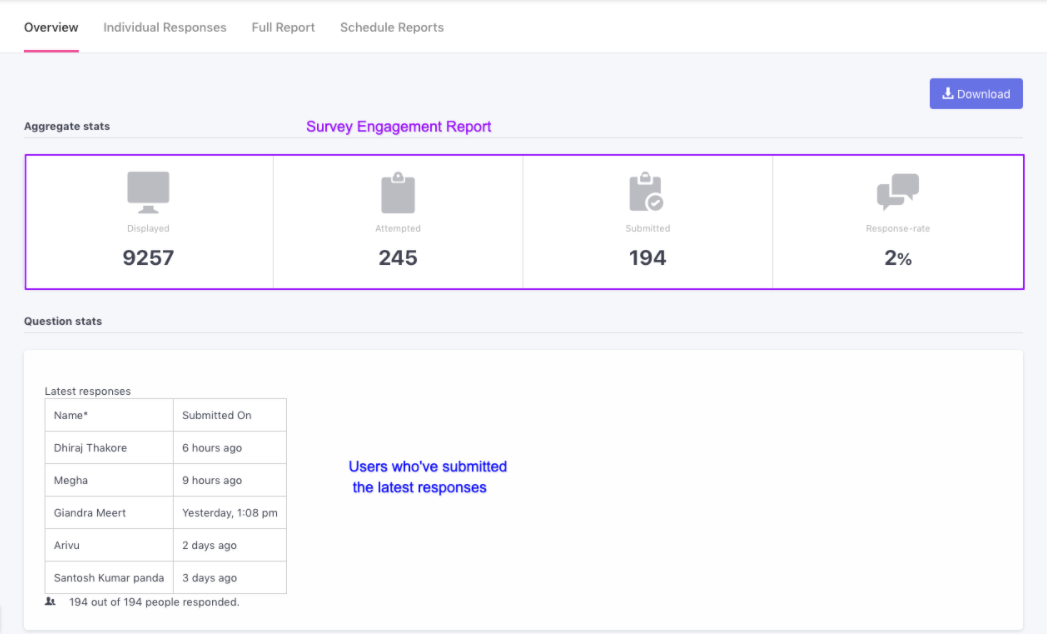
As highlighted above, this section provides a top-level view of Survey responses against Aggregated Stats like Displayed (Views), Attempted, Submitted and Responses Rate. (Detailed read)
-
You will also find a brief report on the Latest Responses received on the questionnaire along with the user's name and date-time of submission.
-
You can click the Download button placed on the top right to obtain a copy,
Individual Responses
Click to enlarge
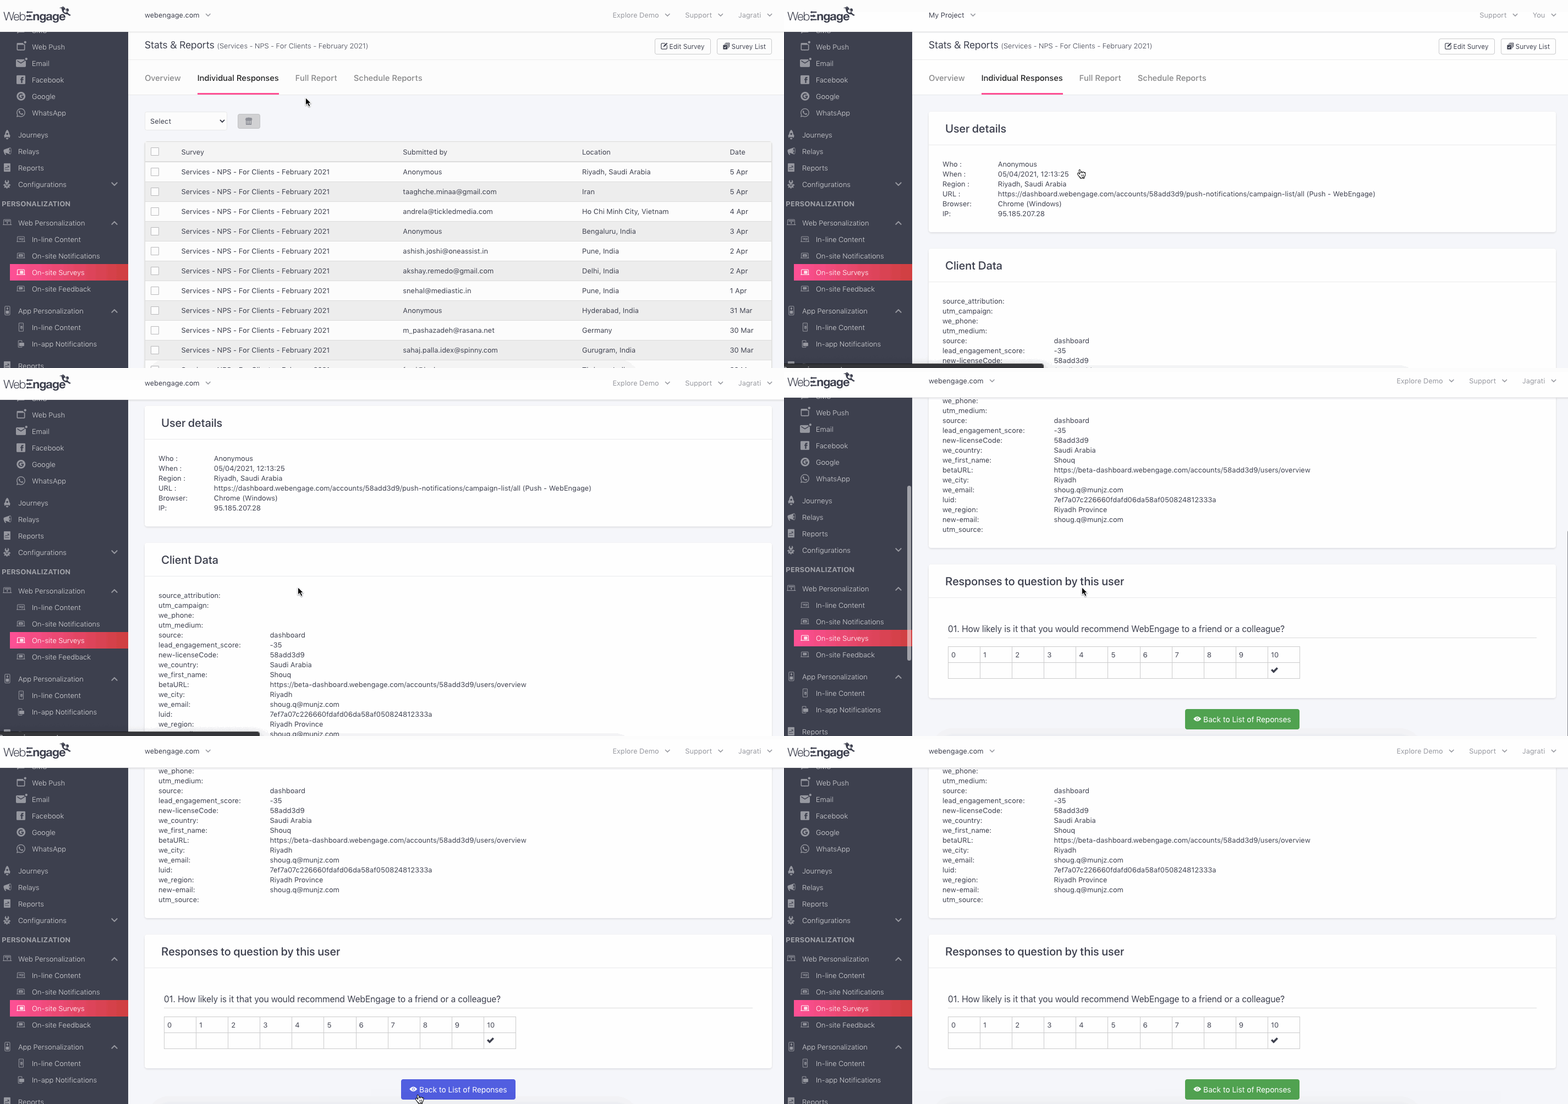
This section provides a detailed report of all the Survey responses for its entire lifetime. As shown above, click on a row to view specific answers and user details. Let's quickly walk you through it:
-
User Details Includes the user's Name (Who), When the response was submitted (Date-time), where it was submitted from (Region), and tech details like Browser, Page URL, and IP Address.
-
Client Data Includes user details related to your WebEngage accounts like their User ID (LUID), Source, and Email Address.
-
Responses to Questions by This User
You can choose to delete irrelevant submissions by selecting a row and clicking the Delete icon placed on the top left of List of Responses.
Full Report
Click to enlarge
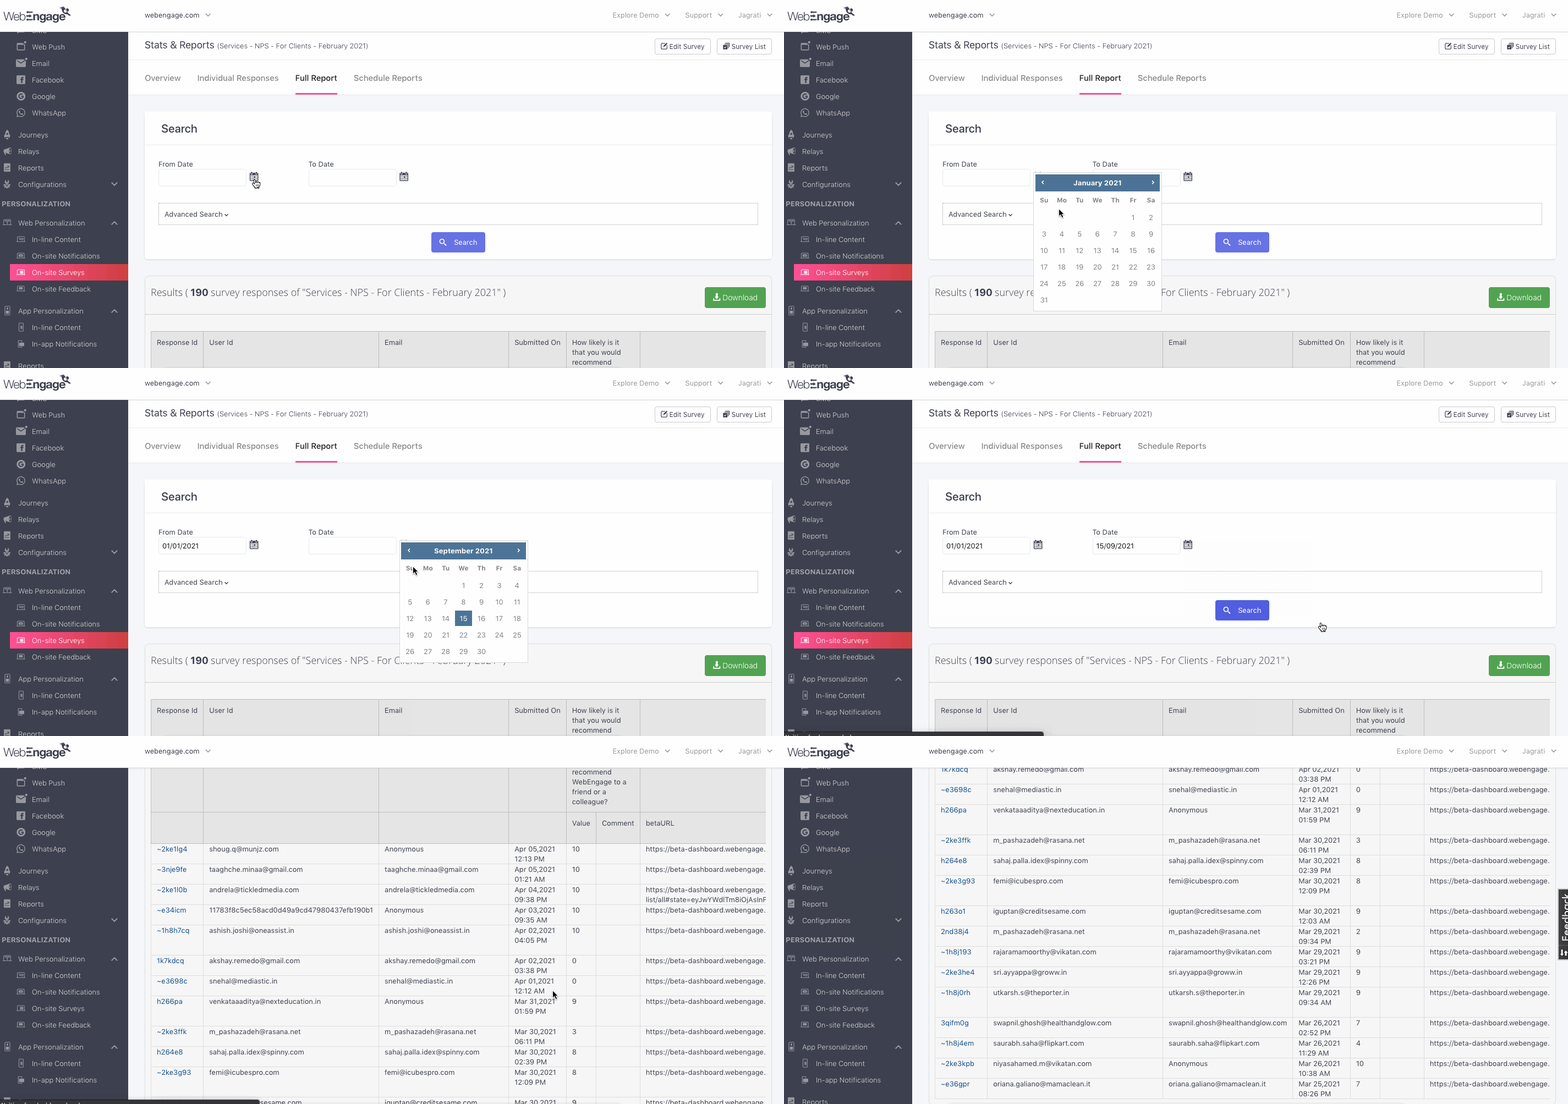
This section provides a detailed report of each response over the entire lifetime of your account.
Using Advanced Search, you can filter down the report by:
-
A specific time frame
-
Response Status: Helps you filter out survey responses that have been Read by an account admin, vs. those that are Unread.
-
Response ID: Each response is given a unique ID. Click on it to access details.
-
User ID: All users that interact with your platforms are assigned a unique ID in your dashboard.
-
Email (Address): Search for a user's messages by adding their email address (found under theirUser Profile).
-
Message: Type in a keyword to filter out all user queries that contain it.
-
Country, City
-
Browser
-
Tags: Tags can be created under Survey Card to manage them better.
-
Page URL: Add a link to filter out all messages that have been submitted on the page.
-
IP (Address): Specify the IP address to filter out all messages submitted through it.
-
Source
Once you have the details you need, click the Download button placed on the table's top right to get a copy.
Schedule Reports
You can easily track a survey's performance by having a report delivered to your inbox! Depending on your needs, you can choose to schedule the following types of reports:
-
Excel Report of Individual Responses
-
PDF Report of Aggregated Stats
-
Direct Email of Individual Responses
Here's how you can go about it:
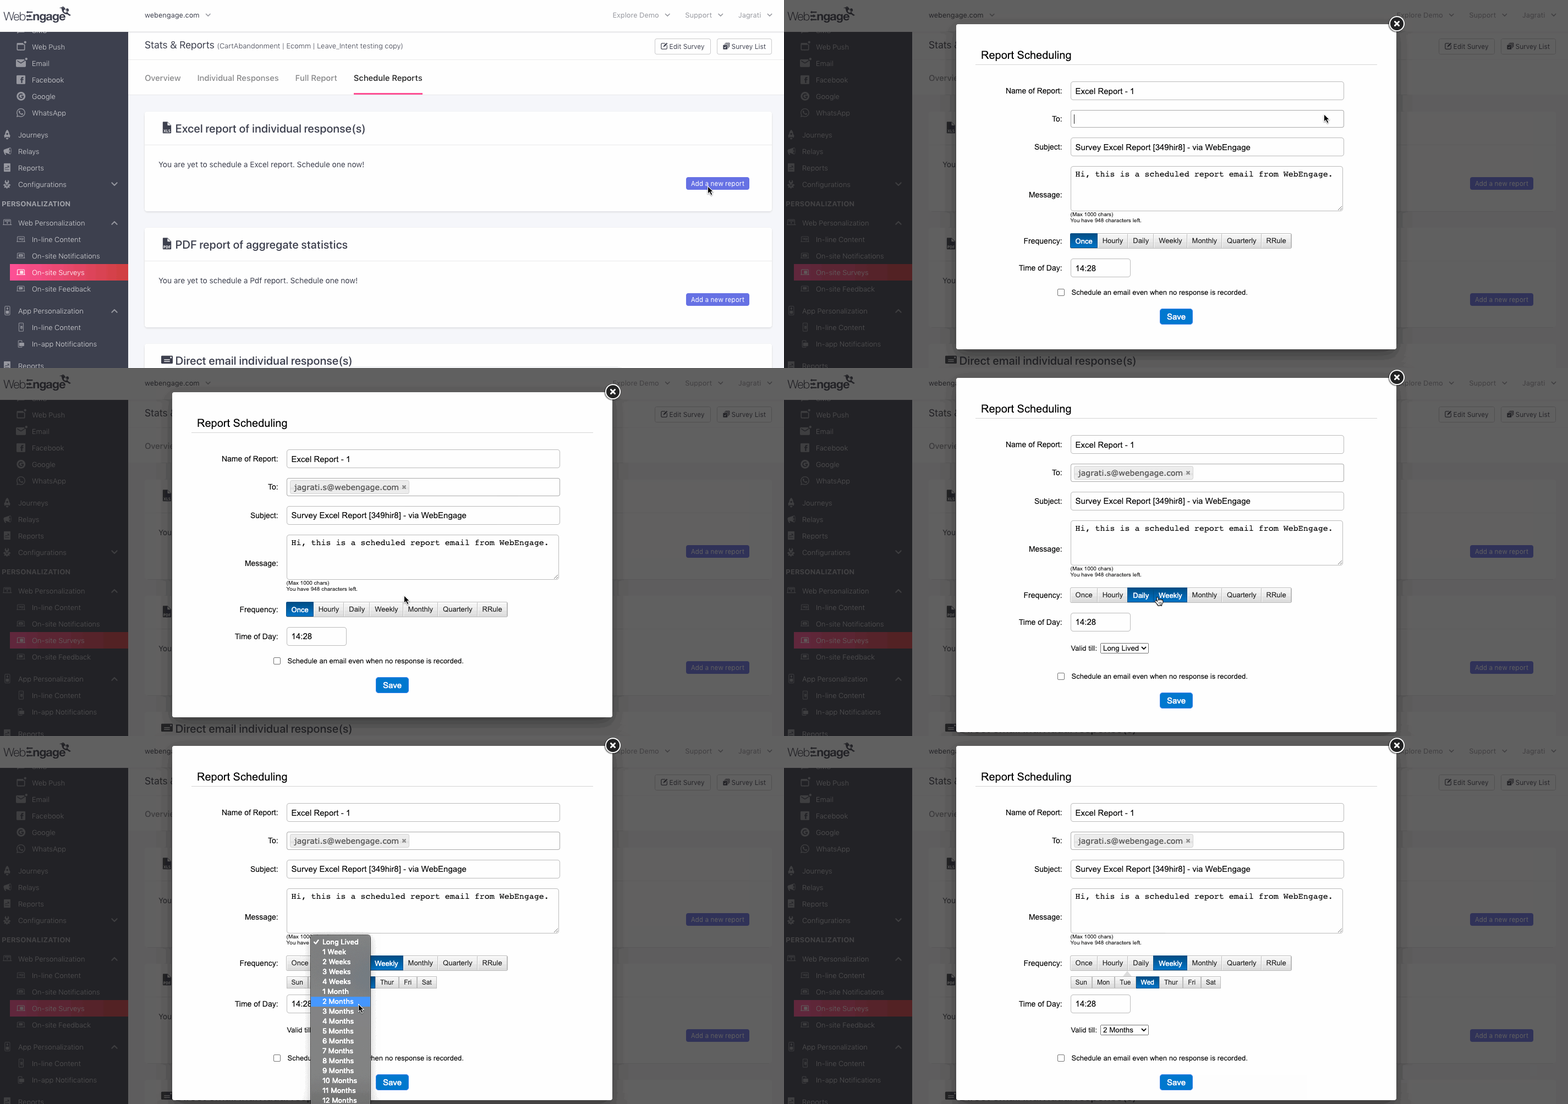
Click to enlarge
Step 1: Click the Add a New Report button to get started. (You can also schedule multiple reports of the same type for a survey.)
Step 2: Name your report.
Step 3: Specify recipient email addresses.
Step 4: Add a subject line for the report.
Step 5: Add a message to provide some context for the report.
Step 6: Specify the report frequency by selecting On (Response) Submission/ Once/ Hourly/ Daily/ Weekly, Monthly/ Quarterly.
Step 7: Specify the time at which the report must be sent.
Step 8 (Optional): Enable the field, Schedule an email even when no response is recorded to receive a notification about the same.
Step 9: Click Save to implement!
As highlighted below, you can choose to Edit, Pause or Delete a Scheduled Report anytime you like.

Click to enlarge
We hope this has equipped you with a robust understanding of how you can access individual responses and analyze the survey's overall performance. Please feel free to drop in a few lines at [email protected] if you have any queries or feedback. We're always just an email away!
Updated 3 months ago