Live Segments Hub
This is the first interface you'll experience on selecting Live Segments from the navigation panel. It's a central repository of all the Live Segments created by you and presents a brief overview of each, as shown below.

Click to enlarge
Segment Details
Let's walk you through the details indicated for each segment:
Segment Name: Indicates segment titles; you can click them to access Segment Analysis.
Users: Indicates the total number of users included in a segment at present.
- The pool of users is updated in real-time as users roll in-and-out as and when their profile traits, actions match/ don't match the rules of segmentation. This is made possible by the principles of Dynamic Profiling and Rolling Time Window that control Live Segments.
Campaigns: Indicates the total number of campaigns sent to a segment over its lifetime. This includes all channels of engagement, Push, In-app, SMS, On-site Overlays, Web Push, Email, WhatsApp, and Web Personalization.
Journeys: Indicates the total number of journey campaigns that have been sent to a segment over its lifetime.
Created On: Indicates the date-time at which the segment was created in your dashboard.
Tags: Indicated the tags associated with the segment.
Tag is a handy feature that helps you categorize your segments as per their purpose, target audience, or any other parameter that makes them easier to locate.
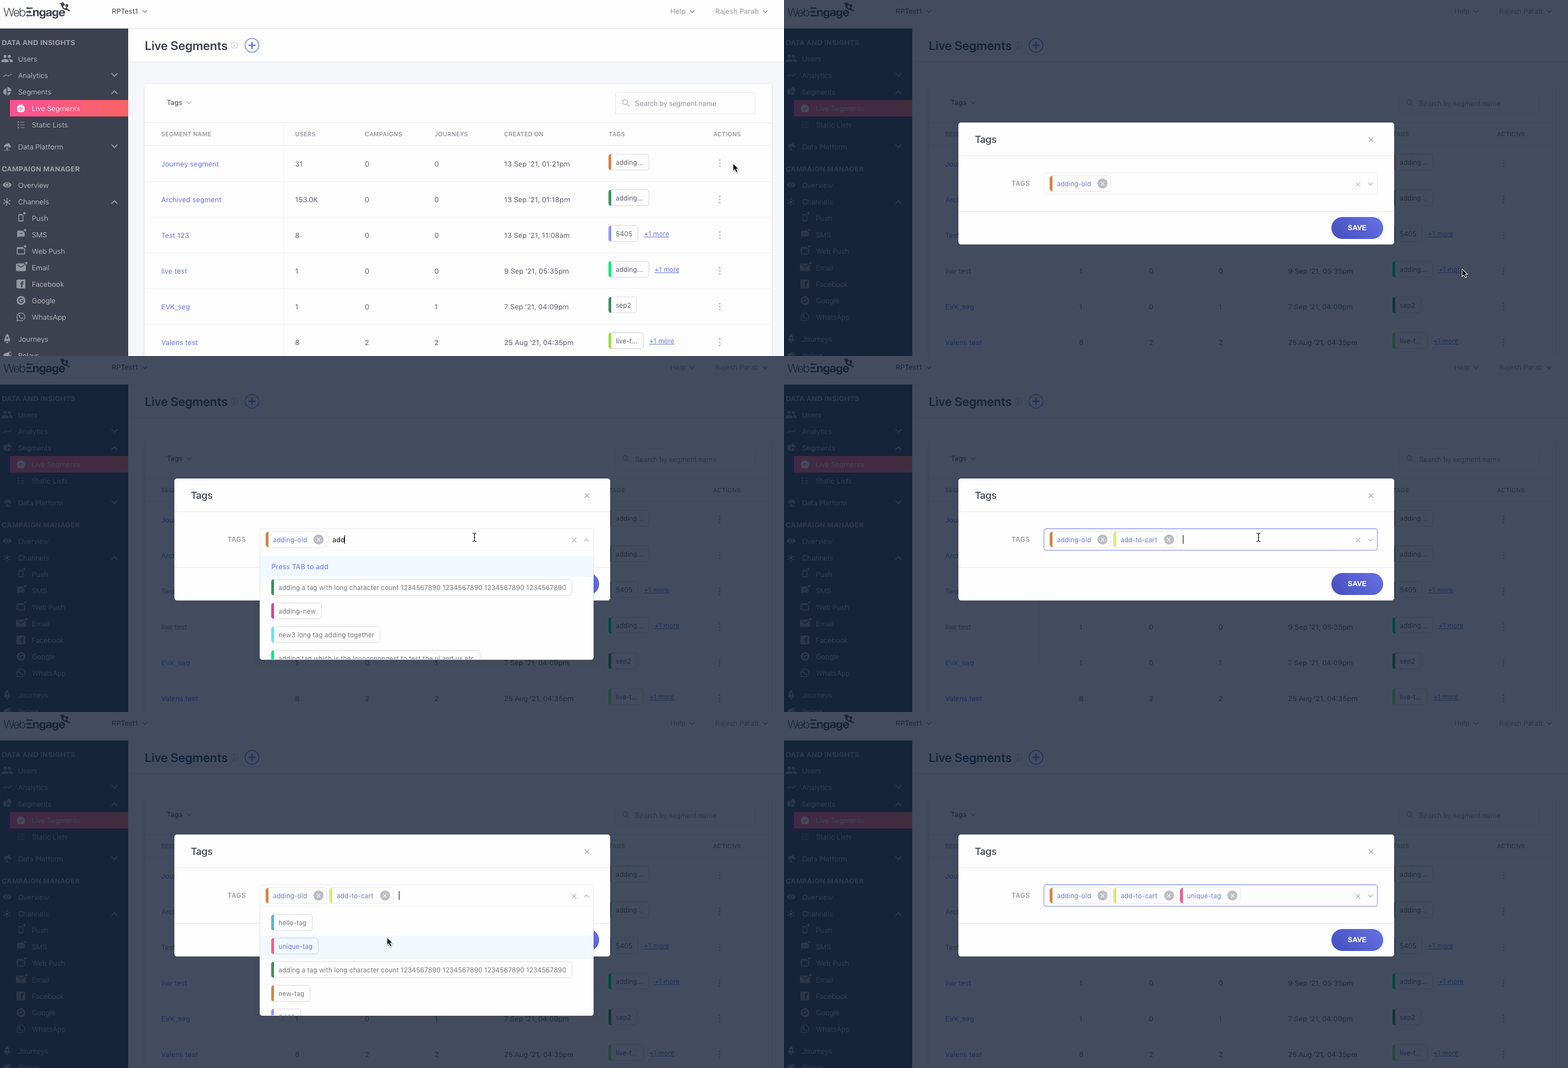
Tags can be created by clicking on the Tag action from the Actions menu.
Actions: The overflow menu enables you to Edit, Delete, Duplicate a segment. You can also choose to:
Segment Status
Let's quickly walk you through the different status tags you may see against a Live Segment.
In Progress
When a live segment is marked as In Progress, it means that the events used in the Behavioral conditions are being processed. This is a one-time activity that takes place only when a new segment is created or when the Behavioral conditions are edited in an existing segment. The amount of time it would take for a segment to get processed varies depending on the volume of events specified in the Behavioral conditions. While the segment is marked as “n Progress”, you will not be able to see the segment count and the list of users in the segment.
Please note that events specified in the Behavioral conditions are considered for a 1 year time period (which is our default data retention period) unless there’s an explicit event time filter applied to the condition. For example: if a segment is created for users who have performed “Added To Cart,” we will automatically scan the “Added To Cart” event for the last one year.
To reduce the time taken for event processing:
- Reduce the volume of events being processed by putting an event time filter.
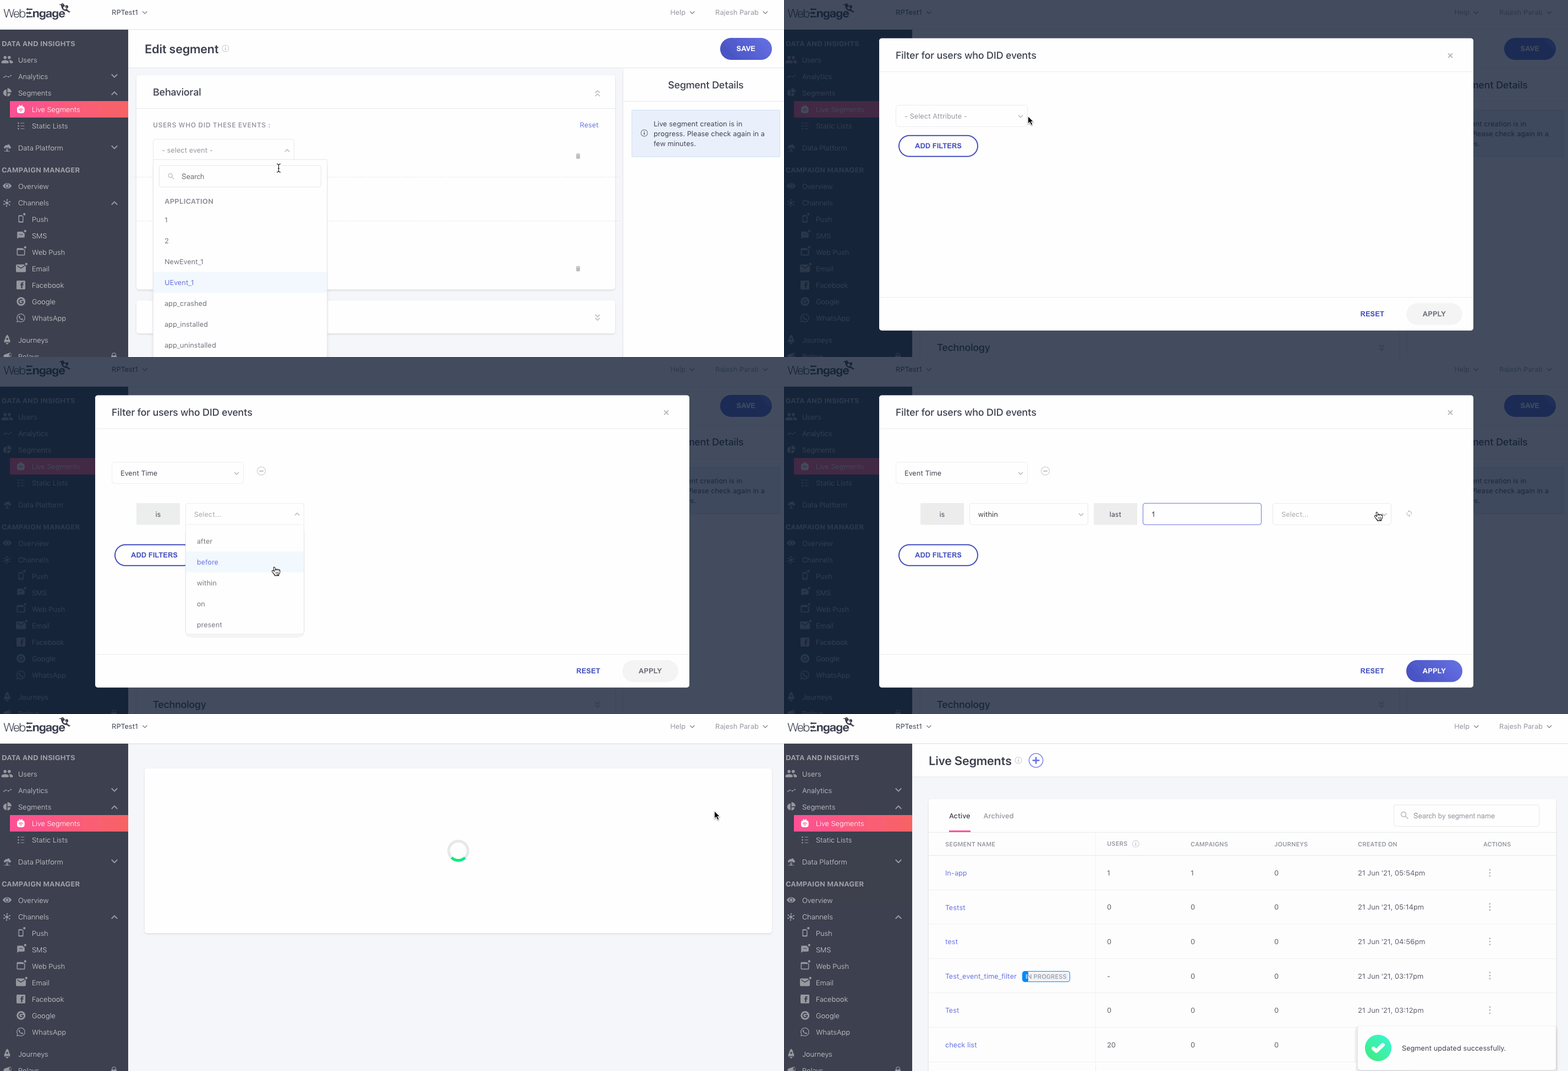
Click to enlarge
This usually happens if your segment includes a fairly large share of your userbase or multiple behavioral rules.
- Instead of using the Session Started event filter under the Behavioral section, you can choose the Last Seen or Created On filter in the User section of segmentation.
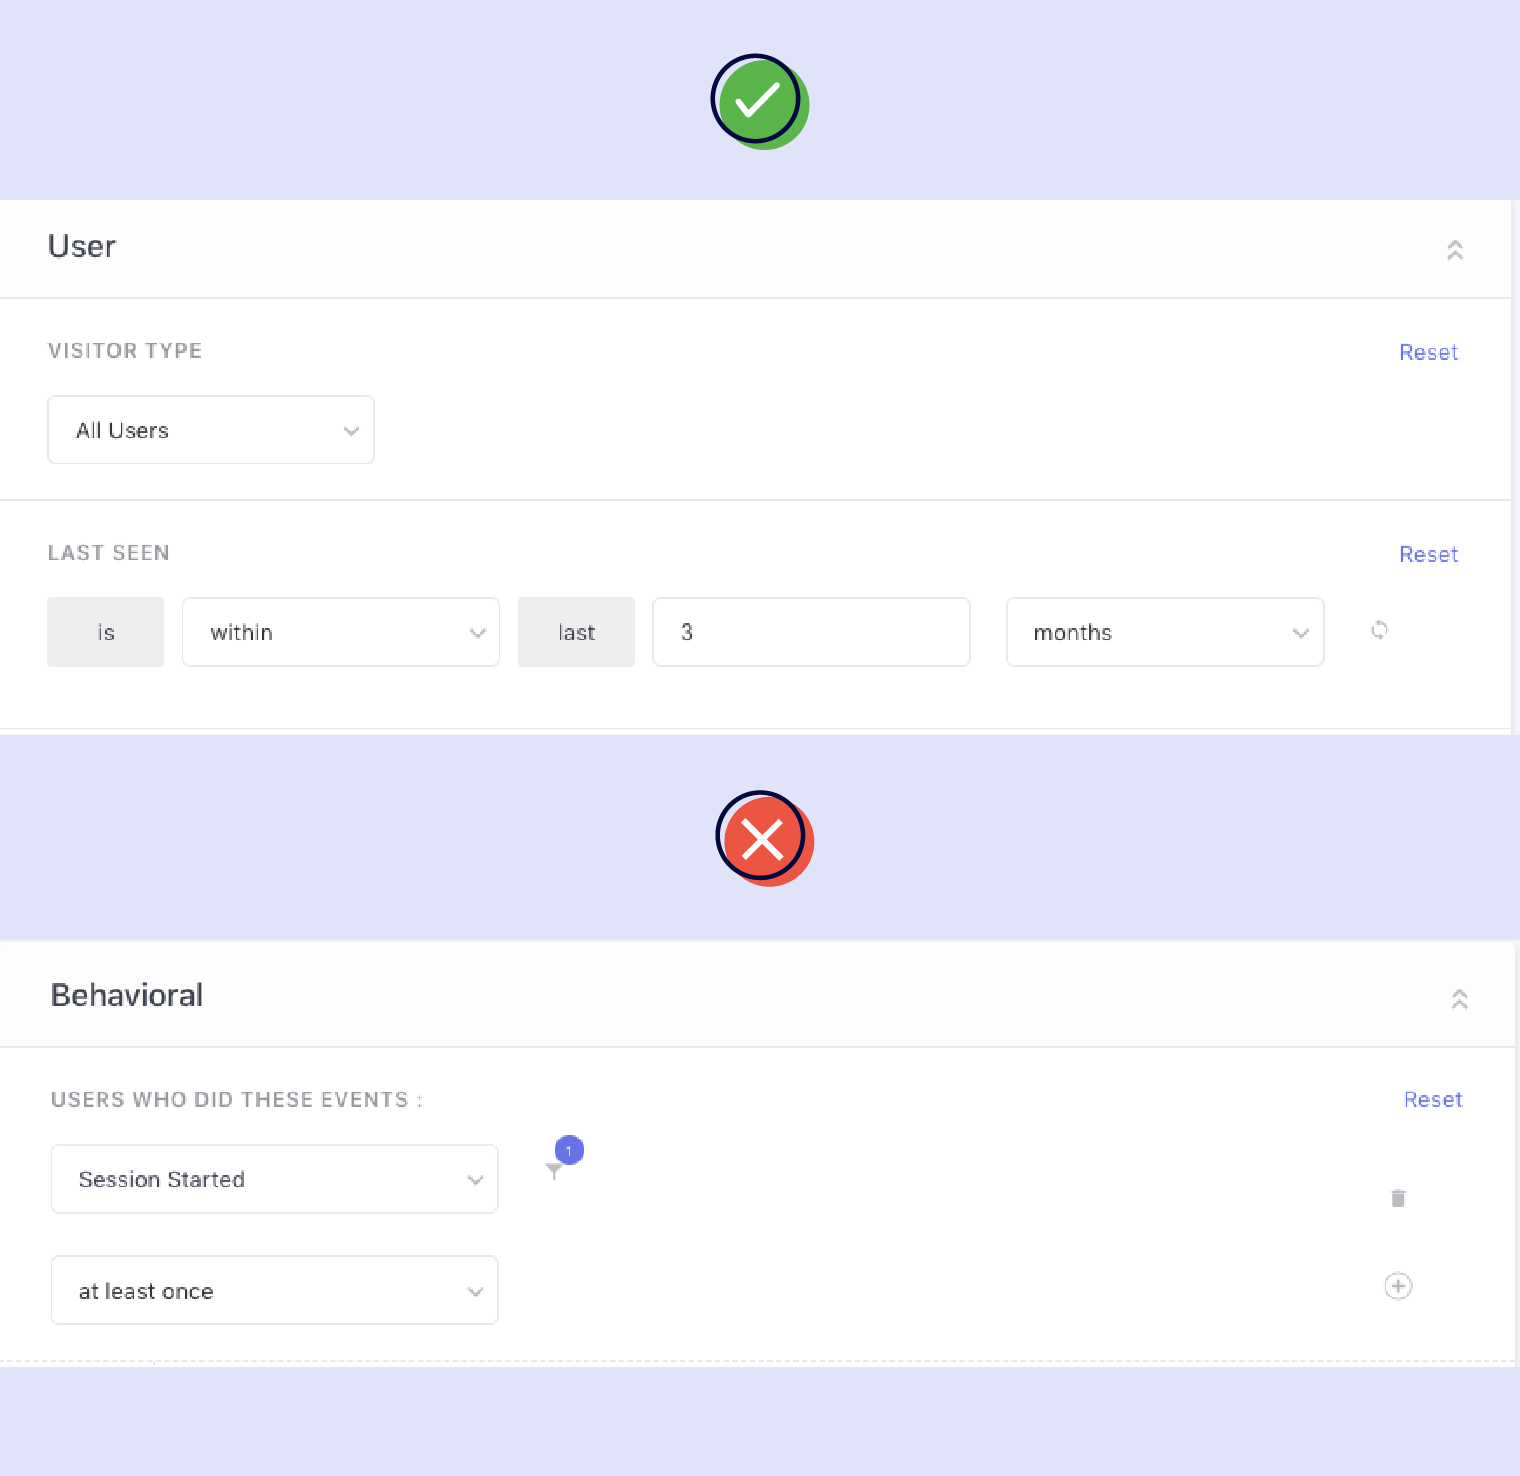
Click to enlarge
If the segment is “In Progress,” then you can see the time it will take to complete processing by hovering over the “In Progress” bar or by clicking on the segment name:
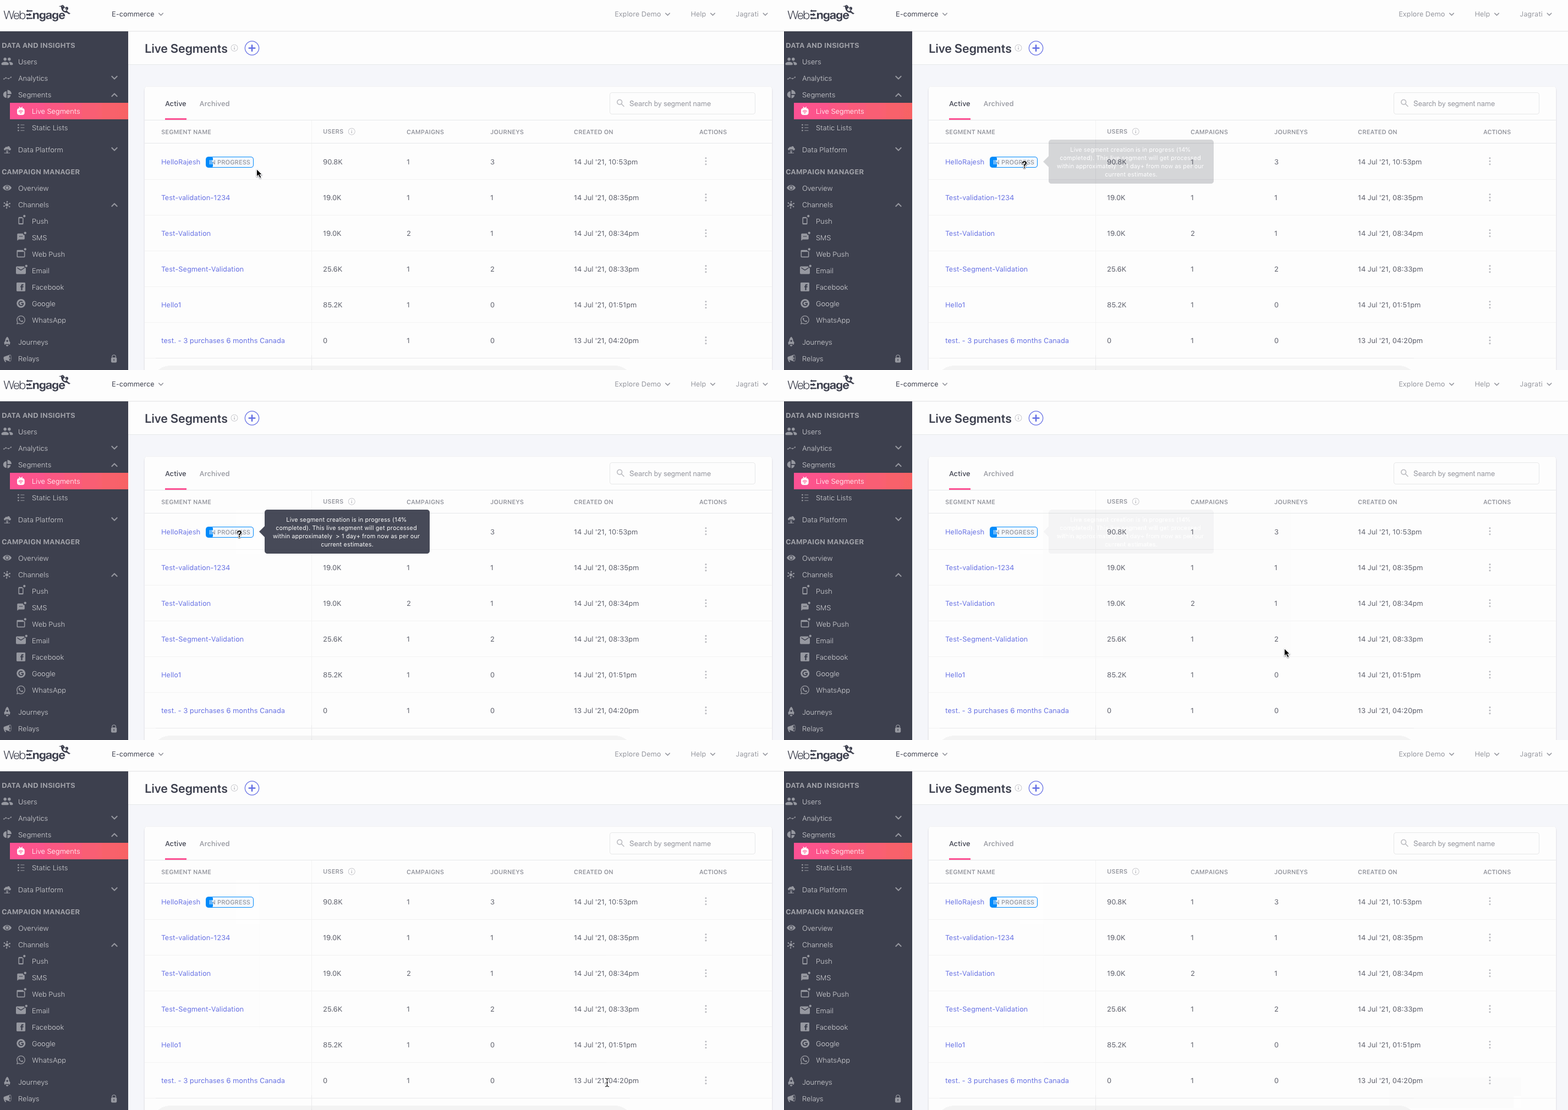
Click to enlarge
Paused
If our systems detect that a Live Segment hasn't been used over the last 30 days then real-time sync of its user pool (as per the principles ofDynamic Profiling & Rolling Time Window) is automatically paused.
This happens if the segment hasn't been used to:
-
Create Push, In-app, SMS, On-site, Web Push, Email, WhatsApp or Web Personalization campaigns
-
Build Journey experiences
-
Run Relays
-
Run Recurring Data Exports to Facebook or Google
In such cases, you will see the status tag, Paused against the segment title, and all its details will be void.
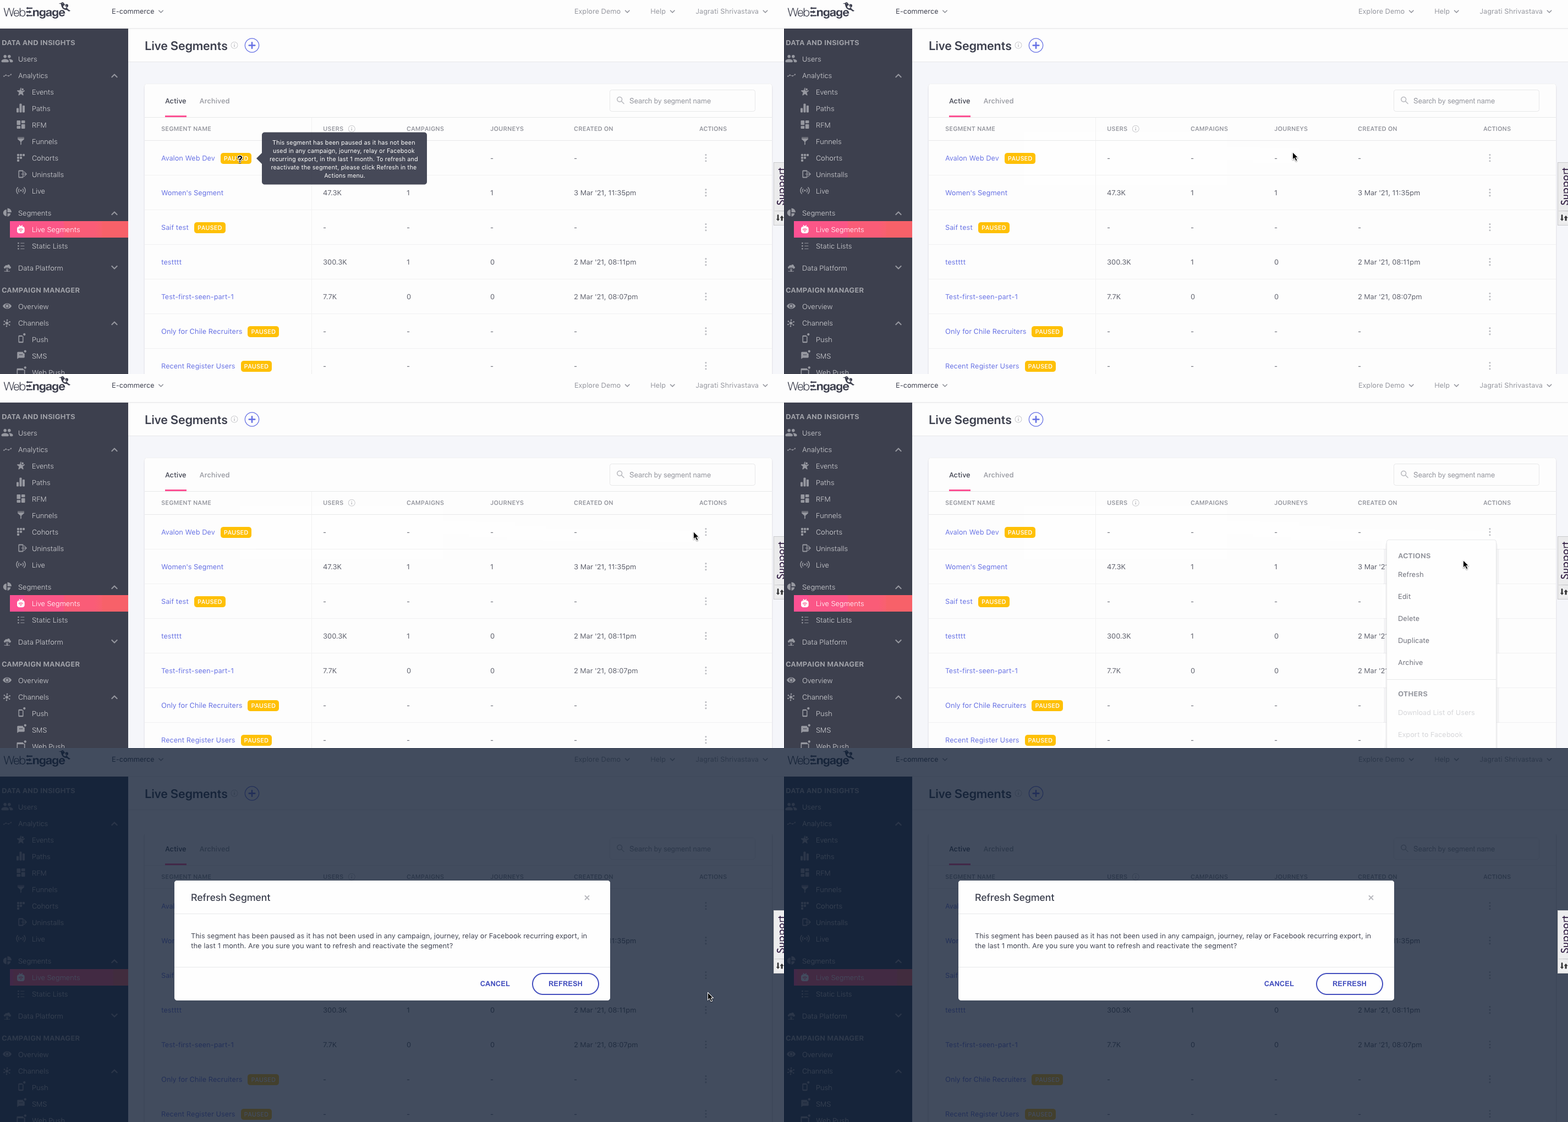
Click to enlarge
You can always resume real-time sync for the segment whenever you plan to use it. As shown above simply select Refresh from the Actions menu, and you're good to go!
Don't worry, the segment will still be available under all campaign, Journey, and Relay creation interfaces to power your user engagement strategies. Once selected, our systems will automatically refresh the segment so that you can go about your business as usual.
Features
Now, let's get you acquainted with all the actions you can take through this section:
Access Segment Creation
You can start building a segment by clicking the Plus icon placed on the top left, as shown below. (Detailed read on creating segments)

Click to enlarge
Favourite Segment
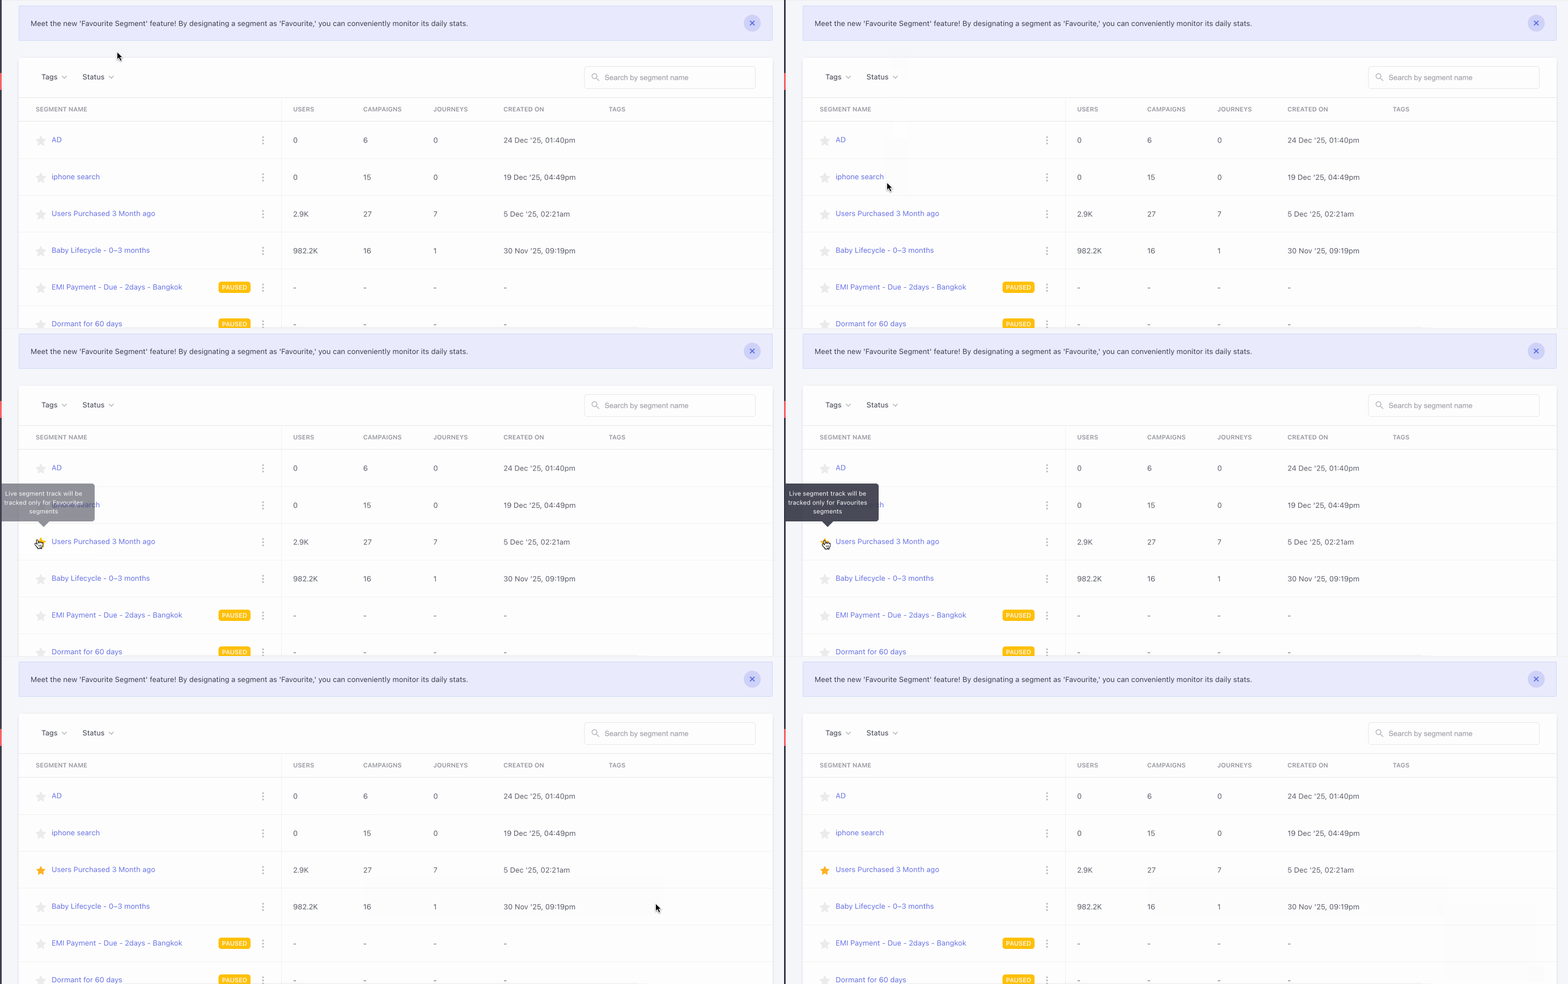
The Favourite Segment feature allows you to mark important segments for quick and easy tracking. Once a segment is marked as a favourite, you can conveniently monitor its key metrics and daily performance without having to search for it each time.
Additionally, favourited segments are exempt from automatic pausing. Normally, segments that are not used in any active campaigns or journeys for 15 days are paused automatically. However, when a segment is marked as a favourite, it will remain active even if it is not used during this period. This ensures that critical segments are always available and ready for use when needed.
Filter by Tag(s)
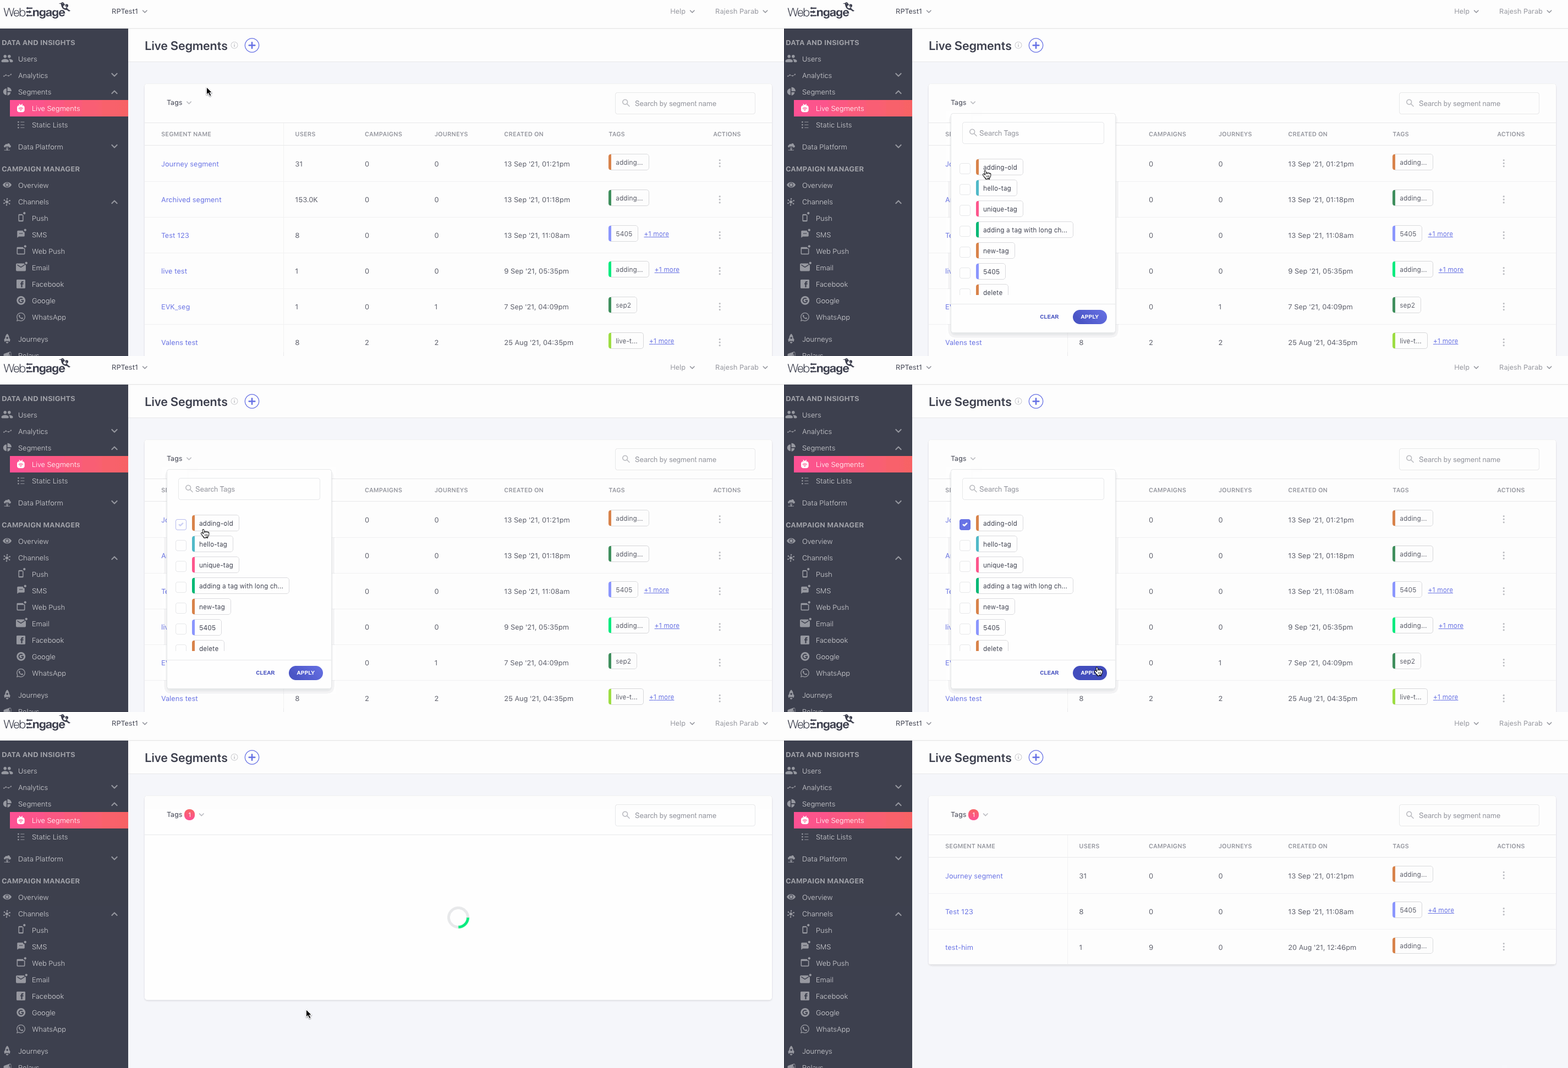
Use the tag filter placed on the top left to dig out existing segments associated with the particular tag(s). All you need to do is choose the tag(s) from the drop-down, and we'll match it to all the segment titles that include it and present the results.
Click to enlarge
Access Segment Analysis
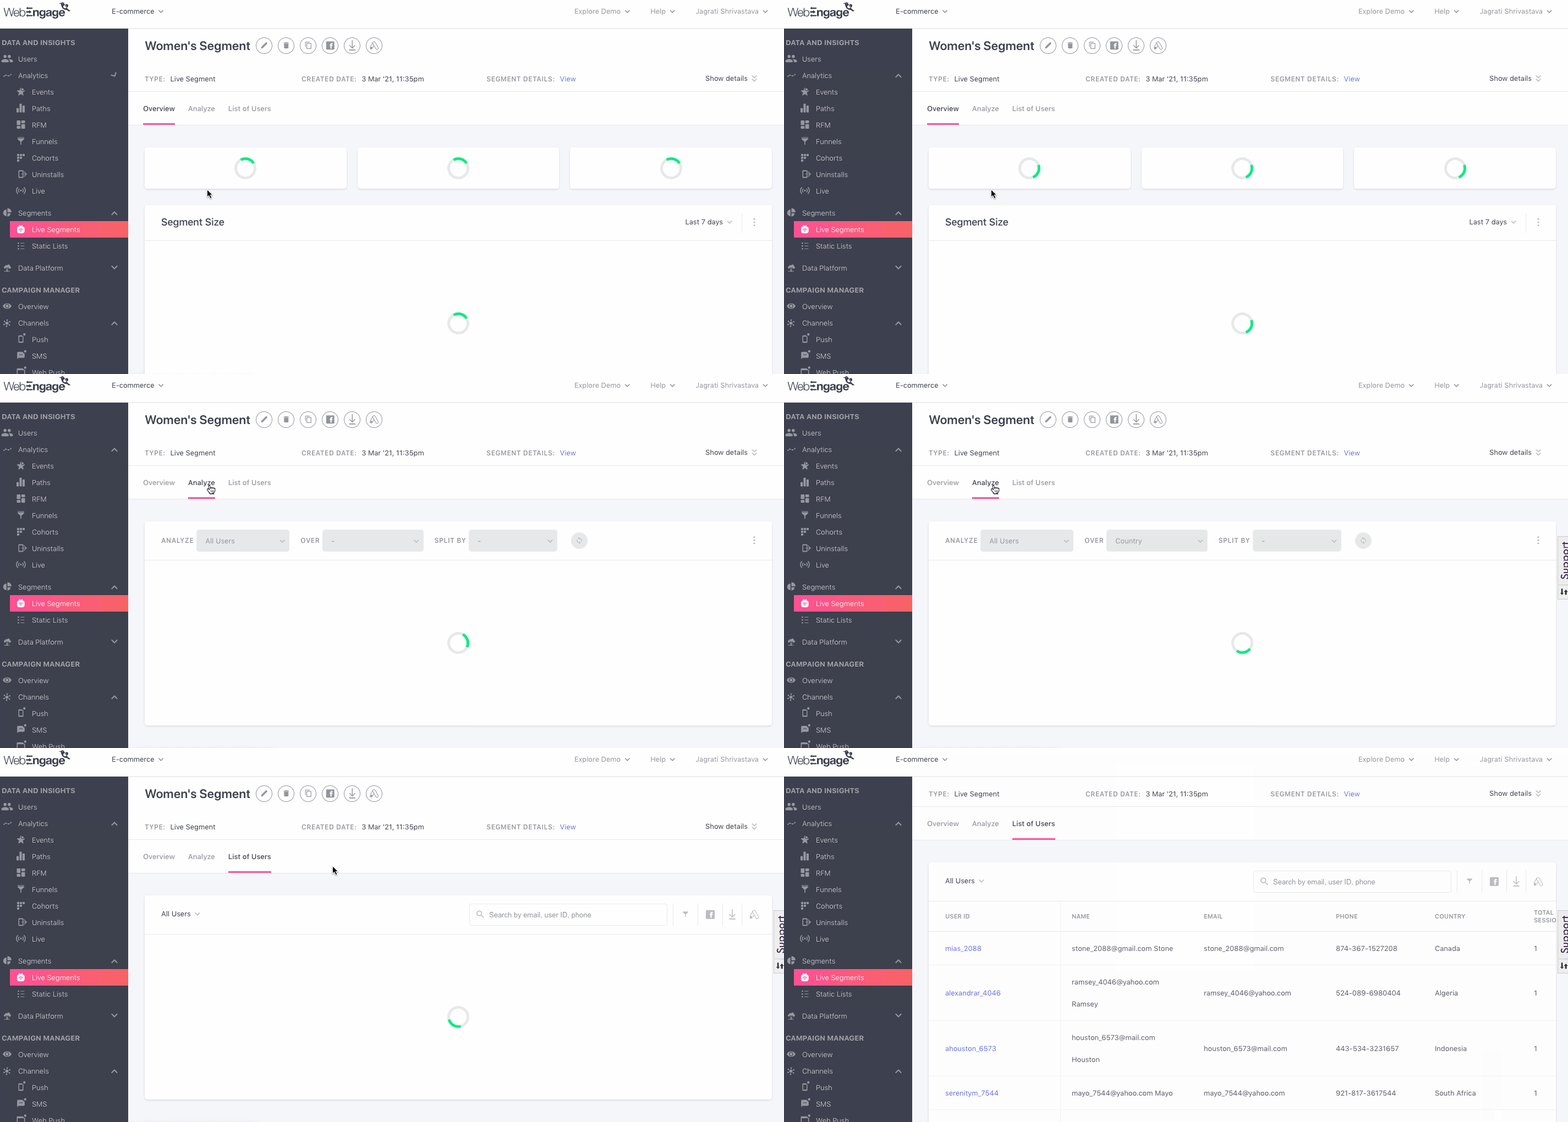
Once a segment is created, you click its segment title to access the analysis section.
Click to enlarge
Modify Segment
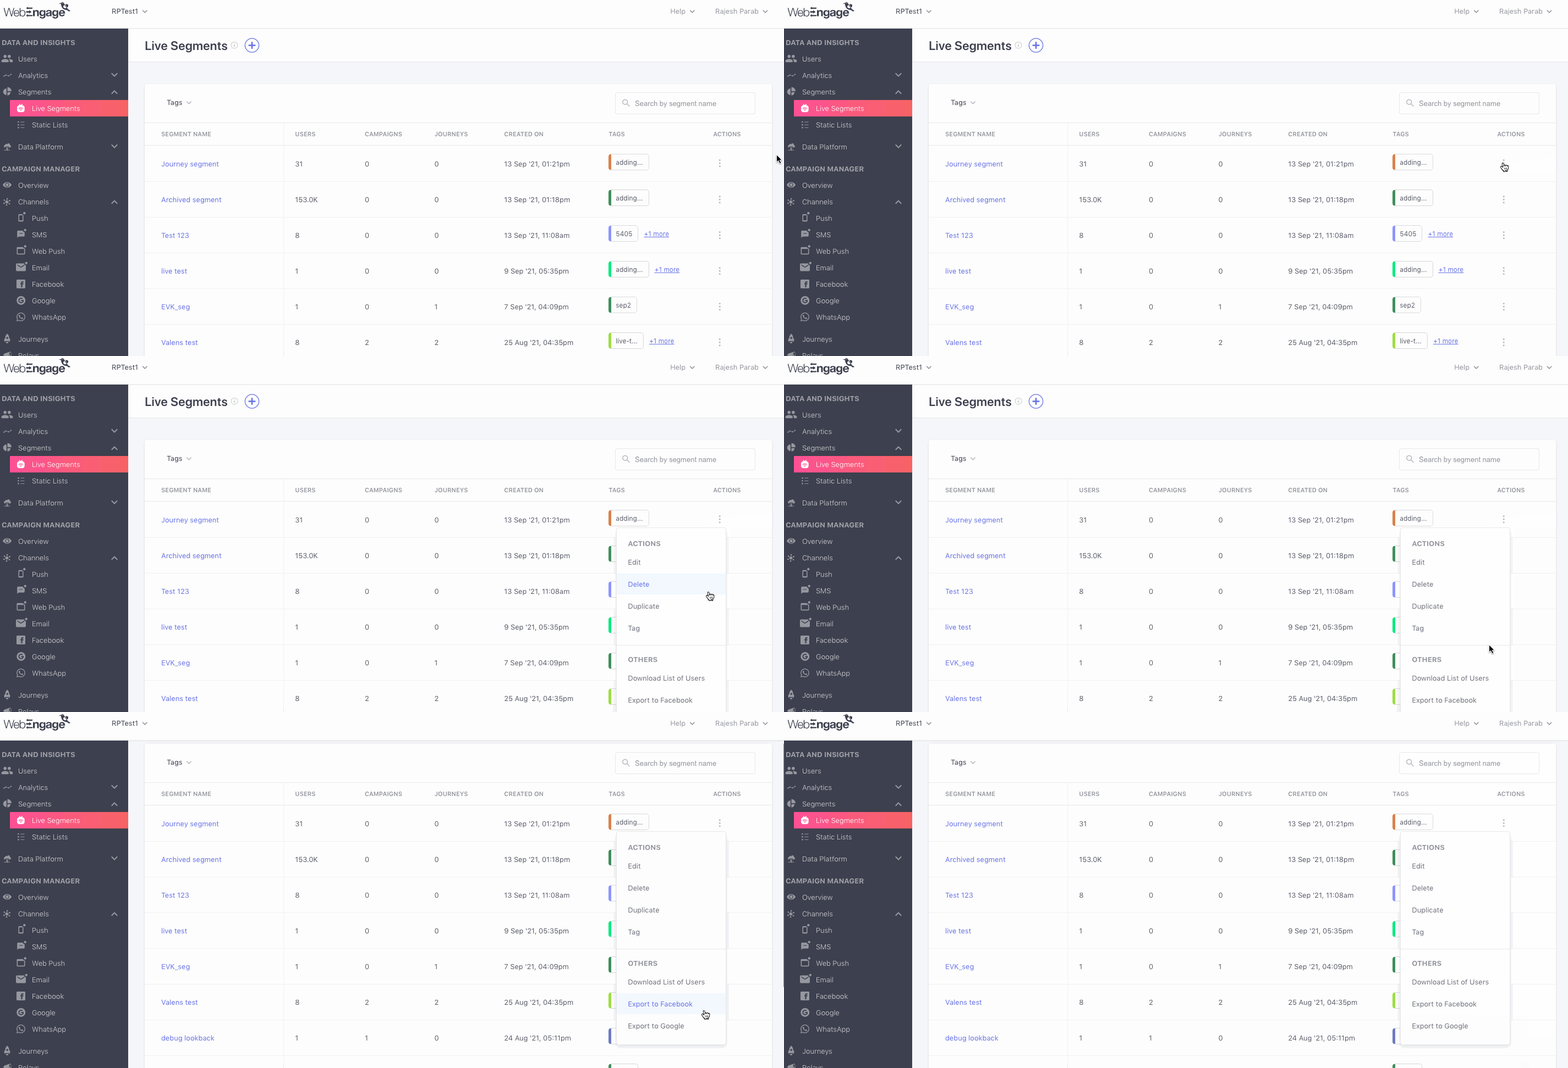
Using the options nested under the Actions column, you can choose to Edit, Delete, Duplicate a segment, as shown below. Simply select an option and follow the steps listed here.
Click to enlarge
Add Tags
You can easily create Tags for the segment or choose from the list of already created tags. As shown below, select Tag from the Actions menu to get started. A new modal will open that will allow you to assign tags.
Click to enlarge
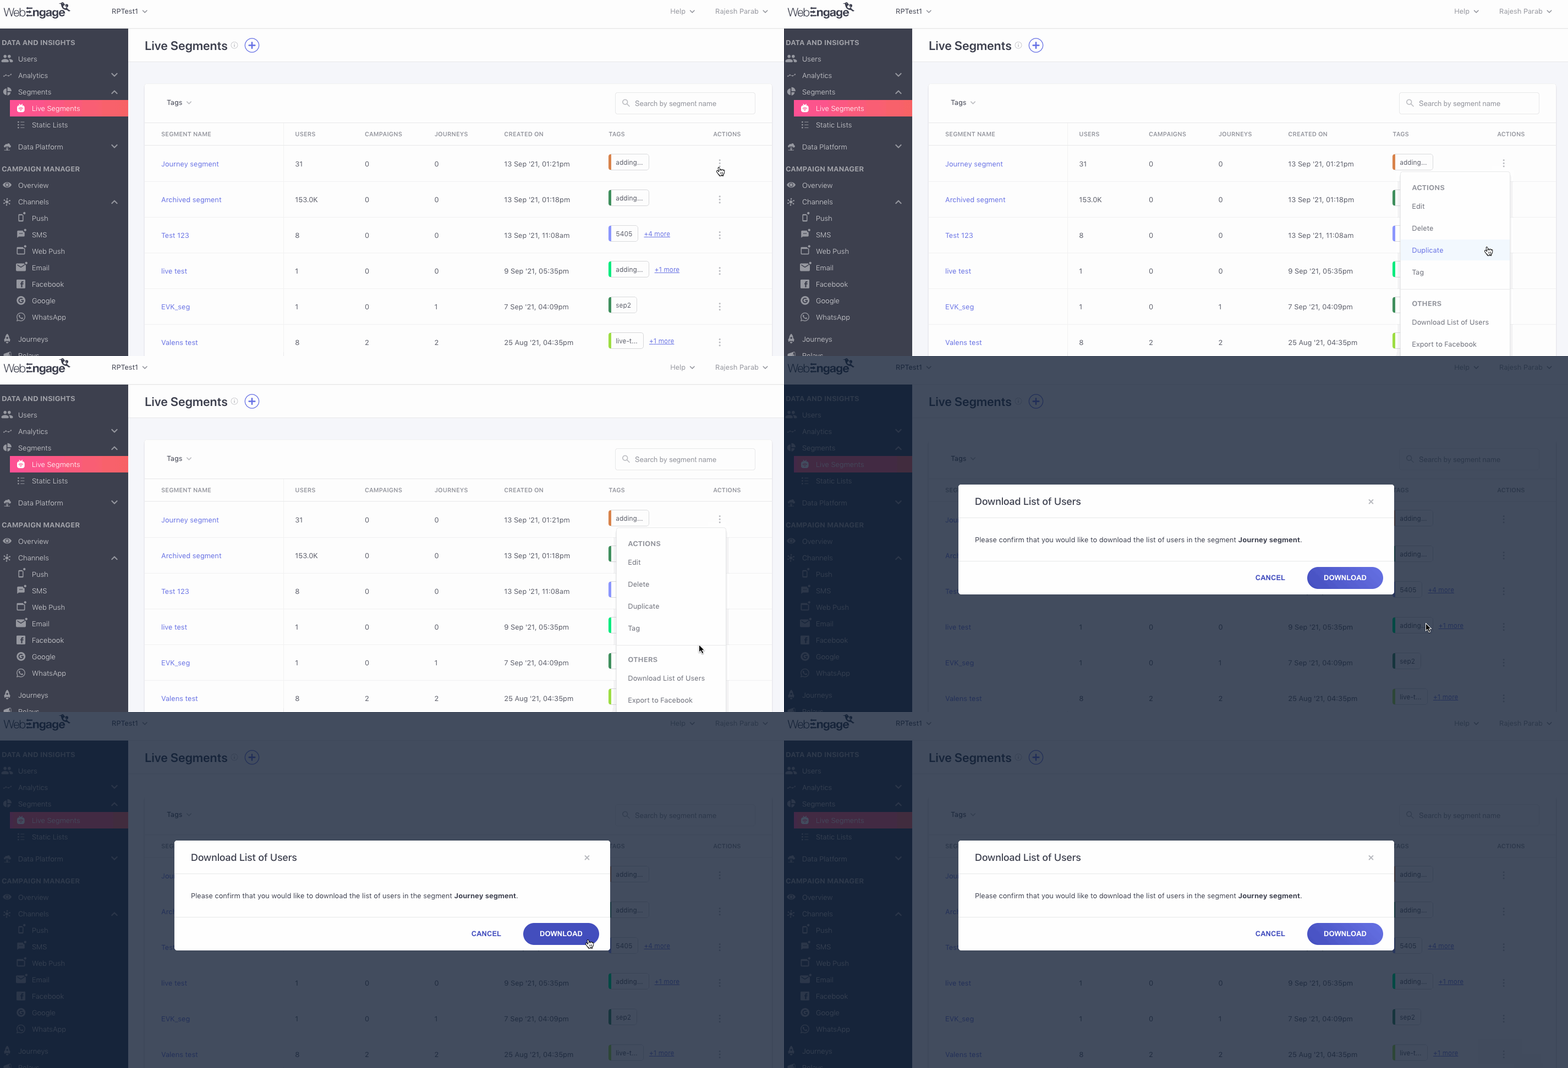
Download List of Users
You can easily download user details for a Live Segment as a CSV file. As shown below, select Download from the Actions menu to get started. (You will receive a download link on your registered email address.)
Click to enlarge
However, please keep in mind that the list will not include details of users who have rolled out of the segment. Hence, the list of users downloaded today could be significantly different from the list of users you download for the same segment next week.
Unable to download user details?Reports can be downloaded only by Admins who have access to Account Management. Please get in touch with the account owner if you are unable to do so.
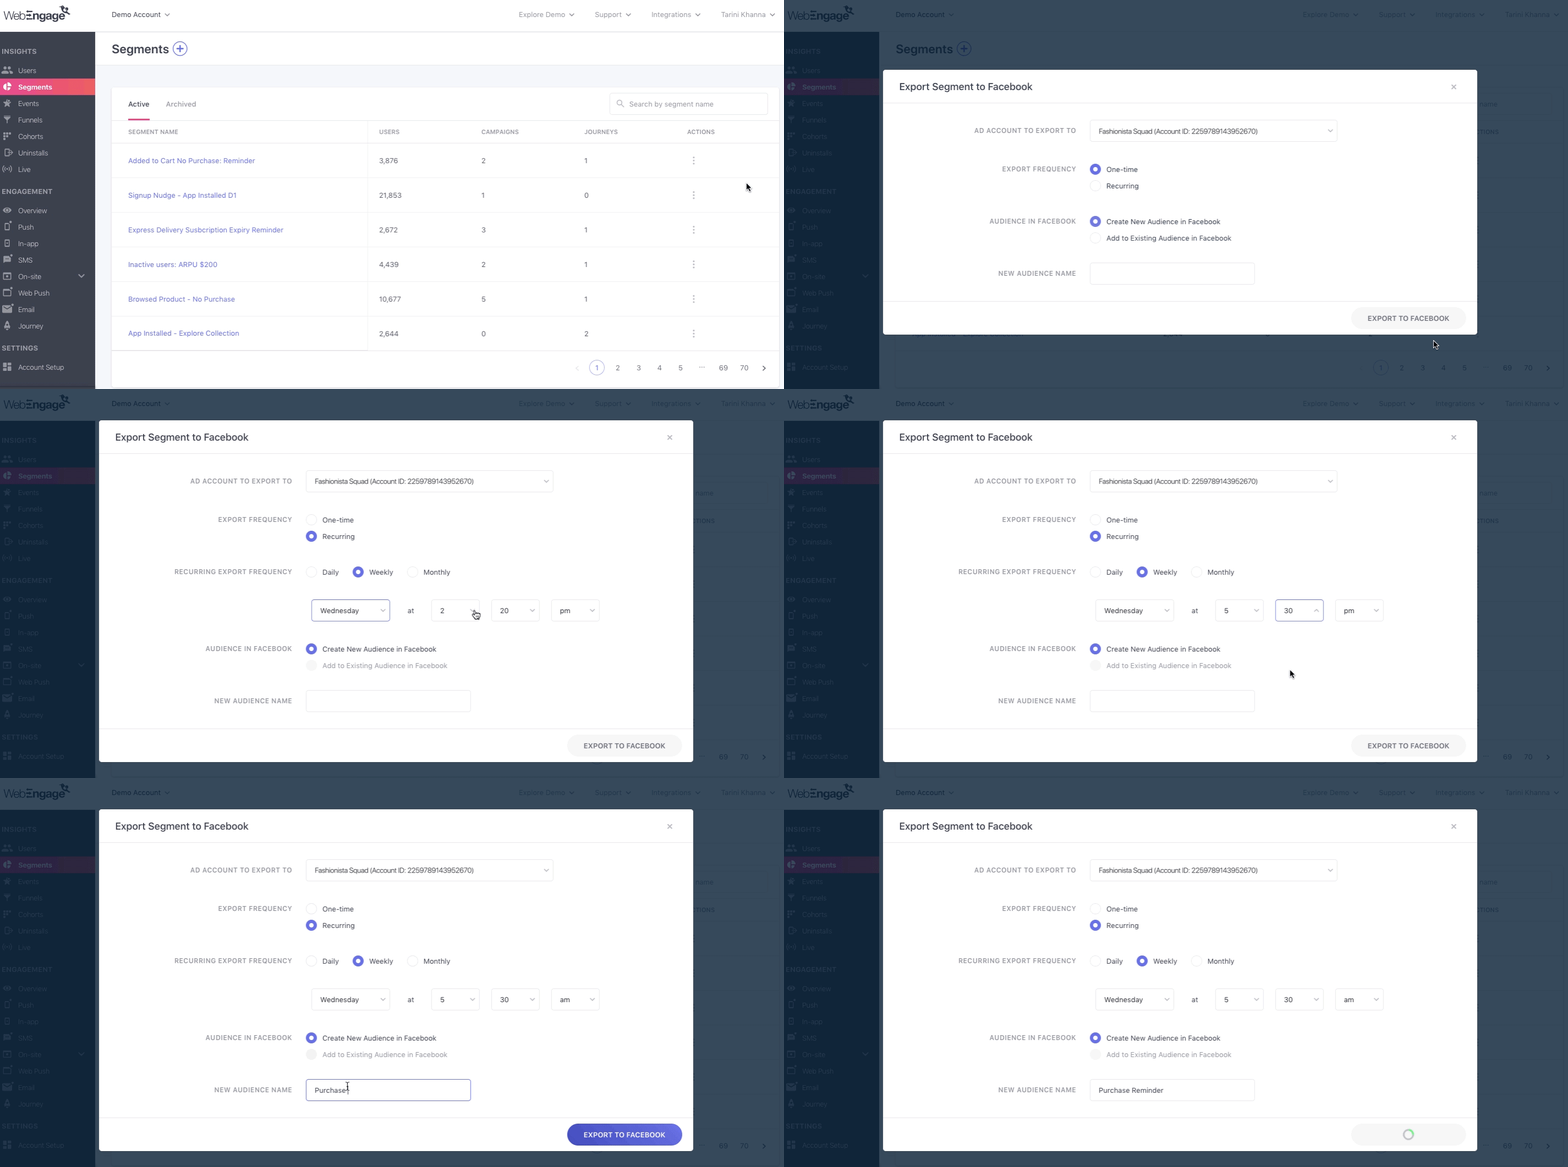
Export Segment to Facebook
You can now leverage the exhaustive segmentation capabilities of your dashboard to supercharge all your Facebook and Instagram ad campaigns! This is a great solution to curb daily data uploads to Facebook and achieve important business goals by focussing on what matters the most - your users.
All you need to do is:
-
Step 2: Set up a recurring export to ensure that user details are updated in your Facebook account as and when the Live Segment's user pool is updated.
And you're good to go!
Click to enlarge
As shown above, you can seamlessly export user details by selecting Export to Facebook from the Actions menu.Here are a few ideas to get you started.
Continue Here
Export Segment to Google
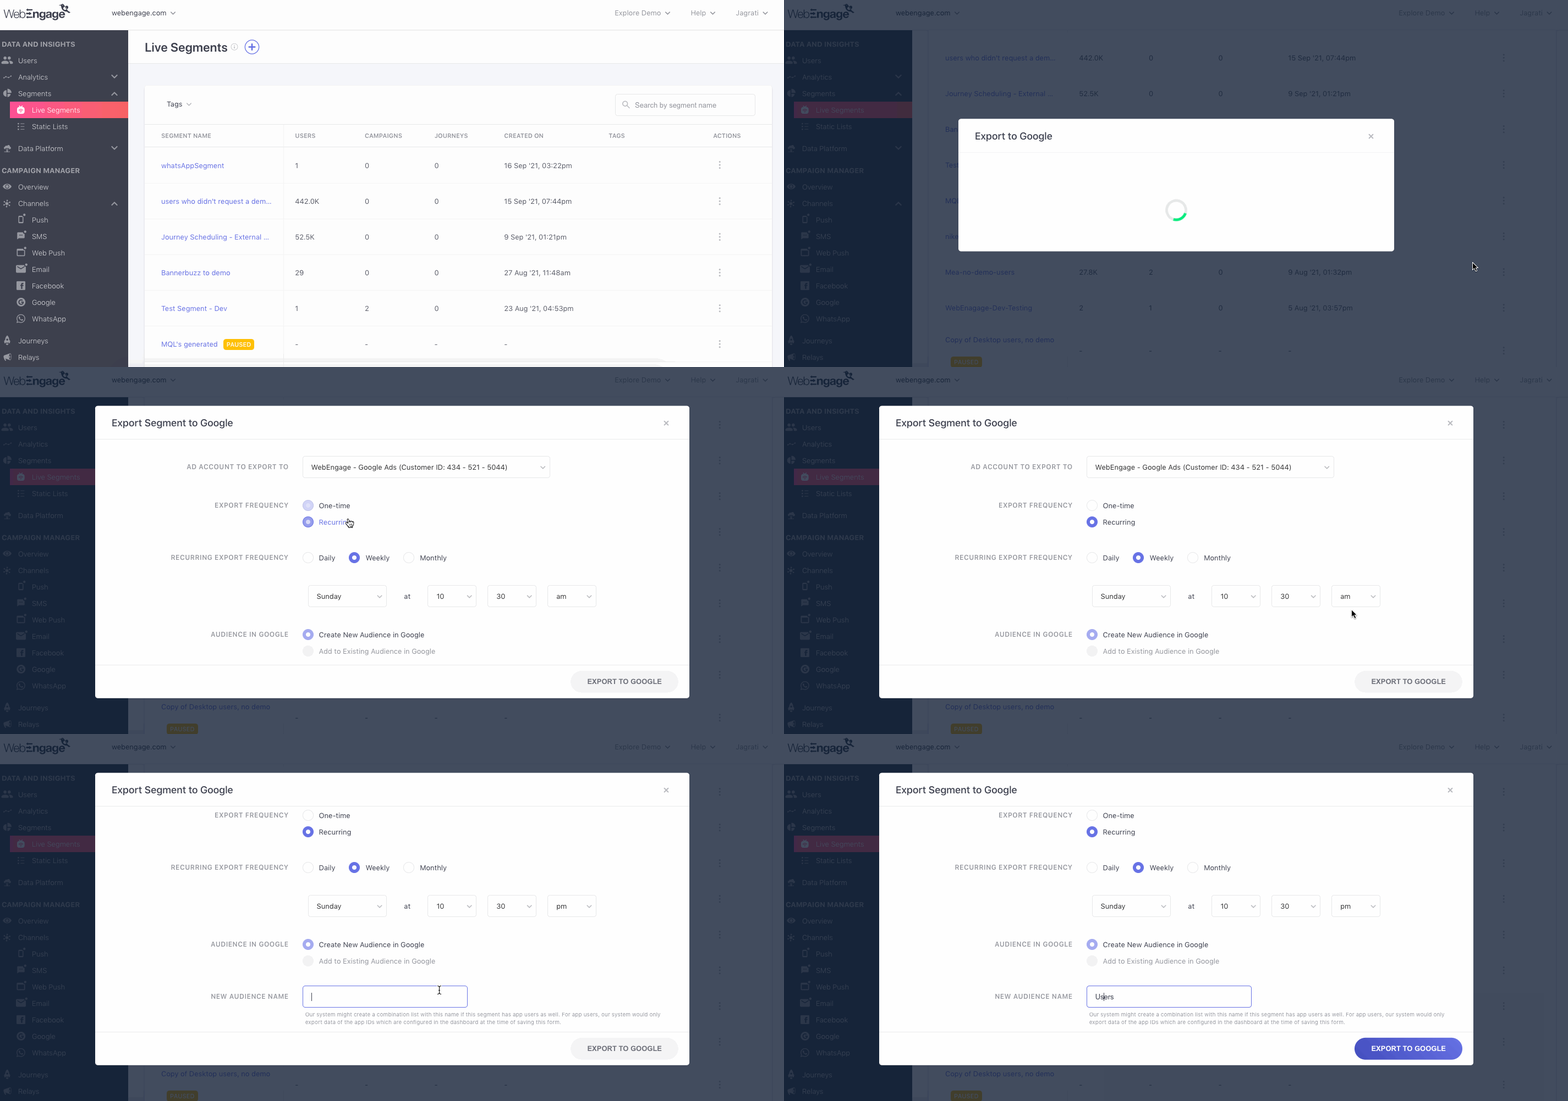
You can easily power your Google Ads with the scores of differentiated segments built in your dashboard. This is the perfect way to extend your brand's experience beyond your platforms and channels while delivering the same level of contextually relevant content.
All you need to do is:
-
Step 1: Integrate a Google Adwords Account.
-
Step 2: Set up a recurring export to ensure that user details are updated in your Adwords account as and when the Live Segment's user pool is updated.
And you're good to go!
Click to enlarge
Simply select Export to Google from the Actions menu to transfer data. Here are a few ideas to get you started.
Continue Here
Search for a Segment
Skip the hunt - Use the search bar placed on the top right to dig out existing segments. All you need to do is type in a keyword, we'll match it to all the segment titles that include it and present a short list you can choose from!
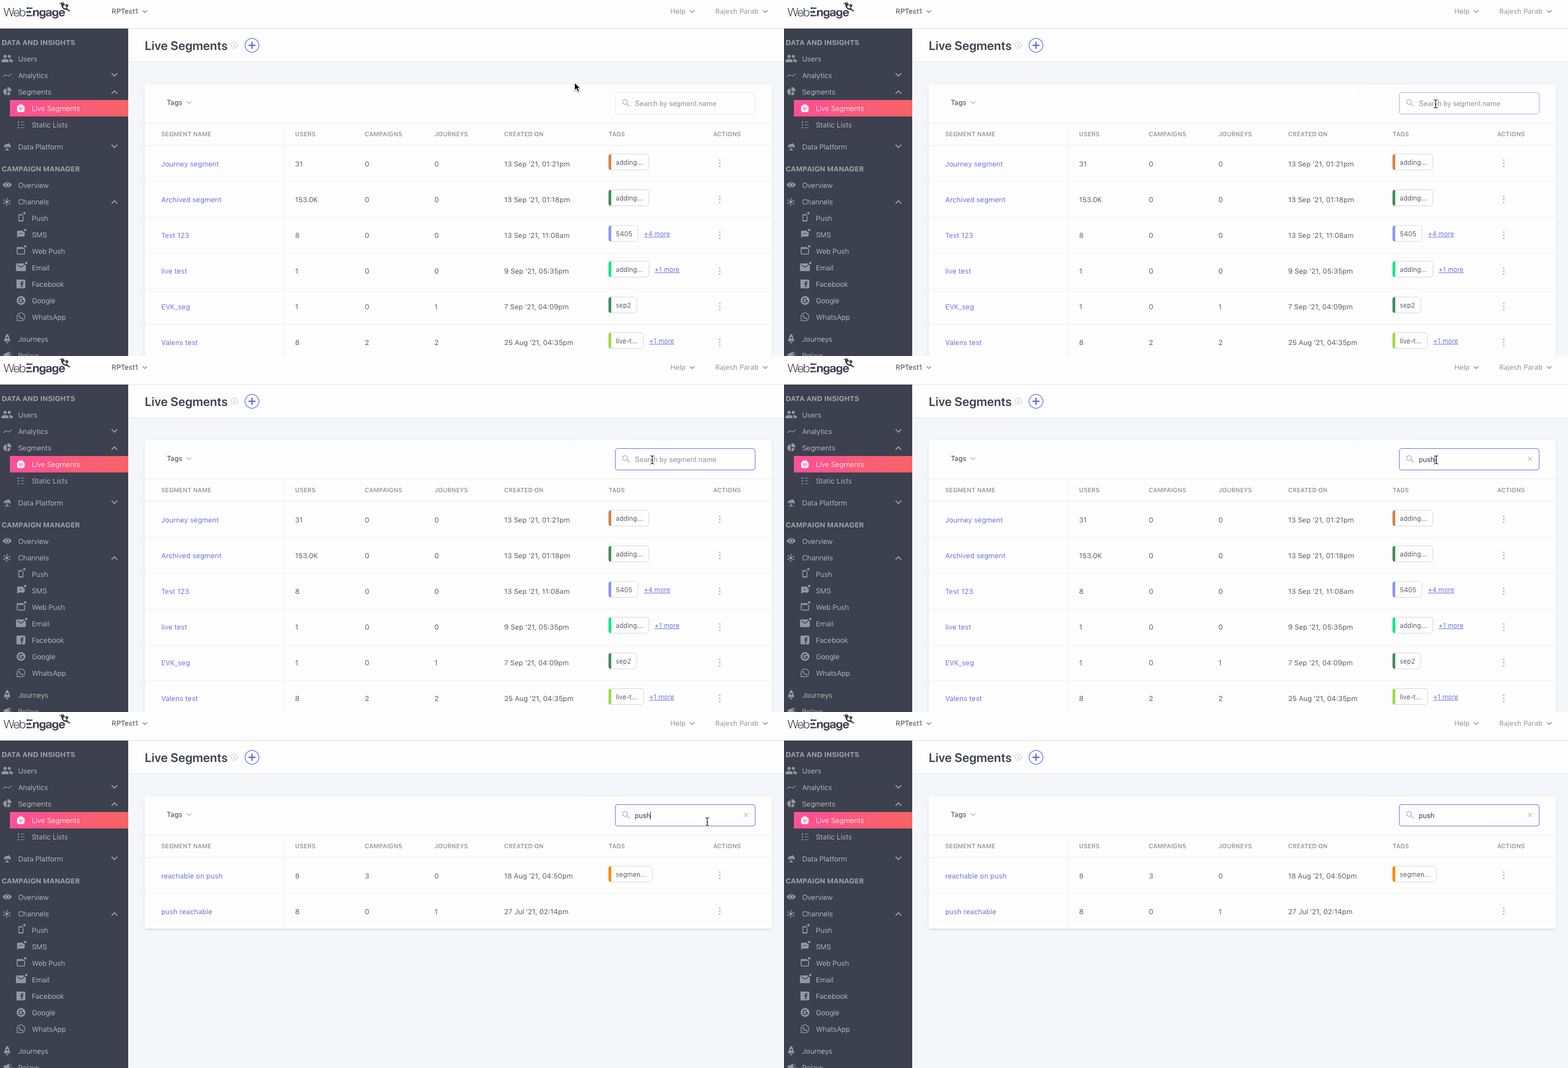
Click to enlarge
Please feel free to drop in a few lines at [email protected] if you have any further queries. We're always just an email away!
Updated about 1 month ago
Let's show you how to create, analyze & modify live segments in your dashboard.