Catalogs and Recommendations

📘

This feature is only available for selected customers. Please get in touch with your Customer Success Manager or [email protected] to get access.

Overview

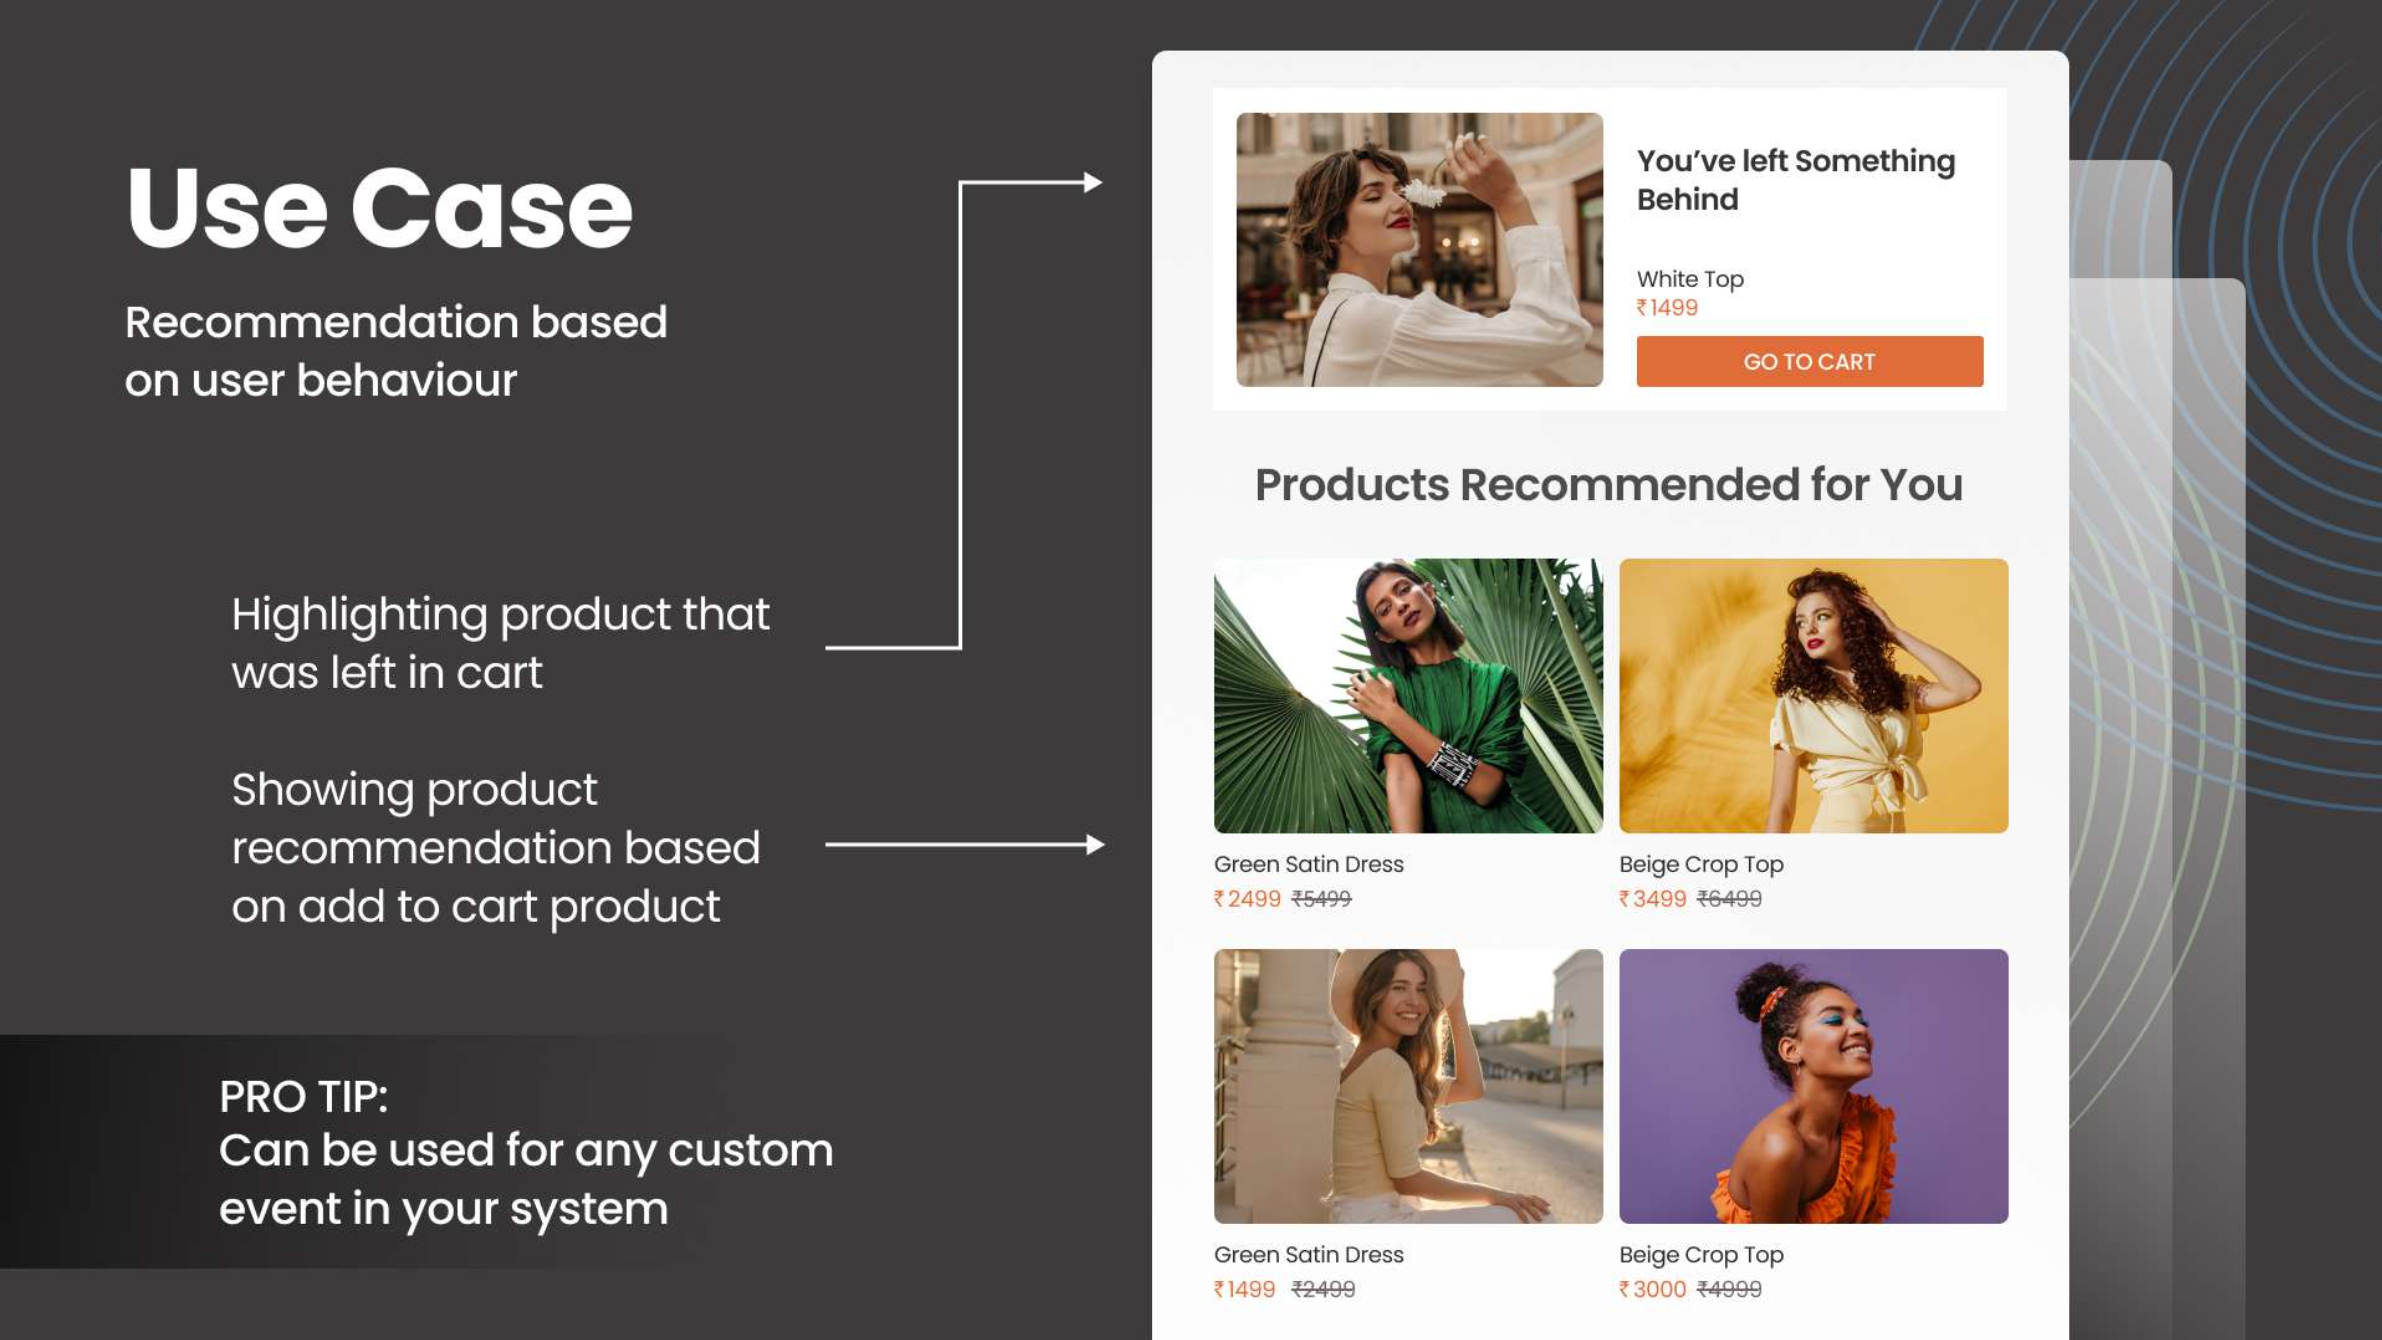
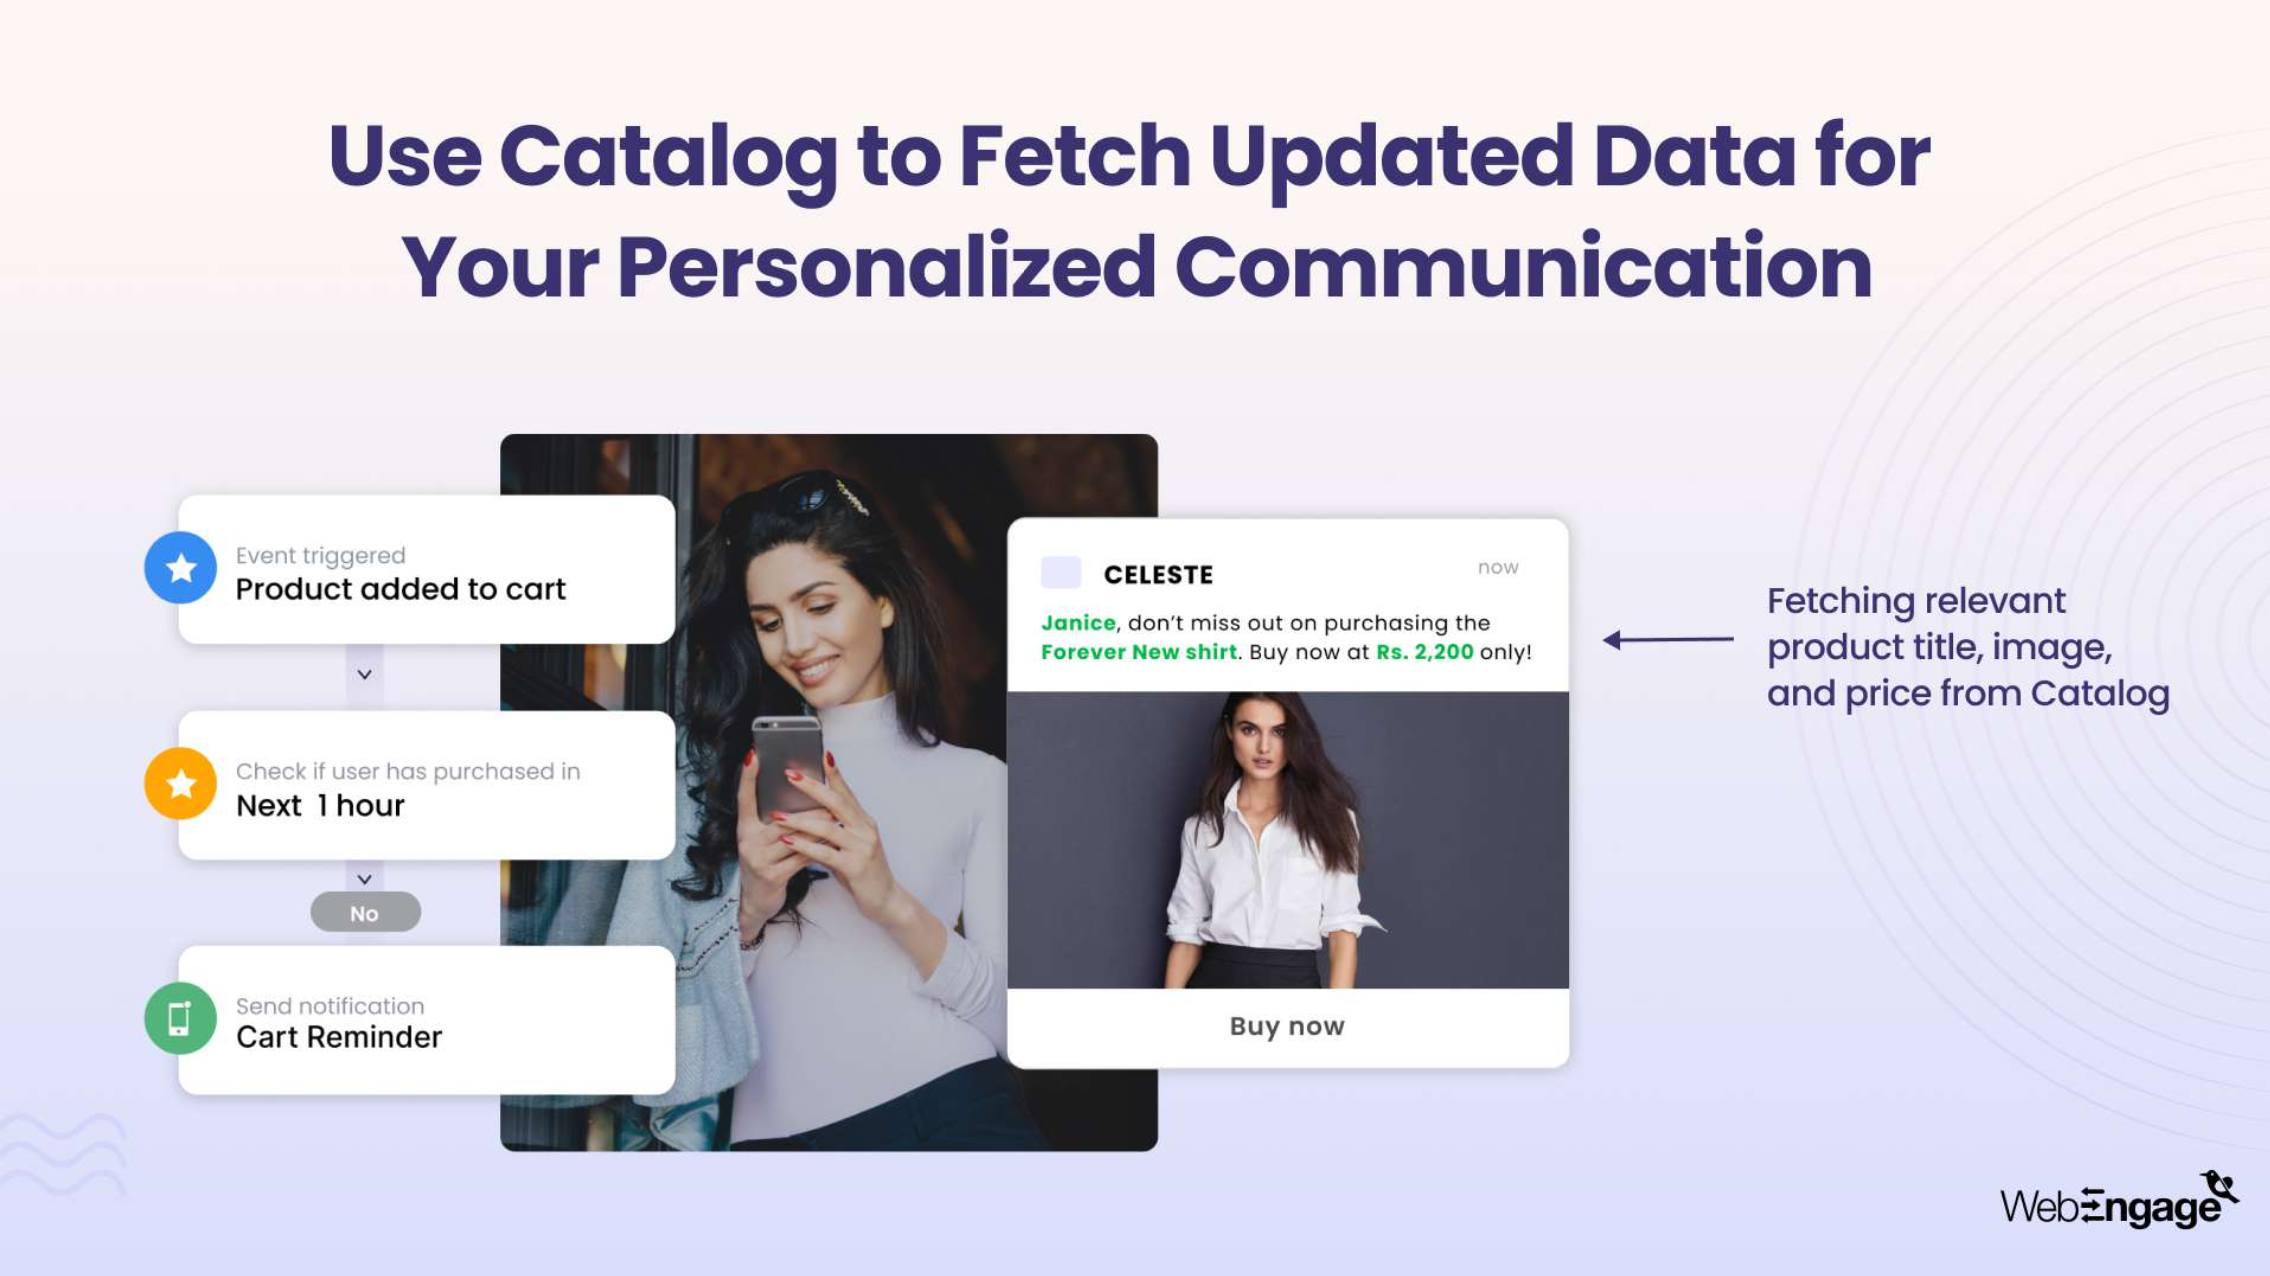
You can create and use multiple catalogs and recommendation strategies to enrich the personalization of your campaigns across various engagement channels, here are some examples:

  1. Recommend products to users depending on their events (added to cart, product viewed, purchased, etc.)
  2. Use the latest data from the catalog for personalization (price, quantity, image, etc.)
  3. Show trending products
For more examples and use cases, you can go through this deck.

Prerequisites

  1. Your catalog file must be in a CSV format less than 200MB in size.
  2. Ensure that your catalog has all the data needed to personalize your campaigns - image, name, price, link, etc.. Your image links must be publicly accessible. It's advised to use the same image dimensions for all products so that there are no alignment issues in your campaign.
  3. If you want to automate the process of syncing your catalog data, keep your Amazon S3 credentials handy. Our system can import the latest catalog file from your Amazon S3 bucket on a daily basis.
  4. To effectively utilize our recommendation engine:
    • Ensure that the item ID in your event is the same as the item ID in your catalog.
    • Pass item IDs in a comma-separated string if there are multiple items associated with that event (example: Purchase event)
    • Ensure that all item IDs are present in your catalog file. A good way to check this would be to use Events to check the top item IDs for a particular event (example: check occurrences of Product Viewed over item_id - convert to table view).

Upload catalogs

Uploading a catalog involves 3 steps - Configuration of basic inputs, Mapping of known fields, Preview and selection of data types.
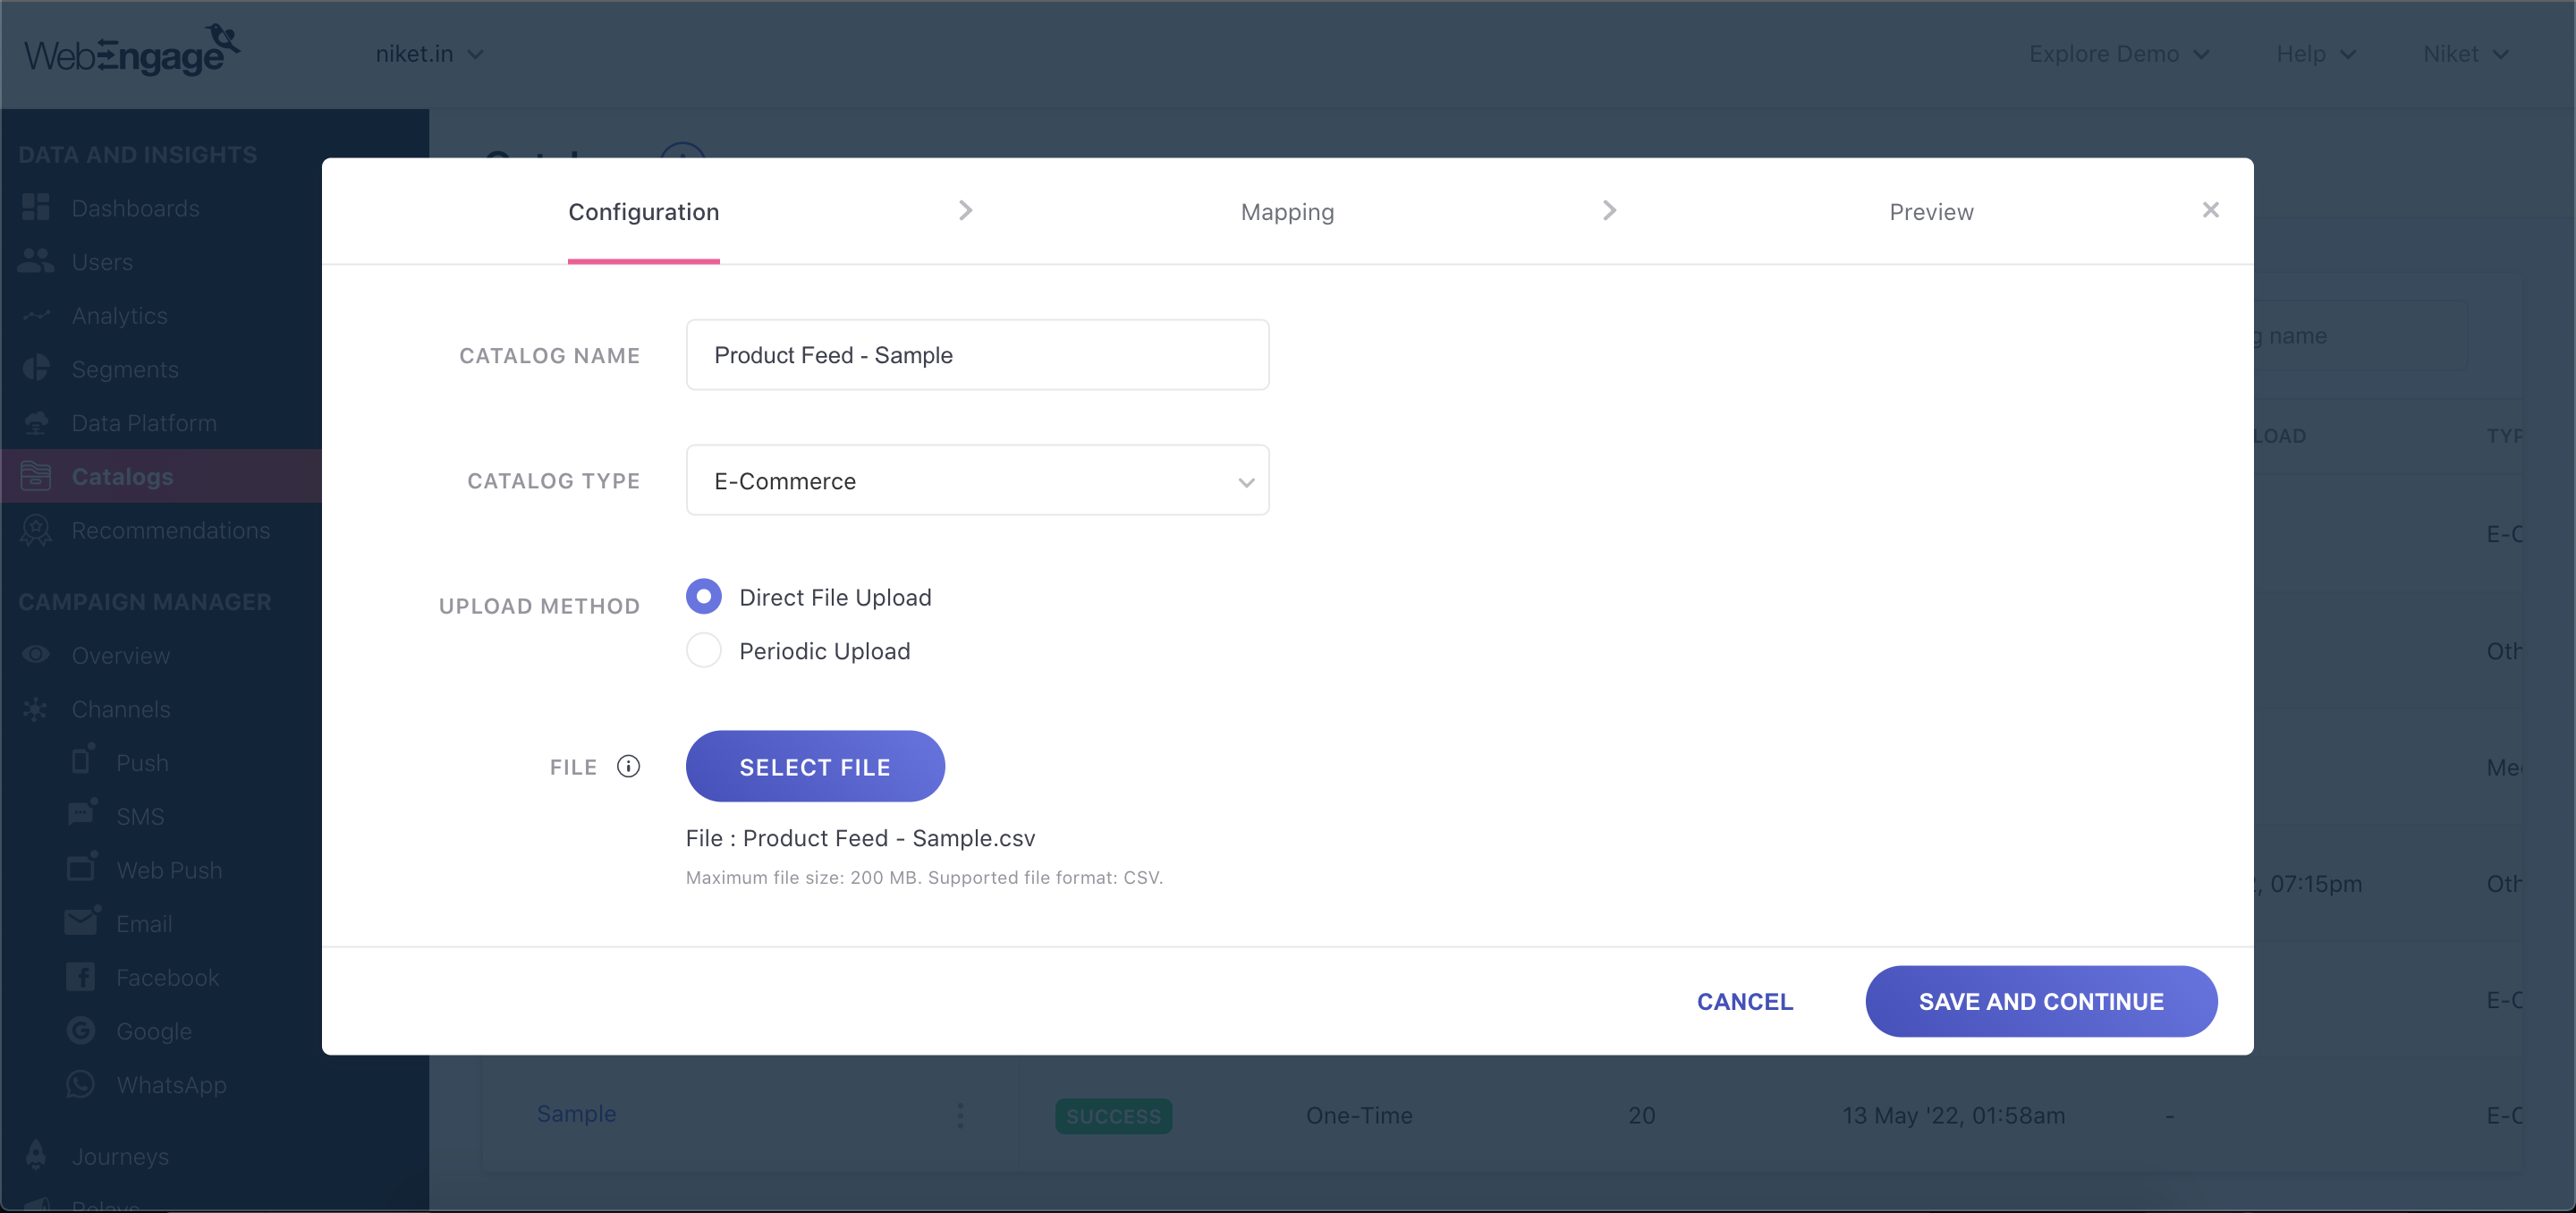
  1. Configuration
    • Specify a name for your catalog and select your project's industry.
    • Select Direct File Upload as your upload method if you want to do a one-time upload of your catalog file. You will have the option to re-upload a new version of the file manually at a later stage if needed.
    • Select Periodic Upload as your upload method if you want our system to automatically import the latest catalog file daily from your Amazon S3 bucket. Keep the following information handy to integrate Amazon S3 - bucket name, region name, access key and secret access key.
      Note: our system will replace the entire catalog with the latest file.
    • Upload a CSV file (max size: 200MB). Field names must follow these rules: i) contain only letters, numbers, and underscores ii) start with a letter or underscore and iii) have a maximum of 300 characters.
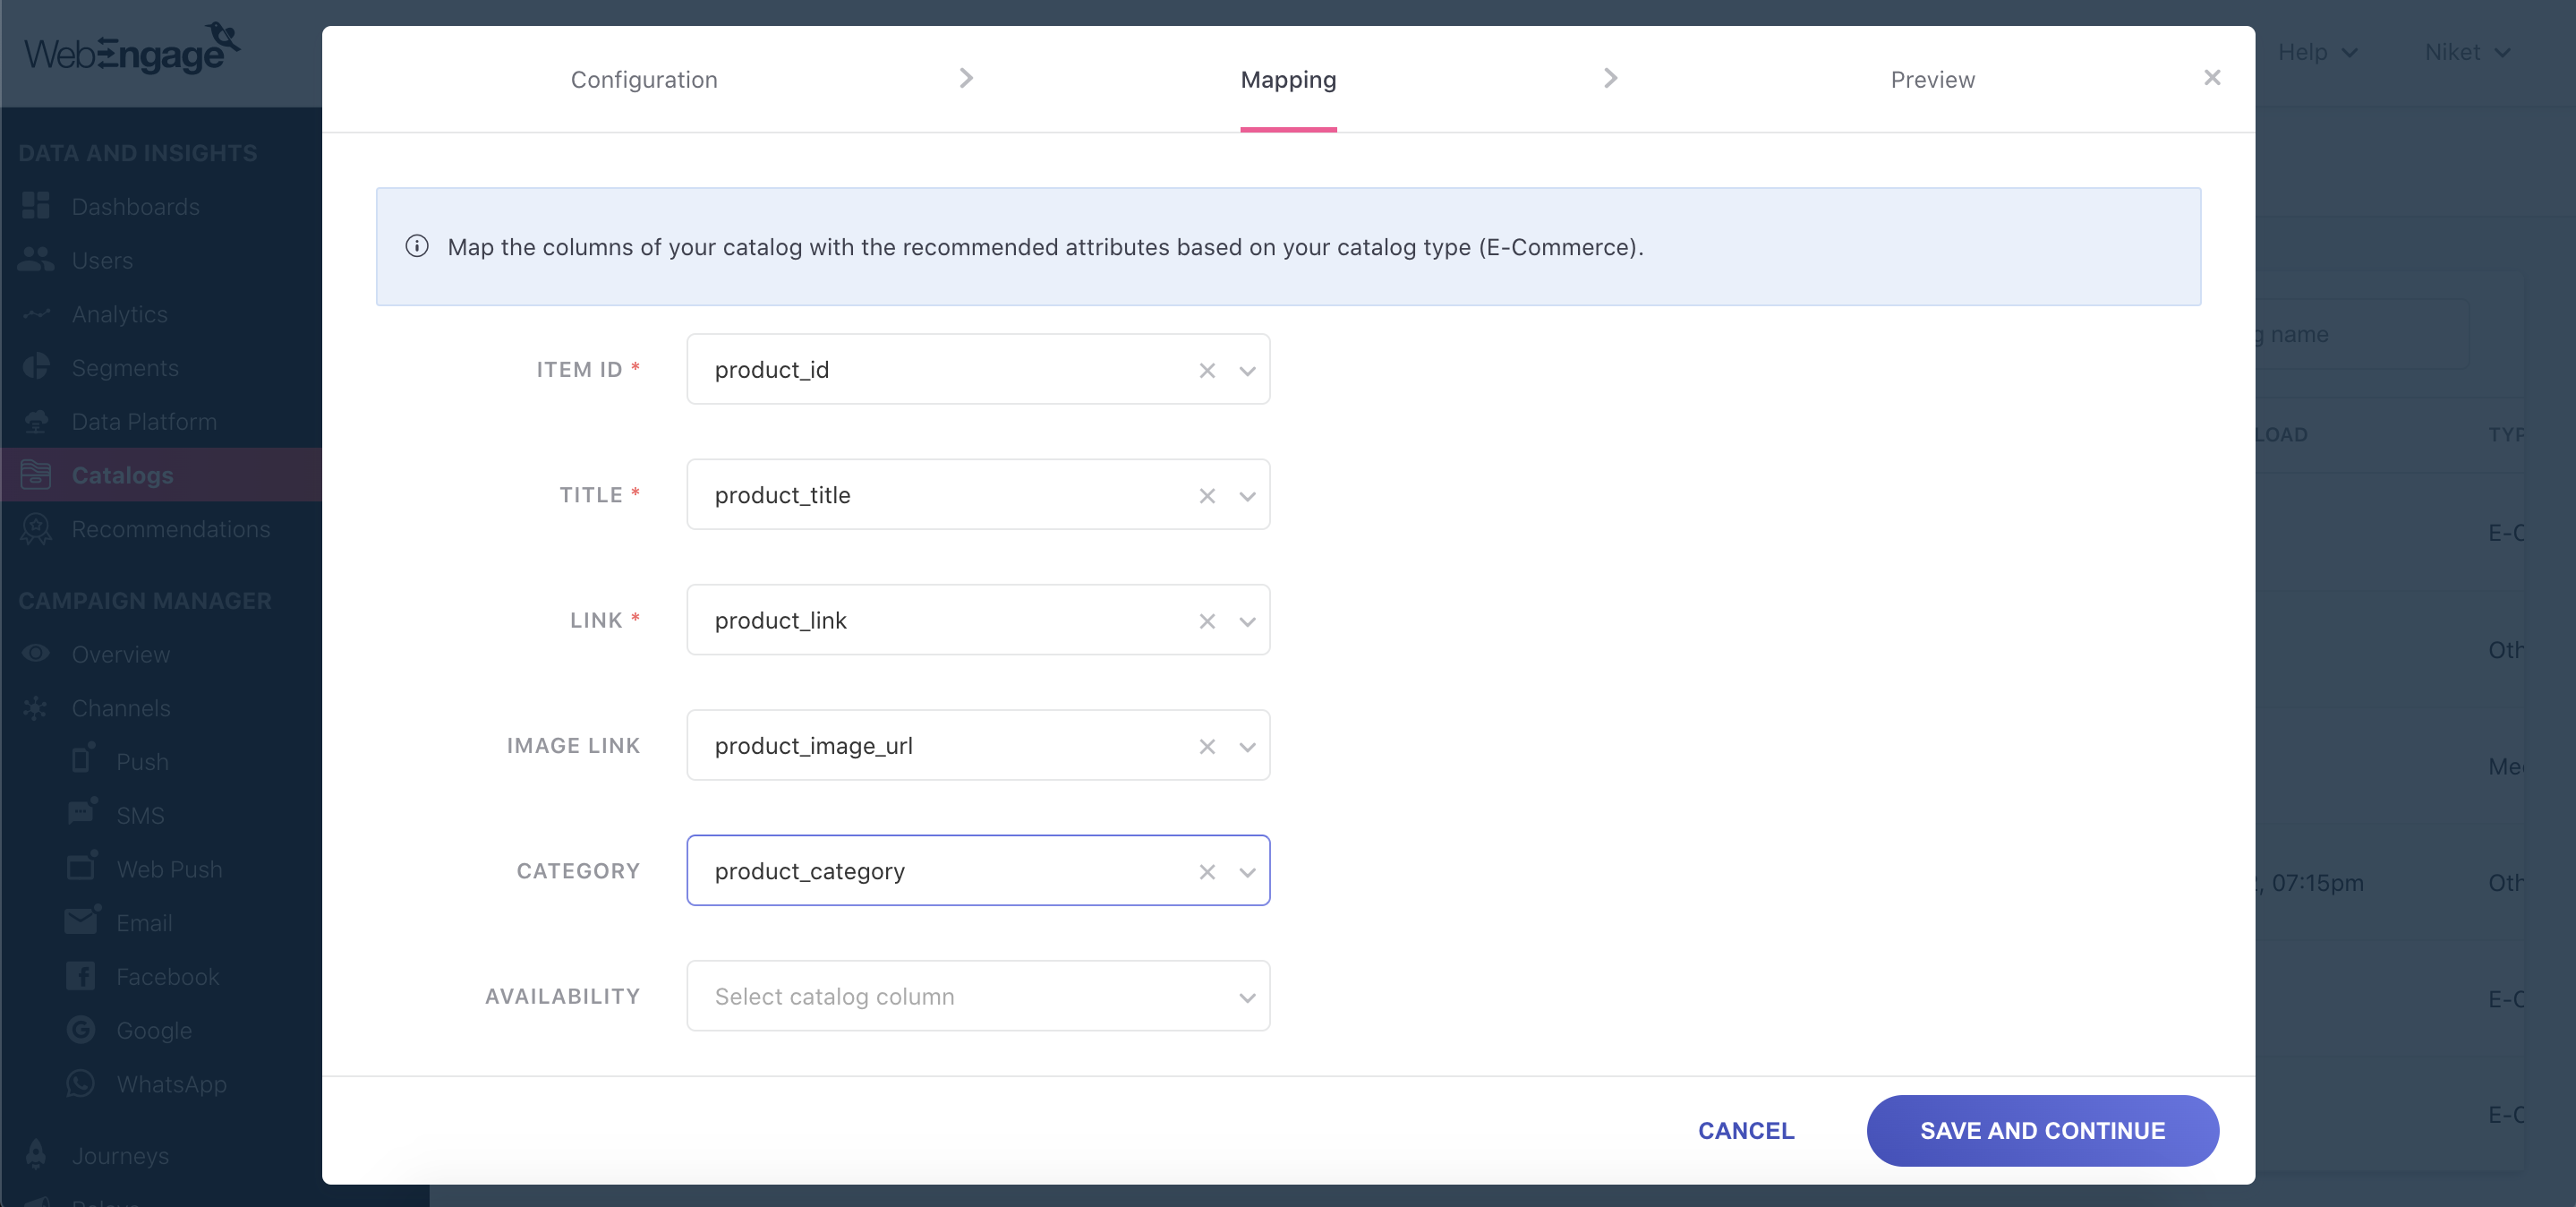
  2. Mapping
    • Depending on the industry you selected, you will be asked to map the columns of your catalog with certain recommended attributes.
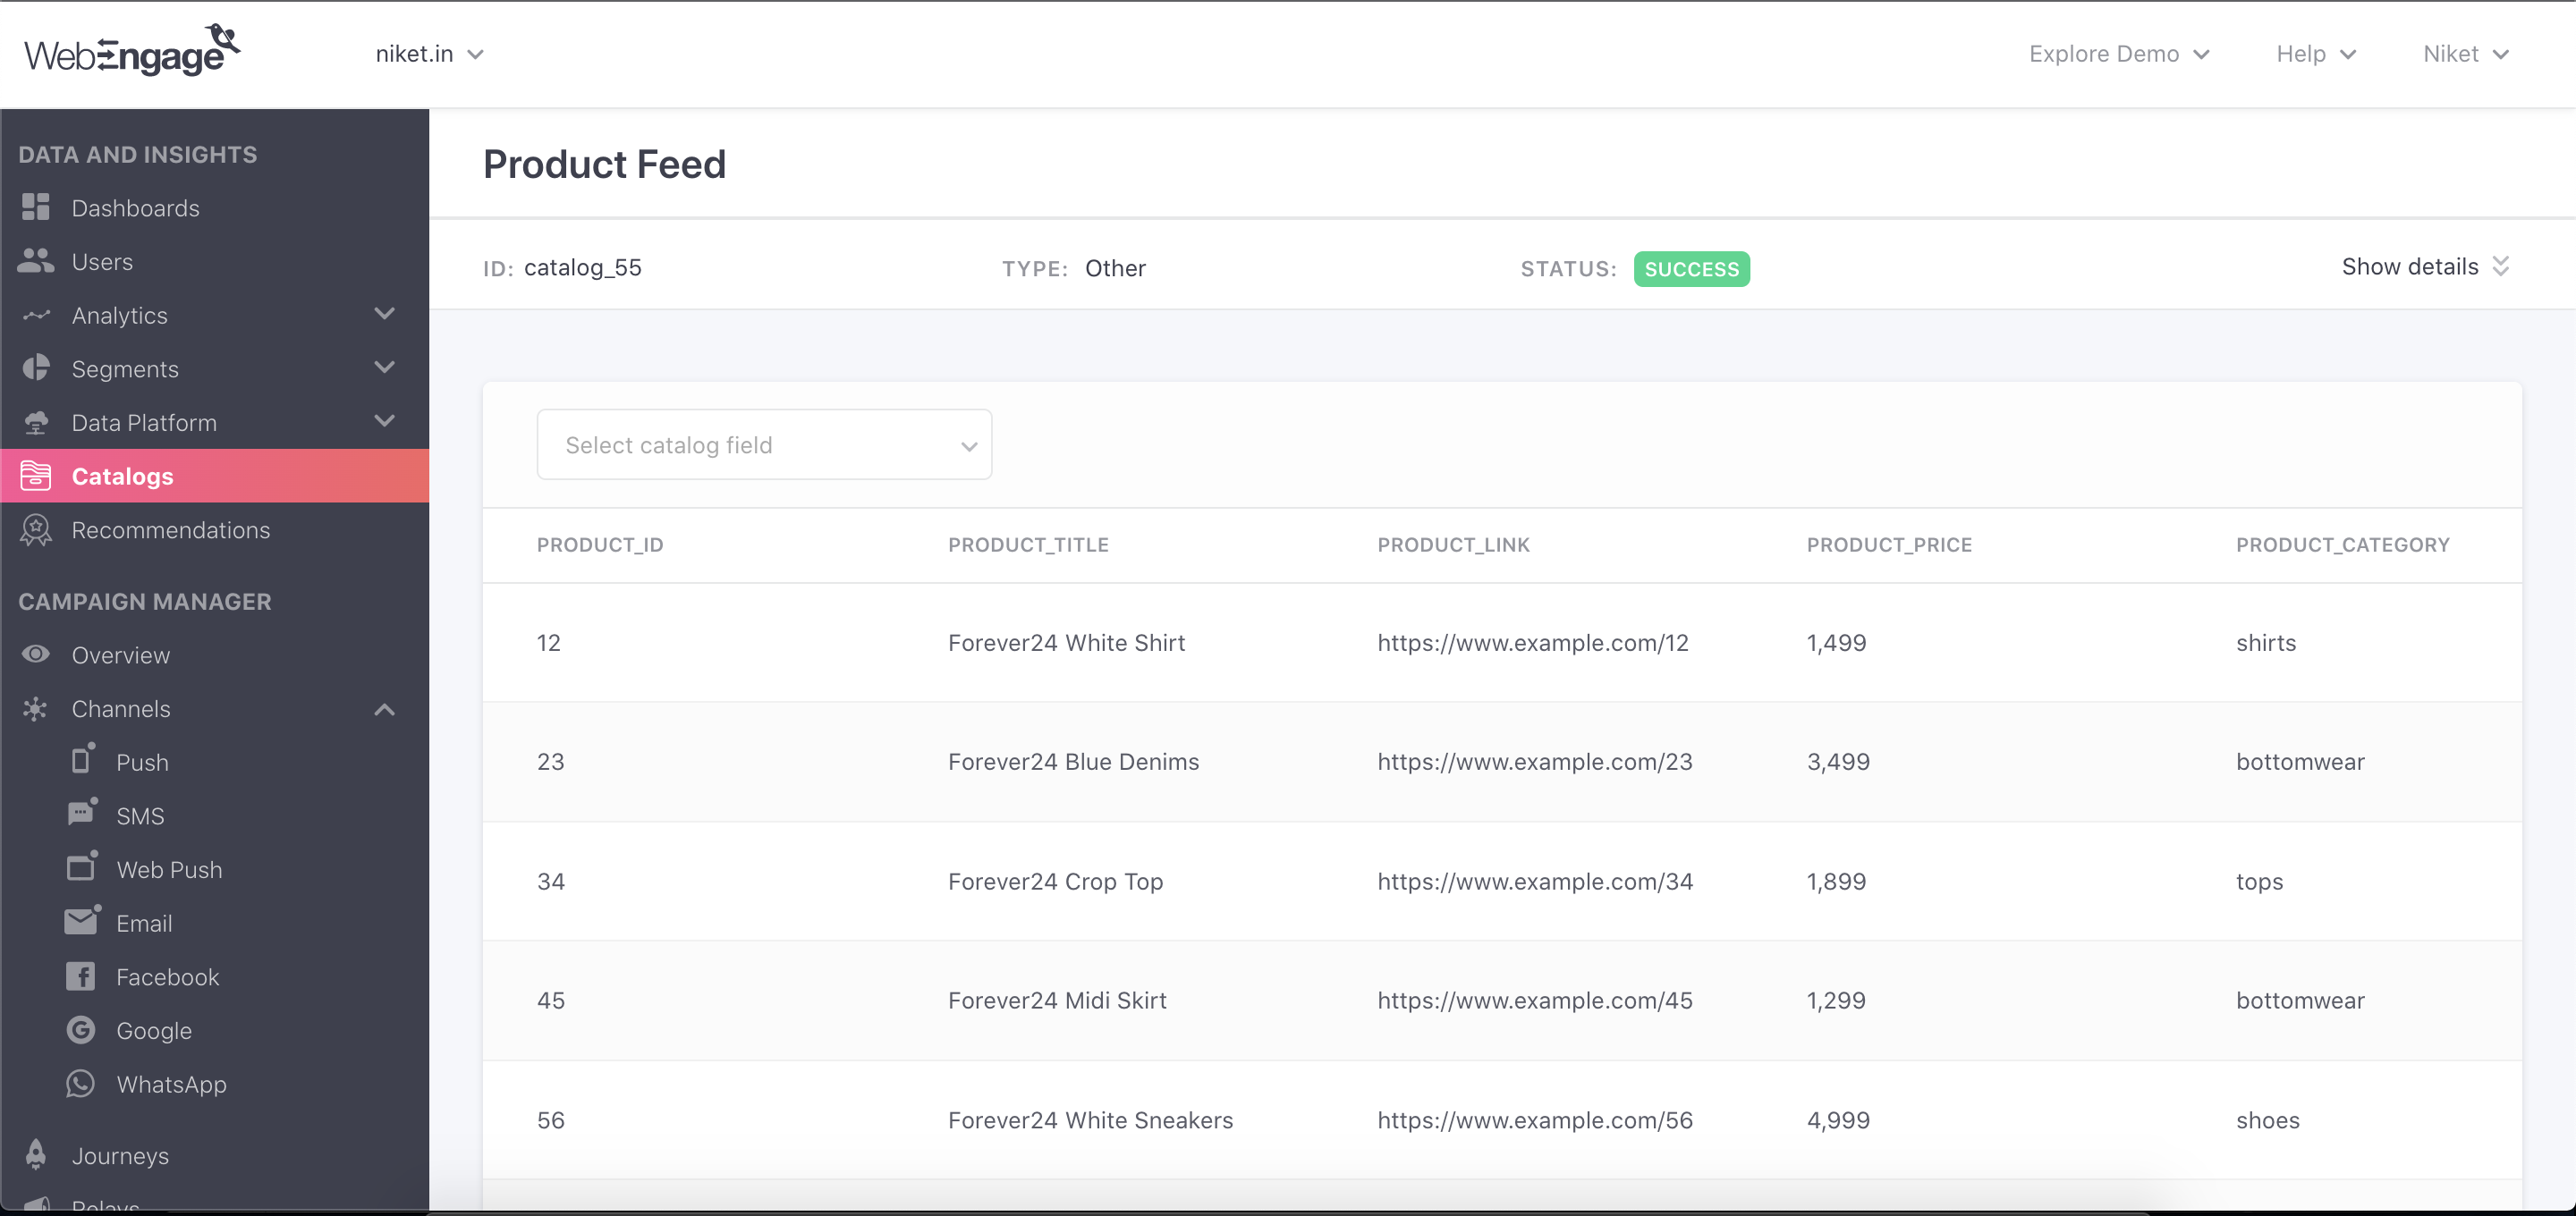
  3. Preview and data type selection
    • Preview the values in your file and select the data type of each field in your file.

👍

Pro tip

Feel free to think beyond the scope of conventional product catalogs.

Use your catalog as a data source to power a variety of power use cases across channels. Example: fetch details of the nearest store manager (their image, name and contact number) and show that in real time in an on-site notification or in-line content campaign when a user enters their pin code on your product detail page.

View and verify data

View the list page of Catalogs to check the basic info of your catalogs - status of upload, upload frequency, number of items, etc. If a catalog's status is marked as Error, hover on its status to view more details of the error.

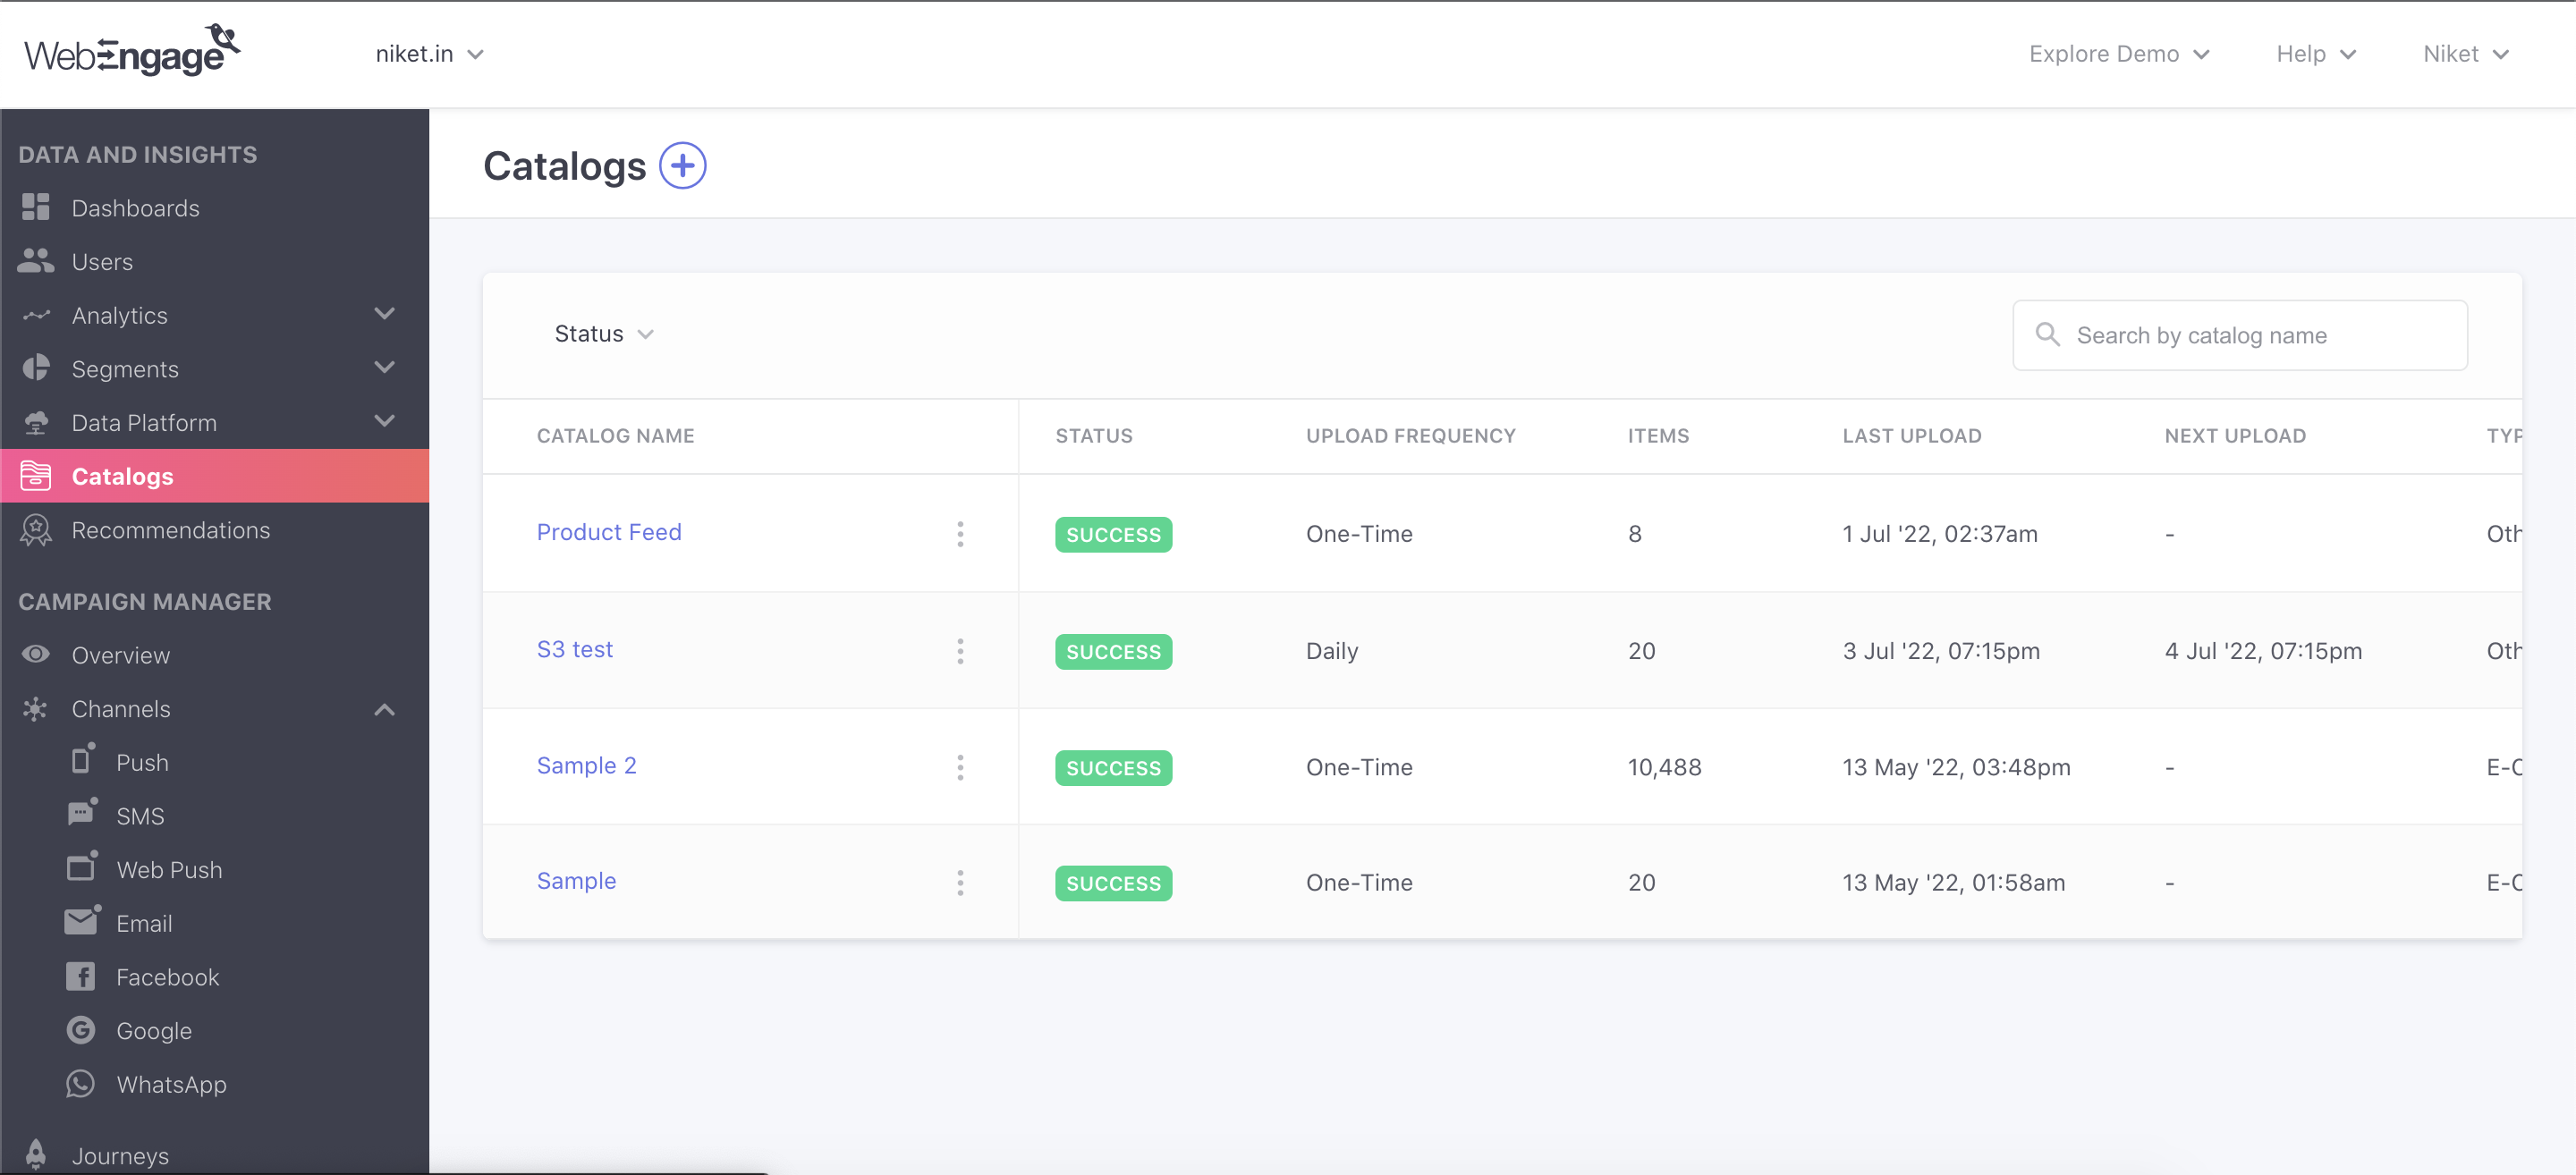
View the list of items to quickly glance through the uploaded data. You can use filters on this page to check specific items (example: price > 1000).

Map events to a catalog

2880

This is a crucial step for using our recommendation engine. Mapping events essentially means stitching the item ID between your catalog and your event data. Map events like Added To Cart, Product Viewed, Checkout Completed, etc. so that you can utilize those events to create your recommendation strategies.

Create recommendation strategies

2880

Follow these steps to create a recommendation strategy:

  1. Specify a strategy name and select the catalog. Our personalization engine would combine the data of our recommendations with the item metadata in your catalog so that you can utilize recommendation strategies in your campaigns (more on that in the section below).
  2. Select the event on which you want to run your recommendation strategy (example: Added To Cart). The catalog you select must have at least one event mapped to it, as mentioned above in the Map events to a catalog section.
  3. Select Personalized as your strategy type if you want to recommend products on the basis of a user’s history for the selected event (example: users who have viewed X have also viewed Y).
  4. Select Static as your strategy type if you want to recommend products on the basis of the selected event (example: top selling, top viewed, etc.)
  5. Select the 'EXCLUDE EVENT' that you want to exclude from the recommendation. For instance, selecting the "Purchased" event would imply that any products the user bought during the mentioned lookback period will not be recommended to them.
  6. Select a lookback period i.e the number of days of data that our recommendation engine should consider.

🚧

Note

  • We automatically refresh the data in our recommendation engine at a periodic interval so that your Personalized as well as Static recommendation strategies are always up to date.
  • Our recommendation engine would generate 5 items as an output in most cases. If you would like to tweak this configuration, please reach out to [email protected].
  • You can create up to 10 recommendation strategies per project by default. Contact your Customer Success Manager or [email protected] if you want to increase this limit for your project.
  • The Exclude Event dropdown will only appear as an option if you choose the Personalised recommendation strategy.

Preview recommendation output

2880

View the list of recommendation strategies and select the Preview action to view the output of your recommendation strategy for a user.

Use recommendations and catalogs in campaigns

Personalize using catalog

Select a Catalog from the personalization dropdown and then specify which product you would like to pick from the catalog and which field (image, title, price, etc.) of that product you would like to personalize in your campaign. The product you want to pick can be static product (example: product id 1234) or it can be derived from a user attribute or event attribute (example: product id of the last product that was added to cart by the user).

In addition to above you can also create collection of catalog items using a loop. We enable you to loop across any User / Event array attributes.

{% set CatalogCollections= [] %}
{% for productIds in event["custom"]["Page_view"]["custom"]["product_ids"] %}
{% set CatalogCollections = CatalogCollections.concat(catalog['catalog_260'][productIds]) %}
{% endfor %}
{% for items in CatalogCollections %}
      <div style='border: 1px solid red;'>
        {{items['title']}} <br>
        <img src="{{items['imageSrc']}}" width='40px' /> <br>
      </div>
{% endfor %}

Replace
"Page_view" with the event name.
"product_ids" attribute you wish to loop across.
"catalog_260" with the desired catalog.
"title" & "imageSrc" with the column name of the catalog.

Personalize using a recommendation strategy

Select a Recommendation Strategy from the personalization dropdown and then specify which product you would like to pick from the recommendation engine and which field (image, title, price, etc.) of that product you would like to personalize in your campaign. Here's an example of how to fetch the title of the first recommend product for a cart abandonment email campaign:

You can specify some default content (fallback) to avoid sending blank data to your users. Here's an example:

{{recommend["u_recommendation_1"]["0"]["product_title"] |  default('Apple iPhone 13 Pro')}}

Similar to catalog, you can create collection of recommendations using a loop. We enable you to loop across any User / Event array attributes and create master recommendation object.
This is useful when you want to customise the recommendation strategy and mix it with other strategy as fall back.

Below is the sample nunjuck code for different use cases

Merge "Item - Item" & "Static" recommendation based on event attribute as array

Replace
"varIdEvt" with Event name
"varIdEvtAttr" with attribute name
"i_recommendation_10" & "s_recommendation_8" with recommendation strategy


{% set mergedArr = [] %}
{% for varId in event["custom"]["varIdEvt"]["custom"]["varIdEvtAttr"] %}
     {% set mergedArr = mergedArr.concat(recommend["i_recommendation_10"][varId])  %}
{% endfor %}
{% set mergedArr = mergedArr.concat(recommend["s_recommendation_8"])  %}

De-dup the items from merged recommendations created.

Replace
"product_id" with product key from catalog

{% set uniqueList = []%}
{%set idr = []%}
{% for item in mergedArr %}
    {% if not(item["product_id"] in idr) %}
        {%set idr = idr.concat(item["product_id"])%}
        {%set uniqueList = uniqueList.concat(item)%}
    {%endif%}
{% endfor %}

Get products from same category that users interacted with

Replace
"varIdEvt" with Event name
"varIdEvtAttr" with attribute name
"productType" with catalog category column's name


{%set finalArr = []%}
{% for varId in event["custom"]["varIdEvt"]["custom"]["varIdEvtAttr"]%}
    {%for item in uniqueList%}
        {% if item['productType'] === catalog["catalog_1"][varId]["productType"] %}
            {%set finalArr = (finalArr.push(item),finalArr)%}
        {%endif%}
    {% endfor %}
{% endfor %}

Display upto 3 non null product slots as recommendation

Replace
"4" with "t" where you want to show "t-1" products as recommendation

{% set finalArr = finalArr.concat(recommend["s_recommendation_8"]) %}
{%set prodCount = 1%}
{% for prod in finalArr %}
      {% if prod and prodCount <4 %}
      <div style='border: 1px solid red;'>
        {{prod['title']}} <br>
        <img src="{{prod['imageSrc']}}" width='40px' /> <br>
      </div>
      {%set prodCount = prodCount+1 %}
     {% endif %}
{% endfor %}