Lists Hub
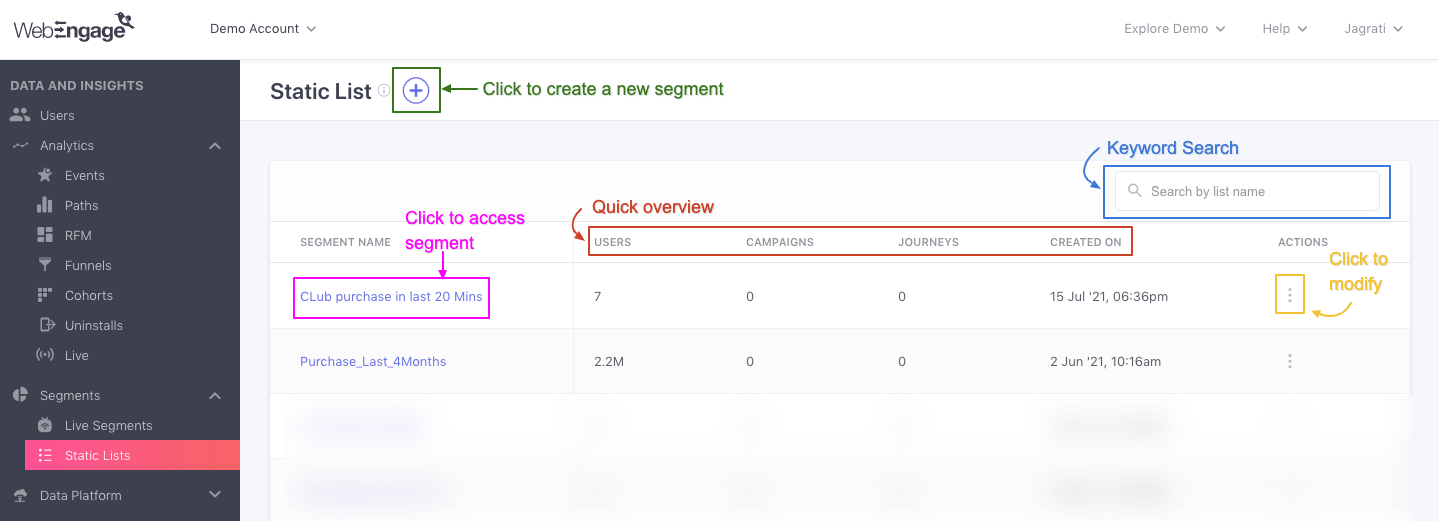
This is the first interface you'll experience on selecting Static Lists from the navigation panel. It's a central repository of all your user lists and presents a brief overview of each, as shown below.
Click to enlarge
Segment Details
Let's walk you through the details indicated for each segment:
Segment Name: Indicates segment titles; you can click them to access Segment Analysis.
Users: Indicates the total number of users included in a segment at present.
Campaigns: Indicates the total number of campaigns sent to a segment over its lifetime. This includes all channels of engagement, Push, In-app, SMS, On-site Overlays, Web Push, Email, WhatsApp, and Web Personalization.
Created On: Indicates the date-time at which the segment was created in your dashboard.
Actions: The overflow menu enables you to Delete the segment and Download its List of Users.
Features
Let's get you acquainted with all the actions you can take through this section:
Access Segment Builder
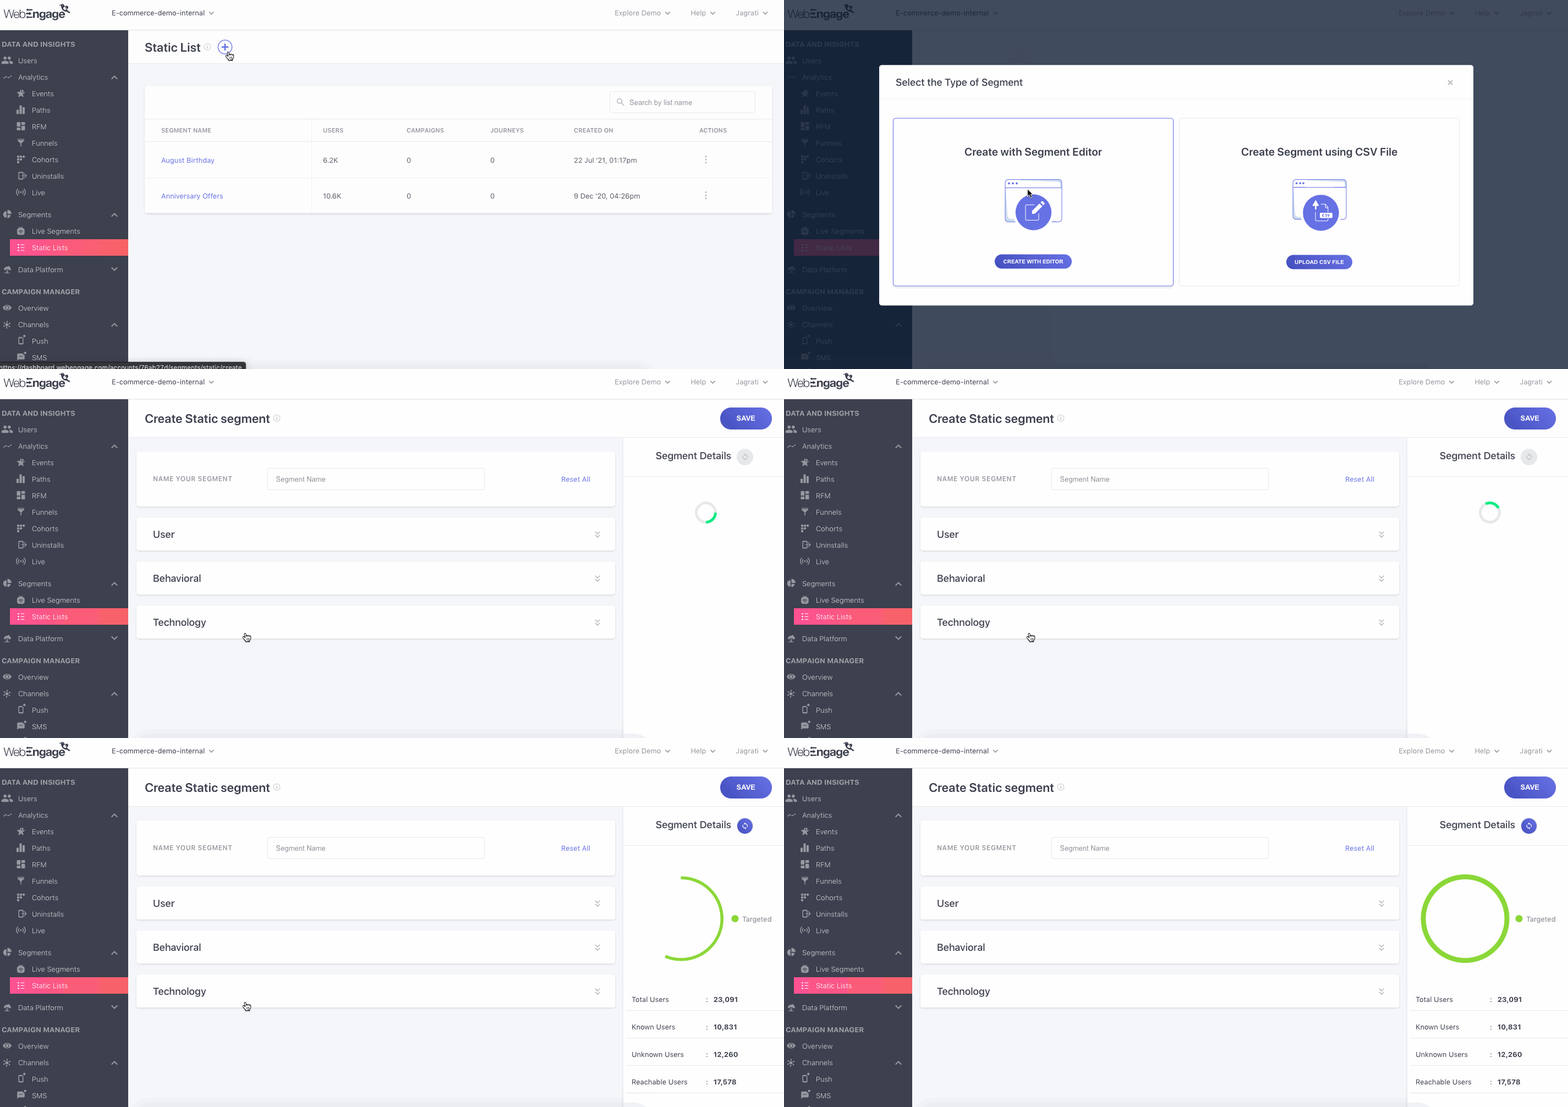
You can start building a Static List in your dashboard for one-time use by clicking the Plus icon placed on the top left, as shown below. Upon clicking the plus sign, you will get two options: Create with Segment Editor and Create Segment Using CSV File.
Create using Segment Editor
This allows you to create a segment by entering the details manually as shown below.
Click to enlarge
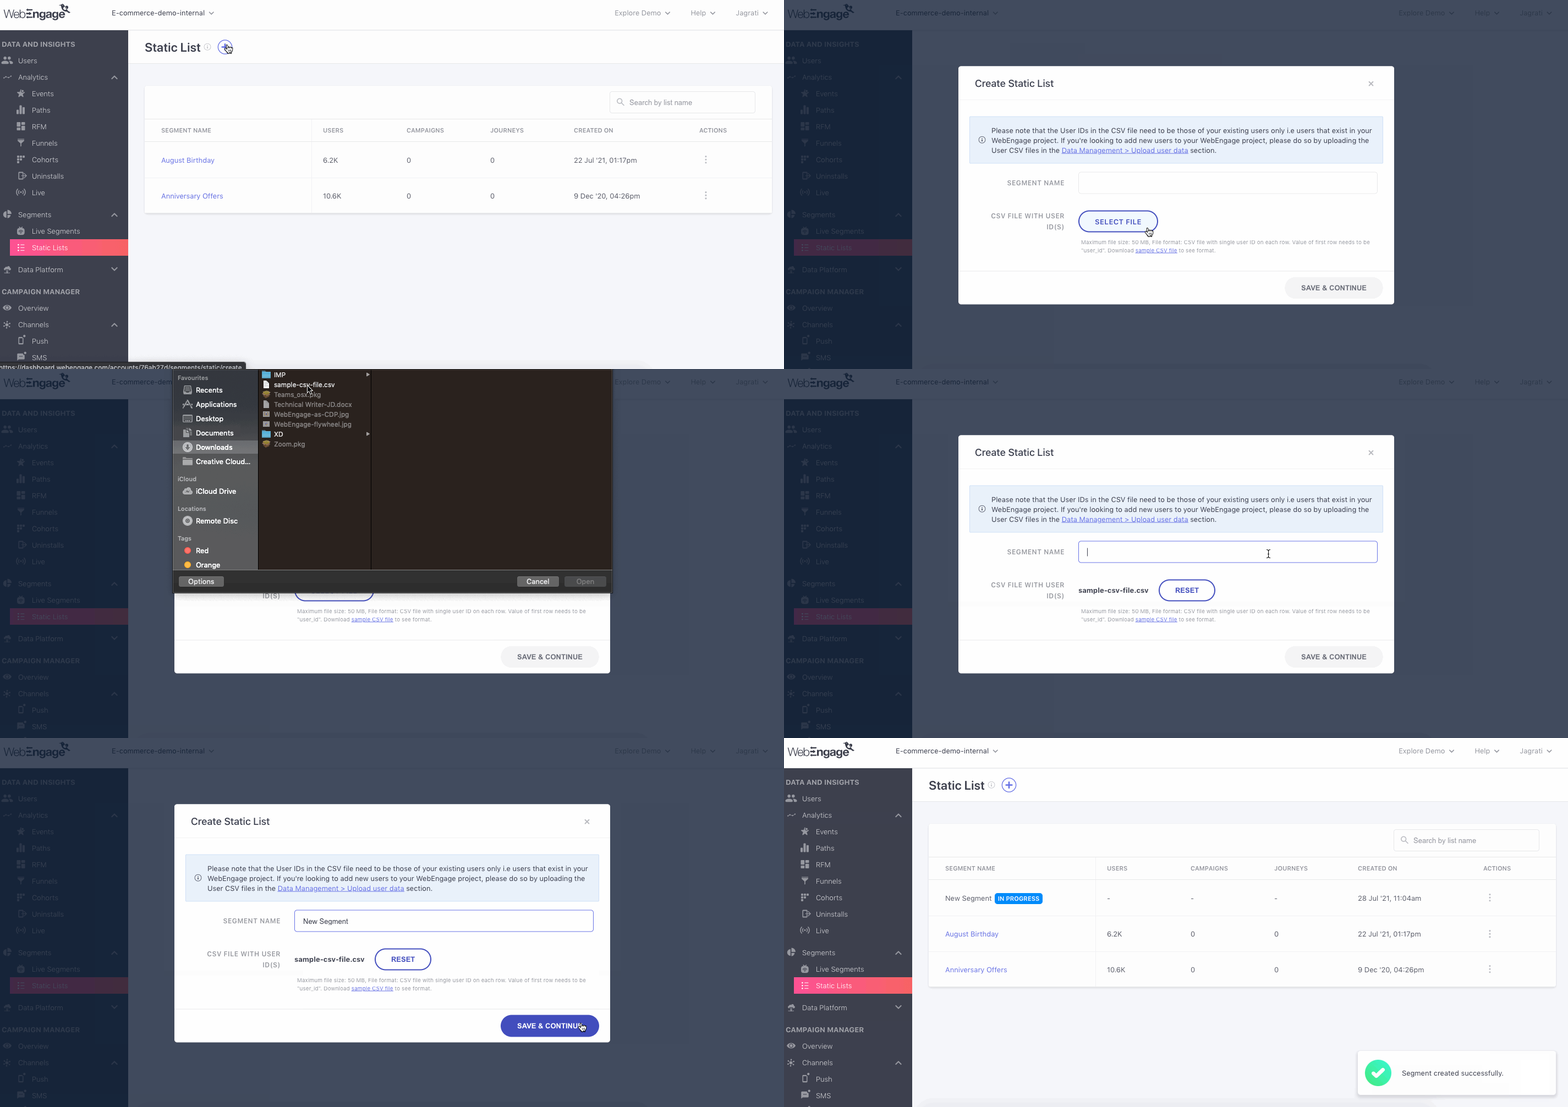
Create Segment Using CSV File
If you have an existing CSV file, you can create a segment by uploading the file directly.
Click to enlarge
Please NoteThe User IDs in the CSV file need to be those of your existing users only, i.e., users in your WebEngage project. If you're looking to add new users to your WebEngage project, please do so by uploading the User CSV files in the Data Management > Upload user data section.
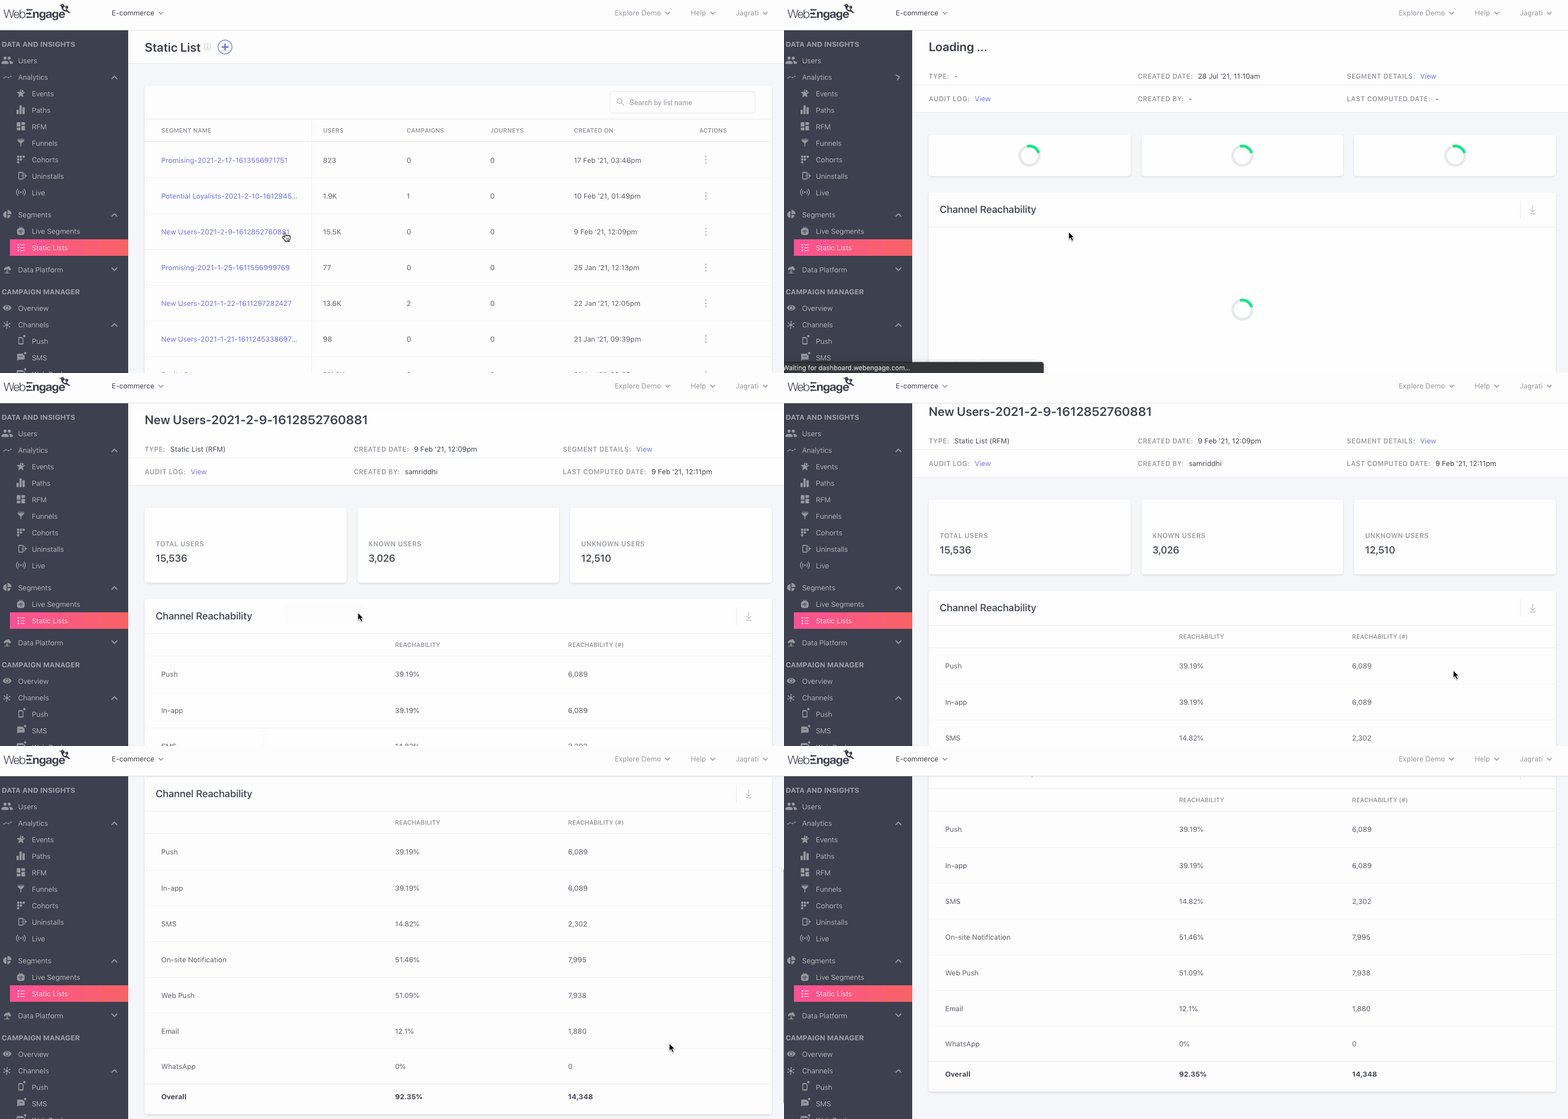
Access Segment Analysis
Once a segment is created, you click its segment title to access the analysis section.
Click to enlarge
Delete Segment
You can choose to delete Static Lists that have become redundant and are not linked to any campaigns. If the segment has been used to send a campaign, then you will need to delete the campaign before you can proceed with deleting it. This process has been put in place to preserve the sanctity of your campaign’s engagement and conversion metrics, which are tied to the segment’s user base.
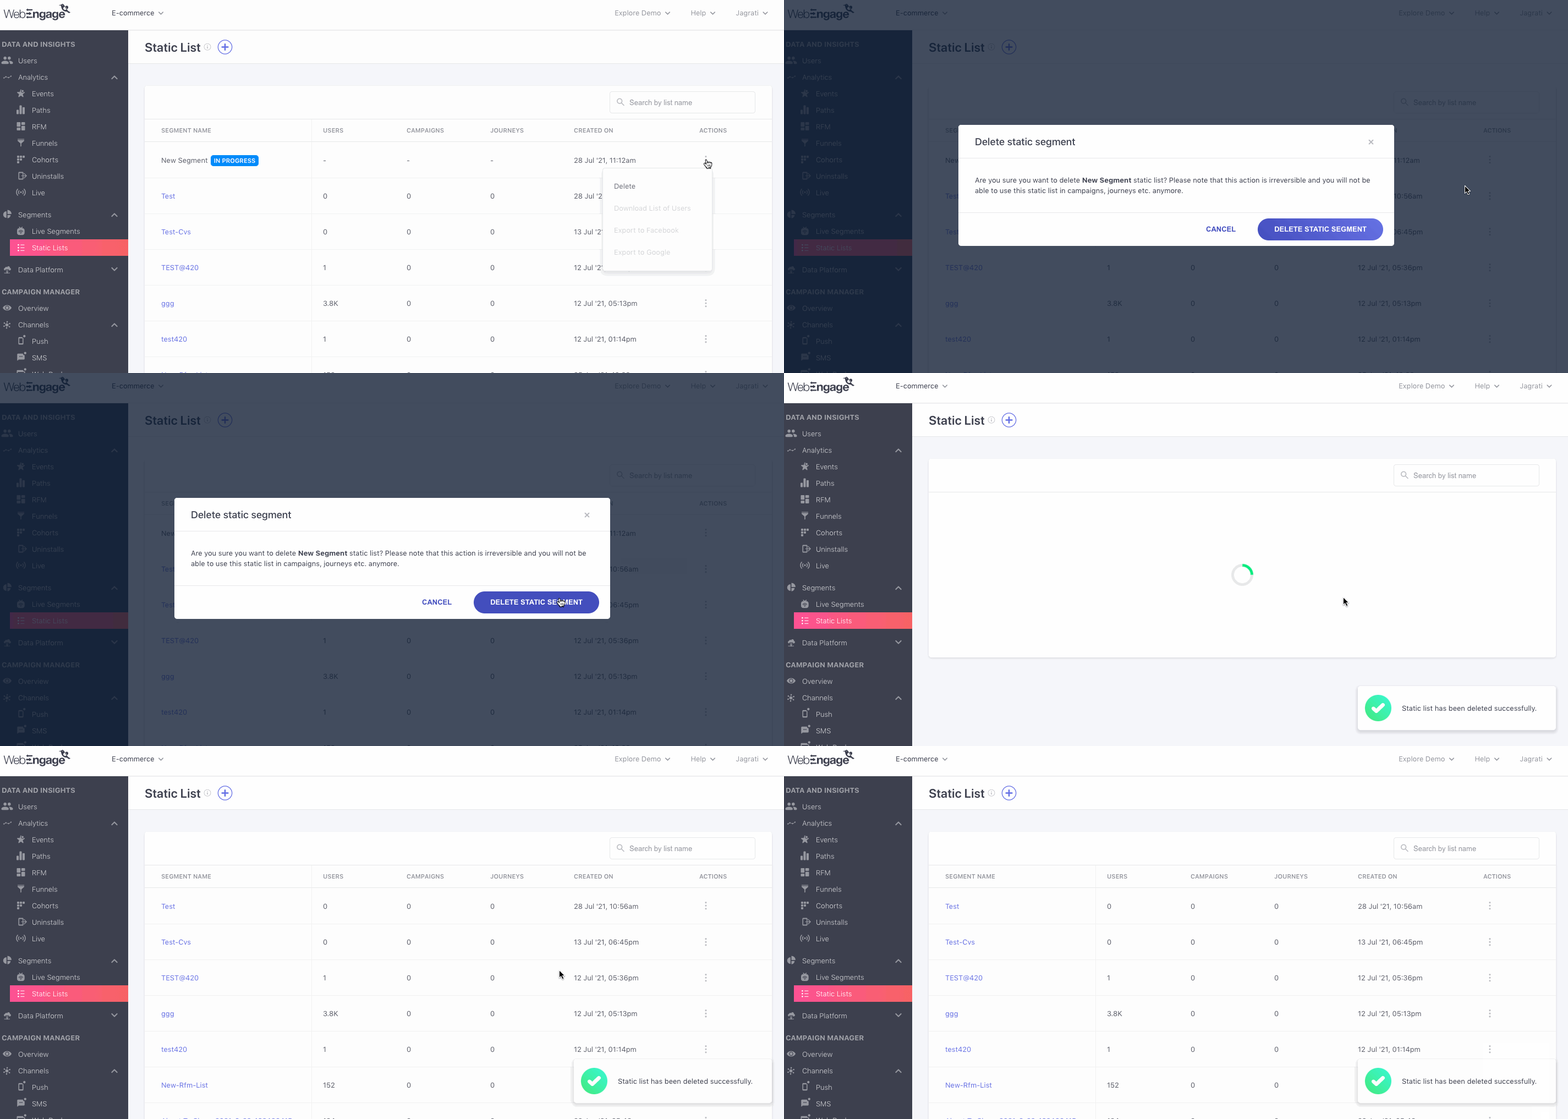
Once deleted, the segment cannot be retrieved. Here’s how you can do it:
Click to enlarge
Step 1: Select Delete from the Actions menu.
Step 2: Click Delete Segment on the pop-up to proceed. (Deletion will be confirmed by a pop-up on the bottom right)
Download List of Users
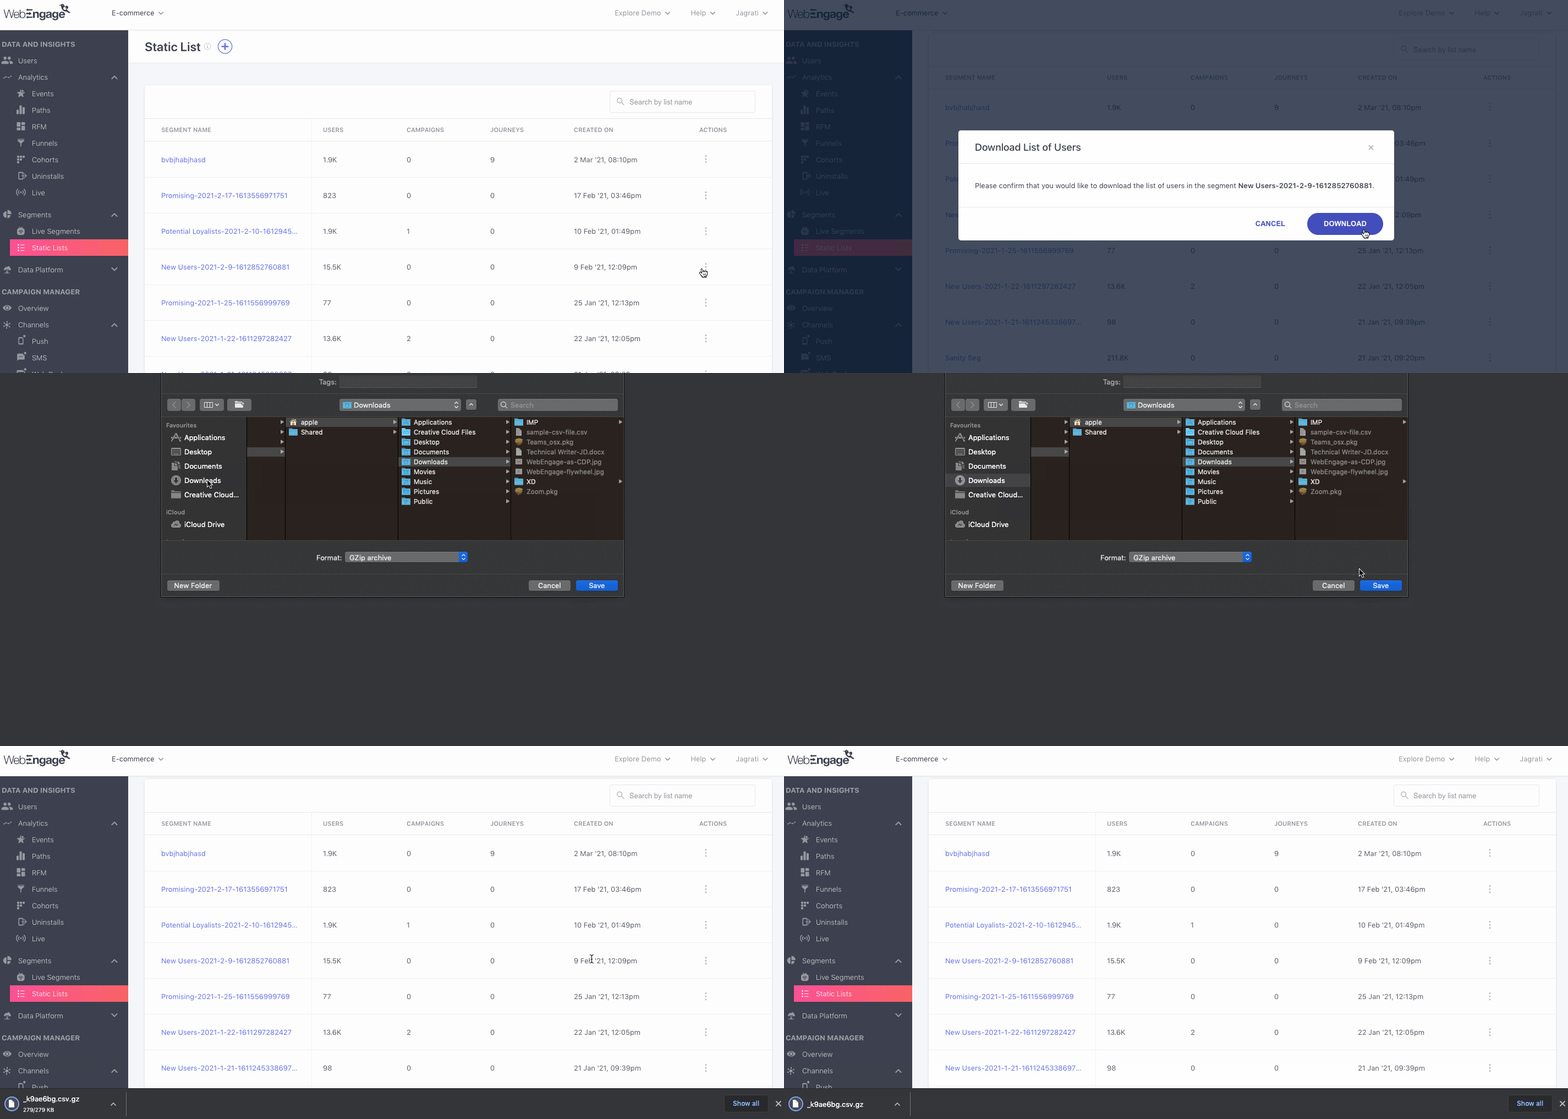
You can easily download the User IDs of all users included in your Static Segment as a CSV file. As shown below, select Download from the Actions menu to get started. (You will receive a download link on your registered email address.)
Click to enlarge
Unable to download user details?Reports can be downloaded only by Admins who have access to Account Management. Please get in touch with the account owner if you are unable to do so.
Search for a List
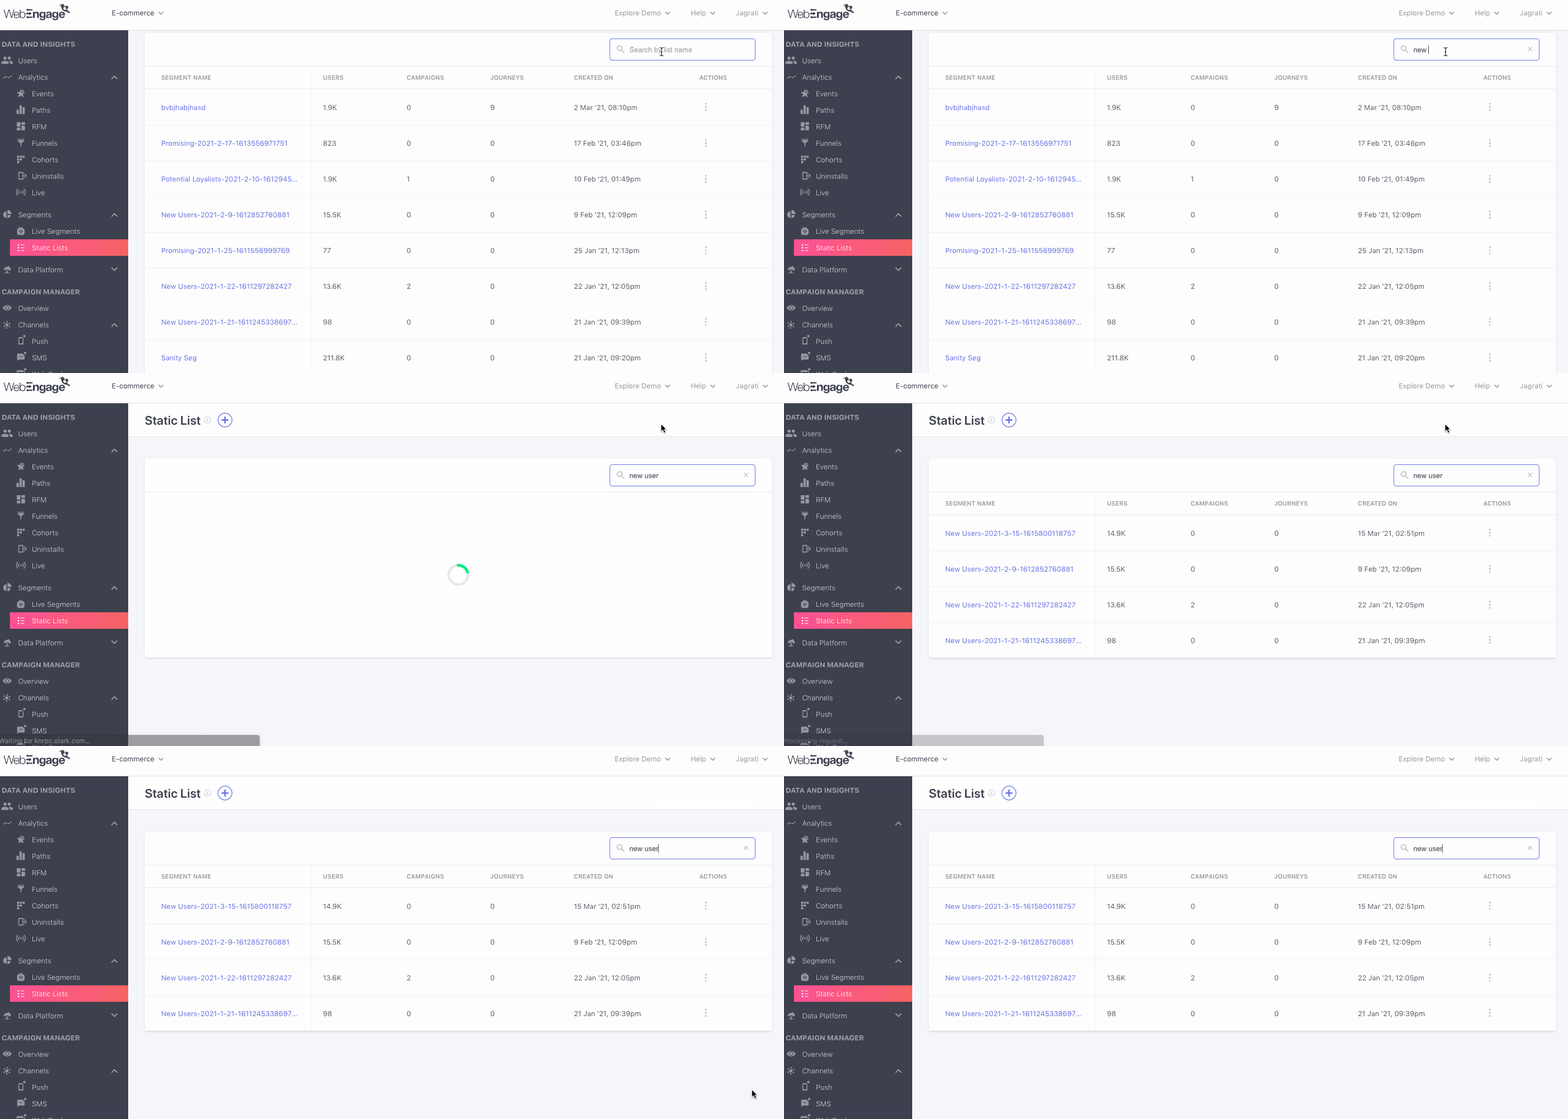
Skip the hunt - Use the search bar placed on the top right to dig out existing segments. All you need to do is type in a keyword, we'll match it to all the segment titles that include it and present a short list you can choose from!
Click to enlarge
Please feel free to drop in a few lines at [email protected] if you have any further queries. We're always just an email away!
Updated about 21 hours ago
Let's show you how to create and analyze static user lists in your dashboard.