Custom Alerts
The Custom Alert feature on your WebEngage dashboard enables you to create alerts for specific metrics you want to track. You can use this feature to set a threshold for a specific metric and receive a notification whenever there is any deviation from the set threshold.
It is a flexible and customizable feature that can be tailored to meet your specific needs. It supports a wide range of metrics, including event counts, conversion rates, and user engagement metrics.
Custom Alerts are an essential tool for your business if you want to stay informed about your key metrics and make data-driven decisions. With its ability to trigger alerts based on customizable thresholds, you can focus on the metrics that matter most to your business, and respond quickly to any changes. This feature provides a convenient and effective way to monitor the performance of the business and ensure that it stays on track toward its goals.
Getting Started With Custom Alerts
There are two ways in which you can create a Custom Alert.
- Alerts can be found in the Data and Platform section on the left navigation bar of your dashboard
The custom alerts option is also available in Events analytics. You can instantly create an alert while analyzing Event data by clicking on the 🔔 icon.

Creating your first Custom Alert
-
Selecting the metric (event) to track
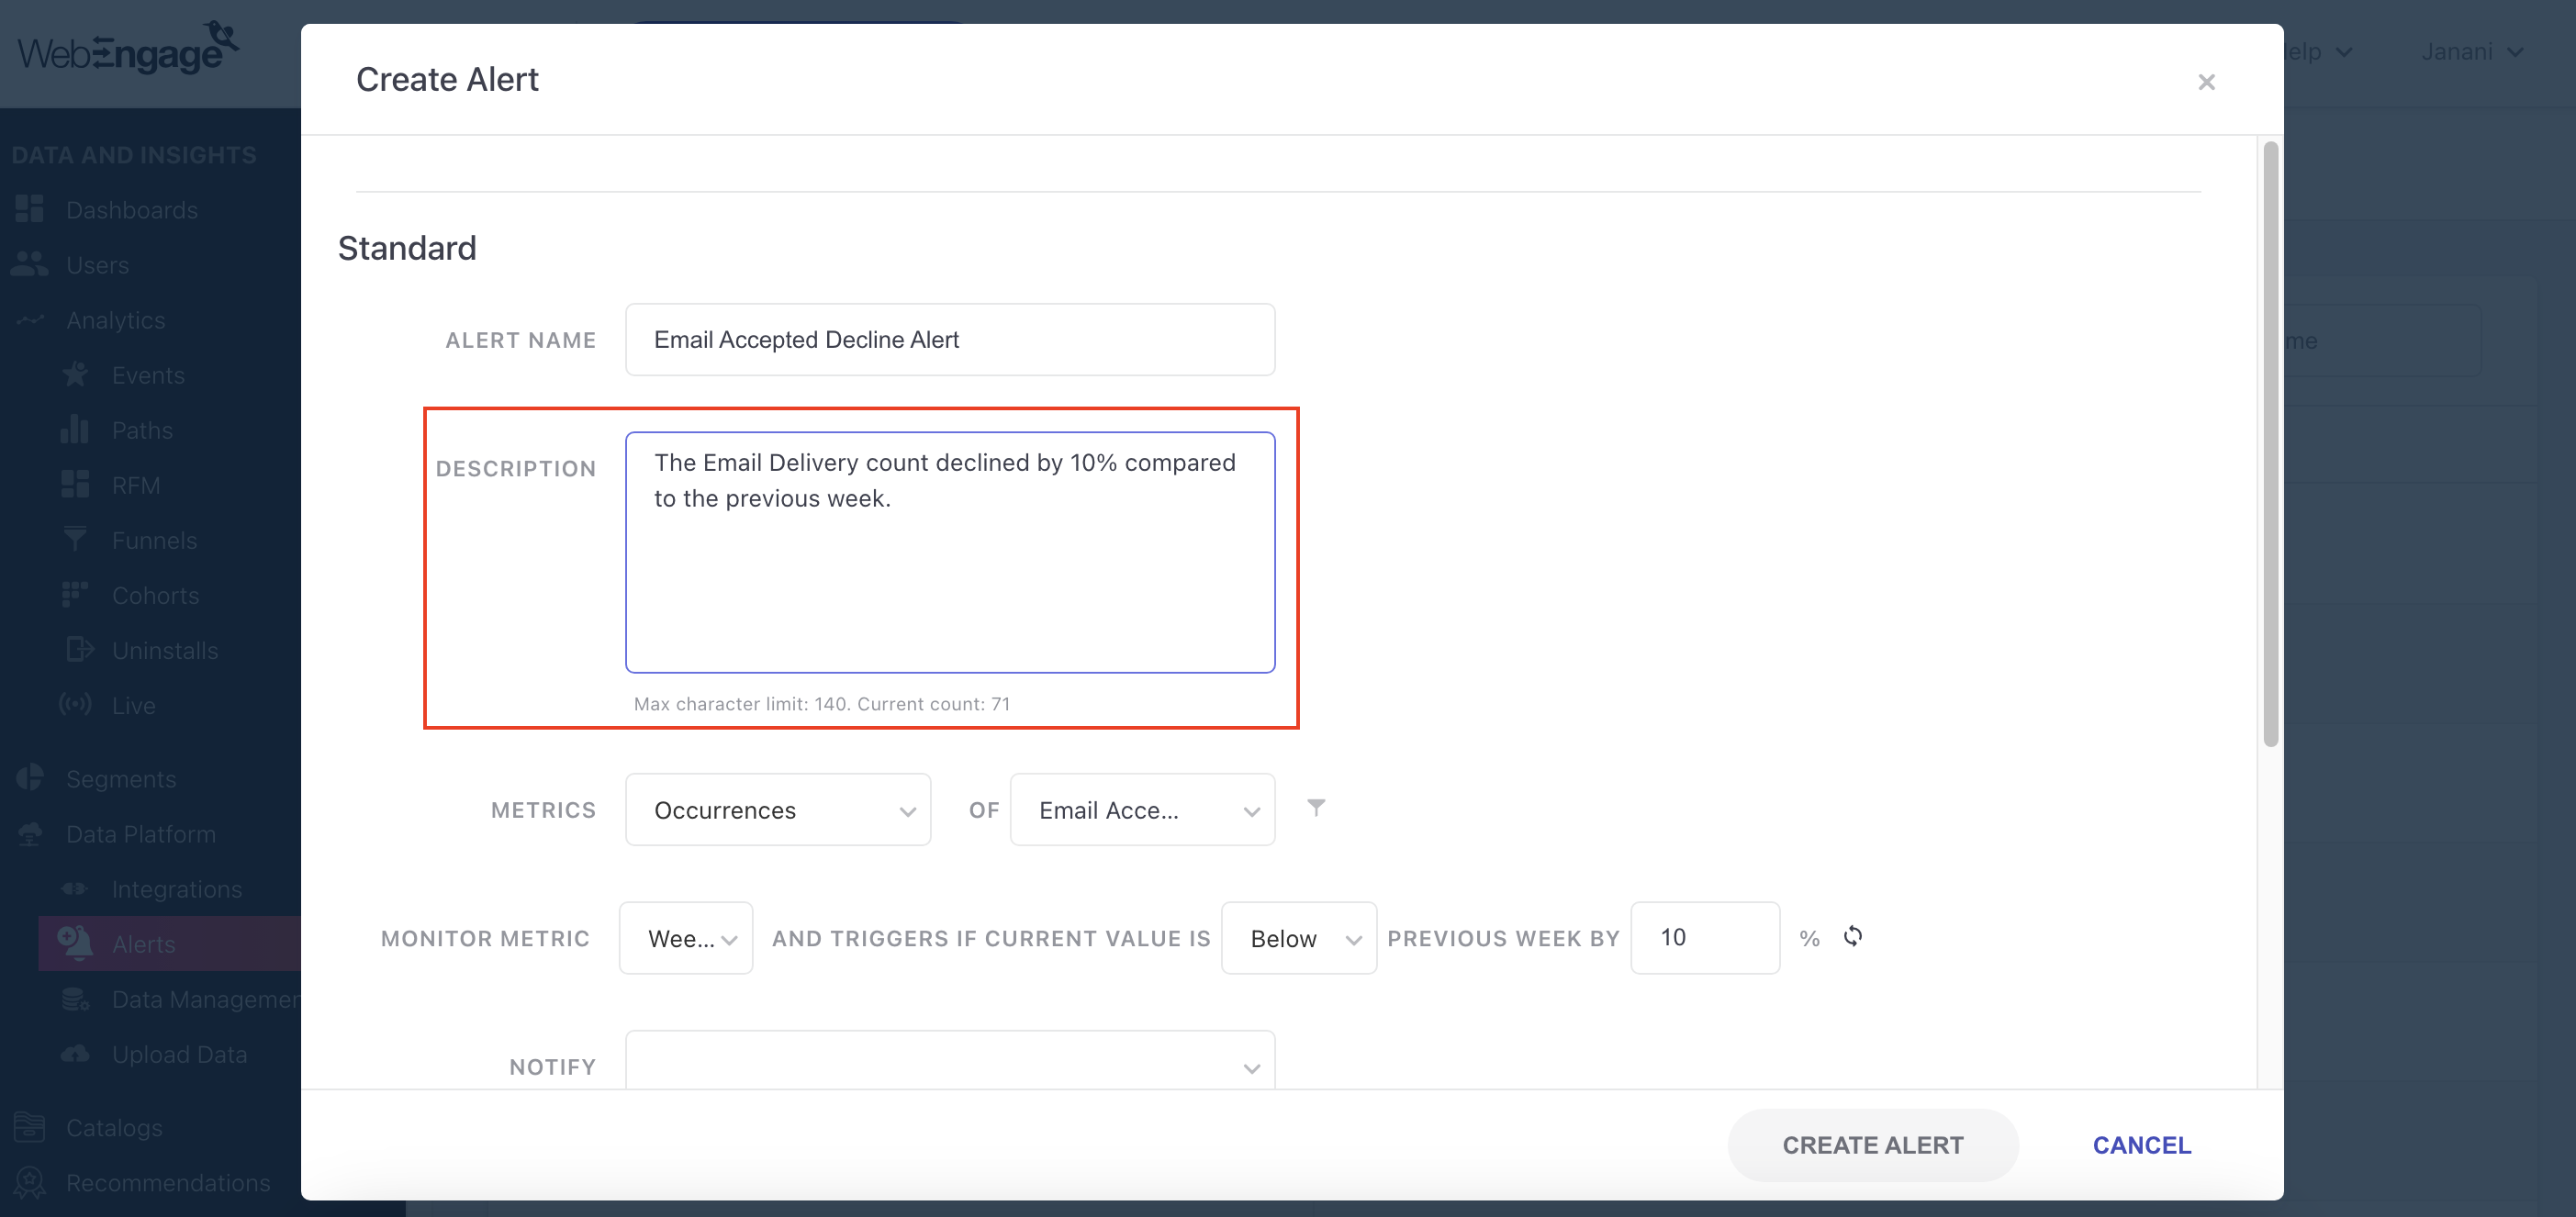
- Step 1: The first step to creating a custom alert is to give the alert an appropriate name. Since multiple Team members on your dashboard can follow the alert, we recommend using a comprehensive alert name.
- Step 2: Description of an Alert (Optional): Once you’ve named your alert, you can add a description of the alert you’ve created i.e. what it’s about, why we need it, etc. Alert descriptions are crucial for providing clarity, context, and effective communication about the alert. They offer a clear explanation of why an alert should be triggered and what action needs to be taken. Alert descriptions also serve as valuable documentation for administrators, facilitating, understanding the need for this alert.
- Step 3: The next step is to select the event you’d like to track. When selecting the metric (event) to track, you can choose from custom events on your dashboard or system events such as app installations, email opens, and more.
Custom Alert also has the ability to track events based on occurrences and uniques.
Setting the frequency is one of the most important aspects of setting up custom alerts. WebEngage offers one of the most advanced frequency and threshold setups for Alerts.
The frequency of alerts can be set on an hourly/daily/weekly basis. Here the event will be checked every hour/day/week based on the frequency that you set. You can also compare these metrics to the past hour/day/week.
Users can also compare metrics based on the average of the past X hours/days/weeks. This makes it more dynamic and customizable as per your requirements.
Let's understand this with an exampleYou have an event for ‘Add to Cart’, and now you want to create an alert when the event action reduces by 10% compared to the last day. What would this event look like?
Check metrics everyday and send alerts if the current day's value is below previous day's by 10%.
-
In addition to selecting the metric and setting the threshold, Custom Alert also provides the option to set the notification settings for your alerts. These settings determine how and when users will be notified about a threshold breach.Set the Notify settings (Email notifications will be sent to specified people)
You can specify the email IDs of the people you would like to be notified by the alert. You can add multiple email addresses of stakeholders who will be notified about the threshold deviation. Ensuring that the right people are kept informed and can take necessary actions to improve the metrics.
You can add the email IDs of users already associated with the WebEngage users or simply search for users and select to subscribe them to the alert.
With the ability to add multiple email addresses, Custom Alert provides a convenient way to ensure that all relevant stakeholders are informed about any changes in the metrics they are concerned care about. This helps to improve communication and collaboration and can lead to faster and more effective decisions.
Using the advanced option, you can make your alerts more nuanced by selecting ‘split by’.
The "Split by" option in Custom Alert provides you with the ability to split an alert based on different types of data, such as city, country, platform, etc. This can be useful when you want to track metrics for different segments of the user base, or when you want to receive notifications for threshold breaches in specific geographic locations or platforms.
For example, if a user splits an alert by platform (Web, Android, iOS), they will receive notifications if the threshold is breached for any of the three platforms. This allows the user to monitor metrics across multiple platforms and receive alerts for any deviations from the threshold on a per-platform basis.
The "Split by" option in Custom Alert provides you with greater flexibility and more granular control over the metrics to track, ensuring you receive notifications for the metrics that matter the most.
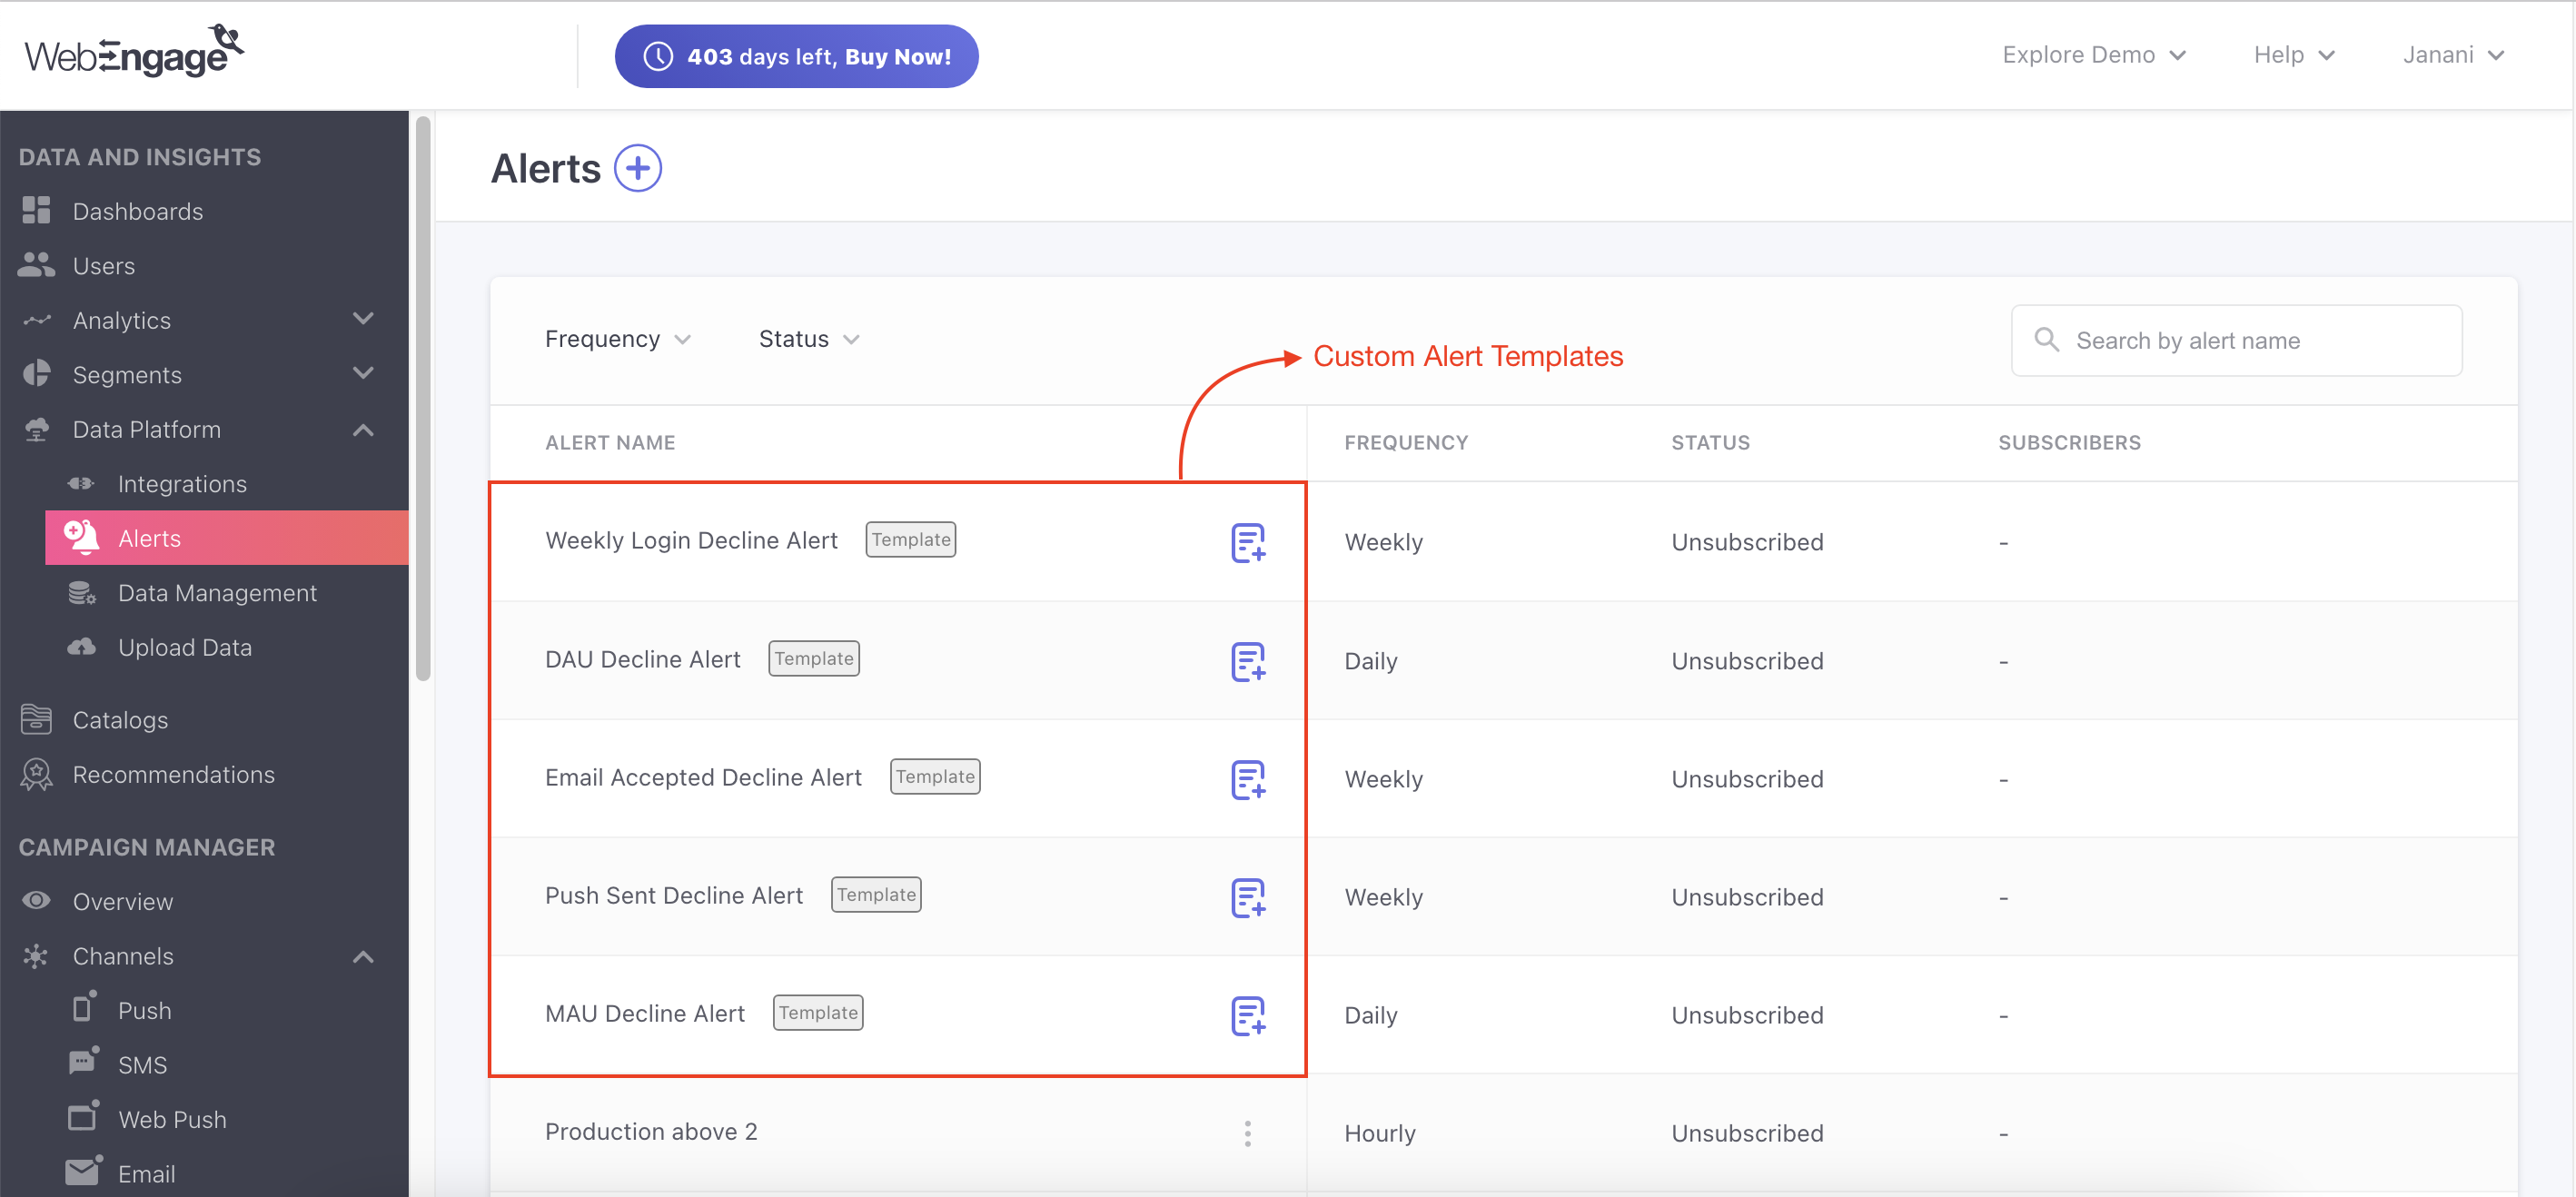
Custom Alert Templates
The custom alert templates are more frequently used. The templates are located at the beginning of the table for easy access and reference. As you create new alerts, they will automatically be positioned below these pre-created templates.
It’s important to note that the custom template itself is not editable directly. However, if you need to modify its contents or settings, you can copy the template to create a new alert and edit it as per your preference.
This ensures that you have the flexibility to tailor alerts to your specific needs while still benefiting from the convenience of pre-existing templates.
There are 5 types of templates WebEngage offers:
- Weekly Login Decline Alert: An alert template for when the weekly user login count declined by 10% compared to the previous week.
- DAU Decline Alert: An alert template for when the daily active user count declined by 10% compared to the previous day.
- Email Accepted Decline Alert: An alert template for when the Email delivery count declined by 10% compared to the previous week.
- Push Sent Decline Alert: An alert template for when the Push sent count declined by 10% compared to the previous week.
- MAU Decline Alert: An alert template for when the monthly active user count declined by 10% compared to the same day of the previous week.
How to Create an Alert from a Template?
- Click on the template icon on the specific Alert adjacent to the template you’d like to use.
- You’re now presented with a ‘Create Alert’ tab, where you can customize the template according to your preferences, and save the alert.
Alert Details
Alert details consist of information about the type of alert, when it was created, and by whom, when it was last triggered, checked, and updated, as well as who made the last update, and frequency of the alert. You can check for the details of your alert by using the following steps:
- Click on the action button adjacent to the alert you want details to.
- Navigate to ‘Edit’, which then opens the ‘Create alert’ tab.
- Click on ‘Show details’ on the right side.
Alerts Based on MAU / DAU / WAU
You can track the trend of your active users, receive an alert in case of a sudden fluctuation i.e. increase or decrease of Users on your platform, and notify your team of these changes. Note that these metric alerts are monitored on a daily basis.
How to set MAU / DAU / WAU?
- You can set these metric alerts by choosing the MAU/ DAU/ WAU option from the ‘Metrics’ dropdown.
- Mention the fluctuation you want to observe from the current value dropdown to ‘Above’ or ‘Below’.
- Along with the drop-down adjacent, select any of the following options.
- Specific Value: You can set the threshold above or below which you want the Alert to be triggered.
- Previous Day by Percentage: This allows you to compare the fluctuations in the value by comparing it to the previous day.
- Same Day of Previous Week by Percentage: This compares the fluctuation of values by comparing it to the same day of the previous week from when it’s being considered.
Keep in MindIn the Advanced option, you can select the split-by option for Web, Android, and iOS platforms individually. The system then independently checks if the specified threshold is met, triggering an email in case of fluctuations for any of the platforms accordingly.
Editing an Alert
Custom Alert also includes an "Edit" feature, which allows you to modify existing alerts as per your requirements. This can be useful in instances where you want to update the name of an alert, or add or remove users from the notification list.
To edit an alert, the user needs to follow these steps:

- Navigate to the Custom Alerts section
- Find the alert they want to edit
- Click on the action button (represented by three dots) next to the alert
- Select the "Edit" option
Once the edit option is selected, the user can modify the alert name and add or remove users from the notification list. It is important to note that the threshold for the metric cannot be edited once the alert is created. The threshold can only be modified by creating a new alert for the same metric.
Subscribing to Alerts
Custom Alert also includes "Subscribe" feature, which allows you to start receiving notifications for an alert they were not previously subscribed to or if they want to start tracking a new metric,
To subscribe to an alert, follow these steps:

- Navigate to the Custom Alerts section
- Find the alert you want to subscribe to
- Click on the action button (represented by three dots) next to the alert
- Select the "Subscribe" option
Once subscribed to an alert, you will receive notifications about threshold breaches for that metric, just like anyone else who is subscribed to that alert. To unsubscribe from an alert, follow the same steps and select the "Unsubscribe" option.
The subscribe option provides you with even more control over the alerts you receive, and makes sure that you only receive notifications for the metrics that are most important to you, while keeping you informed without being overwhelmed by notifications for metrics that are irrelevant.
Keep in MindYou are unable to subscribe directly to an alert template. Instead, you should make a copy of the desired template and then subscribe to the duplicated version.
Pausing an Alert
You can opt to Pause an alert(s), allowing you to stop receiving notifications for alert(s) temporarily. This can be useful when the user is aware of a temporary change in the metric, or when they do not want to be disturbed by alerts for a specific period of time.

To Pause an Alert
- Select the alerts option from the navigation bar
- Find the alert you want to Pause in the listing
- Click on the action button (represented by three dots) next to the alert.
- Then select the "Pause" option.
Once an alert has been muted, all users who are subscribed to that alert will no longer receive notifications related to threshold breaches for that metric. To unmute the alert, the user can follow the same steps and select the "Resume" option.
Use Cases
- Track changes in the number of 'add to cart' events: You can set an alert to notify you when the number of 'add to cart’ events decreases by more than 10% compared to the previous week.
- Set up a custom alert to track spikes in customer queries raised on your website/app. You can set the alert for when the event ‘query raised’ increases by 25% compared to the previous month. A high event count of customer queries raised can hint at dissatisfaction, which can be addressed quickly.
- Track changes in the purchase event to get notified each time purchases drop by 10% or more compared to the previous month. Tip: you can further drill down this alert by category and get a view of drops in purchases within each product category. Metric used - purchase made.
- Monitor newsletter subscription and get notified in case of a significant drop in number of subscribers in a week. Metric used - newsletter unsubscribed.
- Track spike in email bounce rate. Let’s face it, a high bounce rate is a cause for concern to most email marketers. By setting up an alert for an increase in email bounce rate by 5%, you can take preventive measures to ensure your email lands in users’ inbox. Metric used - email bounce.
- Set up custom alerts for when push notification failure increases by more than 10% compared to the previous day or week. Metric used - push notification failed.
- Monitor app opens and gets an alert each time there is a decrease by 15% or more compared to the previous day. Metric used - app opens.
Note: The use cases mentioned above are examples and can be customized per the user's requirements.
Copy an Alert
By copying existing alert configurations, you can quickly set up similar alerts without the need to recreate them from scratch, saving time and effort. This also facilitates customization, allowing you to edit copied alerts to specific monitoring needs or scenarios by adjusting the parameters or thresholds as necessary. You can now copy alerts by using the following steps.
- Navigate to the alert you want to copy and click on the action button adjacent to the alert.
- Click on ‘Copy’.
- You’re now presented with a ‘Create Alert’ tab, where you can customize the template according to your preferences, and save the alert.

Custom Alert is a powerful feature that helps users to stay on top of the metrics they want to track. By setting up alerts, users can stay informed about any deviation from the set thresholds and take necessary actions to improve their metrics.
We hope this has equipped you with a robust understanding of how you can analyze user interactions with web overlays. Please feel free to drop in a few lines at [email protected] in case you have any queries or feedback. We're always just an email away!
Updated 8 months ago