Notification Settings
These are global settings that enable you to:
-
Manage the visual style of all your On-site Notifications,
-
Prioritize the order of their appearance on your website.
-
Download performance reports.
Here's how you can go about it:
White Label Settings
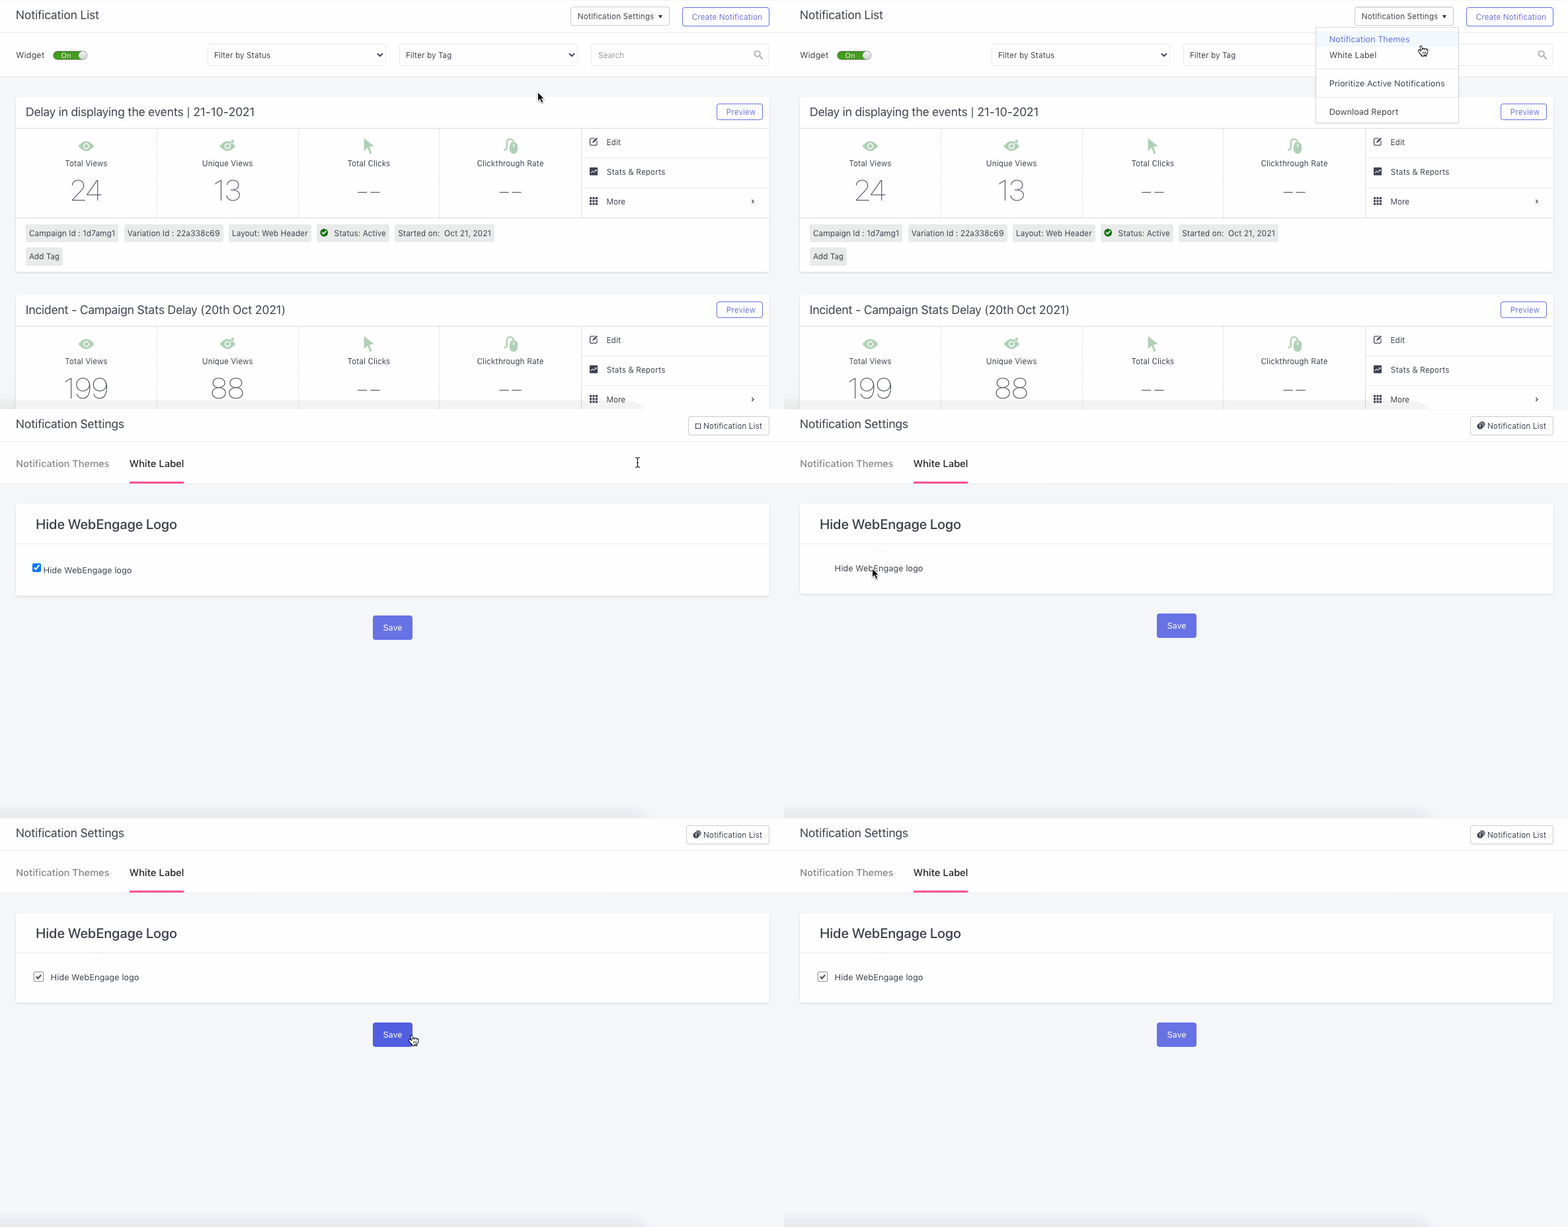
White-labeling enables you to enforce your brand identity on each On-site Notification by hiding WebEngage's logo.

Click to enlarge
As shown above:
Step 1: Click on Notification Settings placed on the top left of Notification List and select White Label.
Step 2: Click the checkbox to hide WebEngage's logo on all your notifications and click Save.
Prioritize Active Notifications
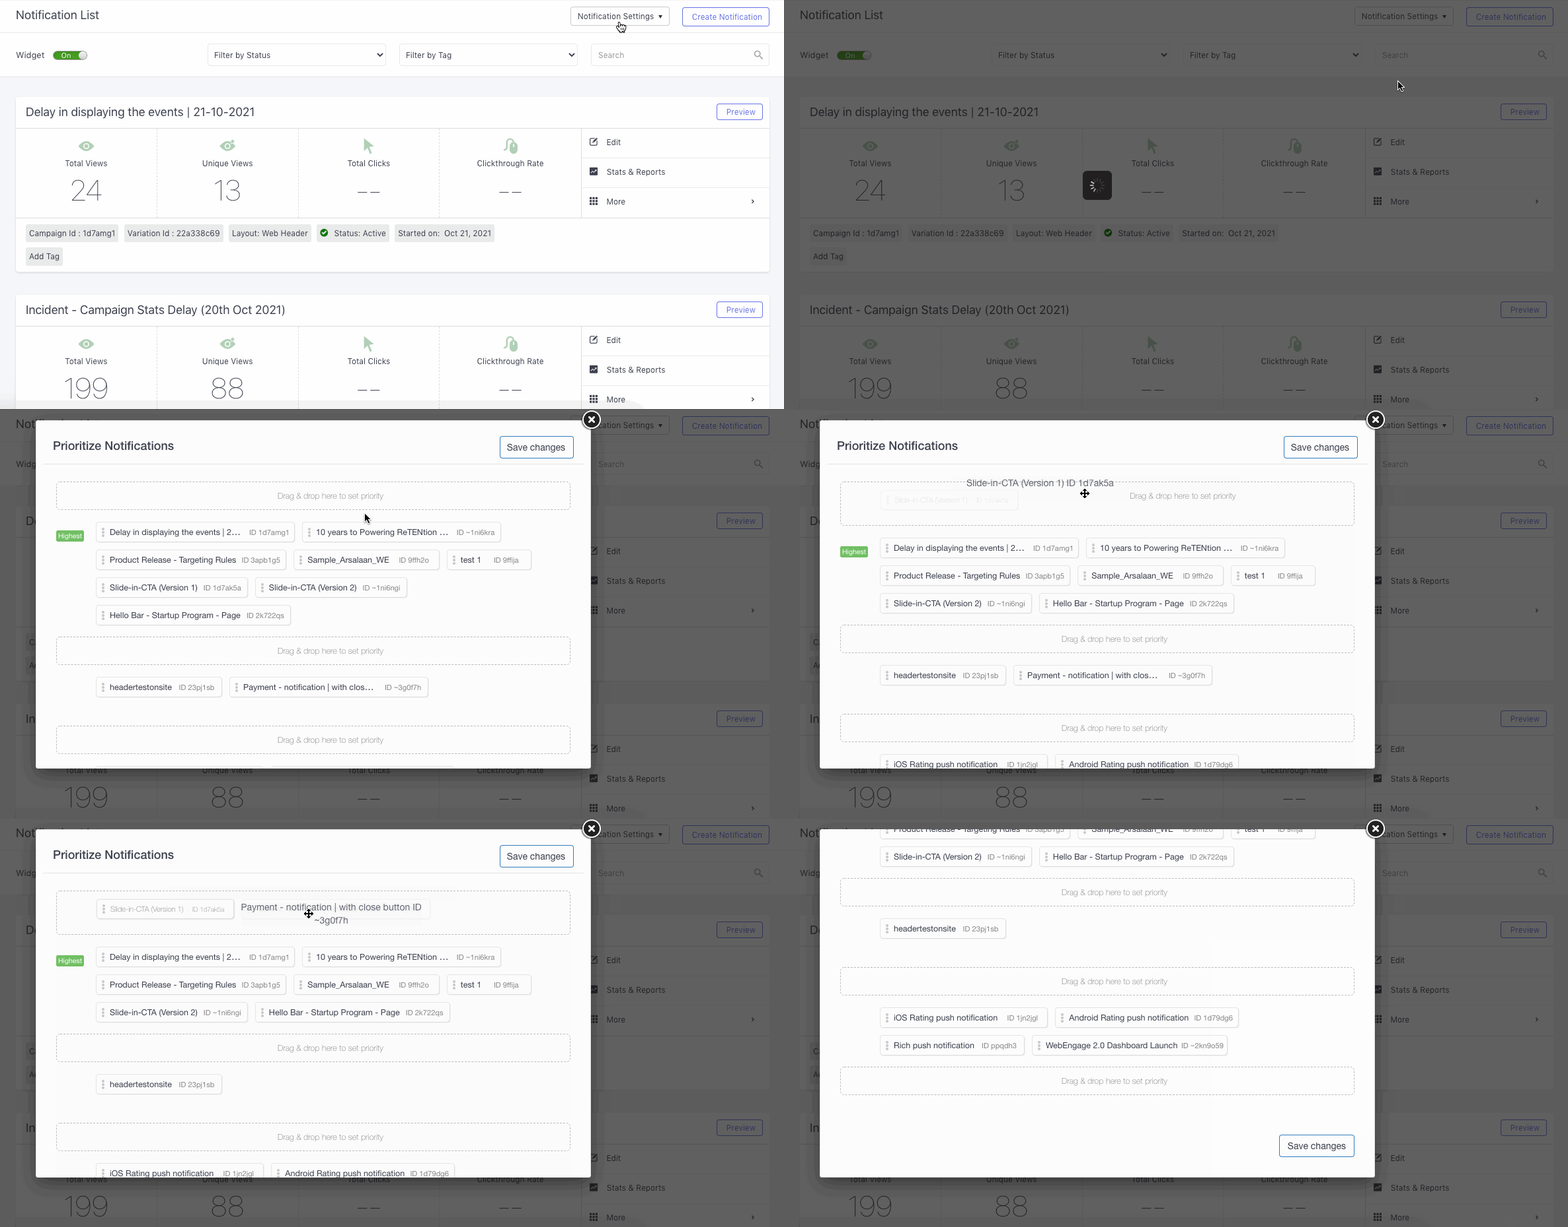
When you're running multiple On-site Notifications for a similar set of users, you can choose to prioritize the order of their appearance on your website as per their importance, relevance, or show them successively as per their context. Here's how you can go about it:

Click to enlarge
As shown above:
Step 1: Click on Notification Settings placed on the top left of Notification List and select Prioritize Active Notifications.
- In doing so, a pop-up will appear on your screen, including names of all your active campaigns.
Step 2: Drag Campaign Names to the top (highest priority), middle (medium priority), or bottom (lowest priority) to prioritize them accordingly. In cases where a user is eligible to be engaged through all the notifications:
-
Priority 1 (first notification moved to the top) will be shown first to the users.
- If multiple notifications have been moved to the top, then any one of them will be shown first (depending on their targeting rules and the user's actions).
- The remaining High Priority Notifications will be shown only once the user has finished engaging with the previous notification, ie. they click on it or close it.
-
Priority 2 (notification moved to the middle) will be shown after the user has finished interacting with Priority 1 Notification(s).
-
The same logic will be applied to the consecutive notifications.
Step 3: Click Save to implement your settings!
Download Report

Click to enlarge
Step 1: As shown above, click the Notification Settings button placed on the top right.
- Select Download Report from the menu. In doing so, you will be prompted by a pop-up.
Step 2: Specify the time frame (From Date - To Date) for which you'd like to analyze the performance of your campaigns.
Step 3: Filter out the campaigns included in the report by their Status and Tags.
- For example, in the above visual we have select All Notifications against Status.
Step 4: Click Download.
Your report will include the following stats for the selected time frame:
Date: Each row in the report indicates engagement stats for a campaign, for the date specified in this cell.
Campaign Name
View: Indicates the total number of time users viewed the notification.
Close: Indicates the total number of times users dismissed the notification after viewing it.
Click: Indicates the total number of times users clicked on a link/CTA included within the notification.
Unique Views: Indicates the number of users who viewed your notification at least once.
Please feel free to drop in a few lines at [email protected] if you have any further queries. We're always just an email away!
Updated 4 months ago