Revenue Mapping
Must ReadPlease ensure that you have a robust understanding of Events, Event Attributes, and related concepts before proceeding. This will help you understand all the terms used below.
Revenue mapping is an essential pre-requisite for tracking the revenue contributed by all your campaigns and journeys. It's a simple one-time setup that helps you draw a correlation between certain user actions (prompted by a campaign) and your business's revenue.
How to Access
Revenue Mapping can be accessed through the Data Management section of your account, as shown below.
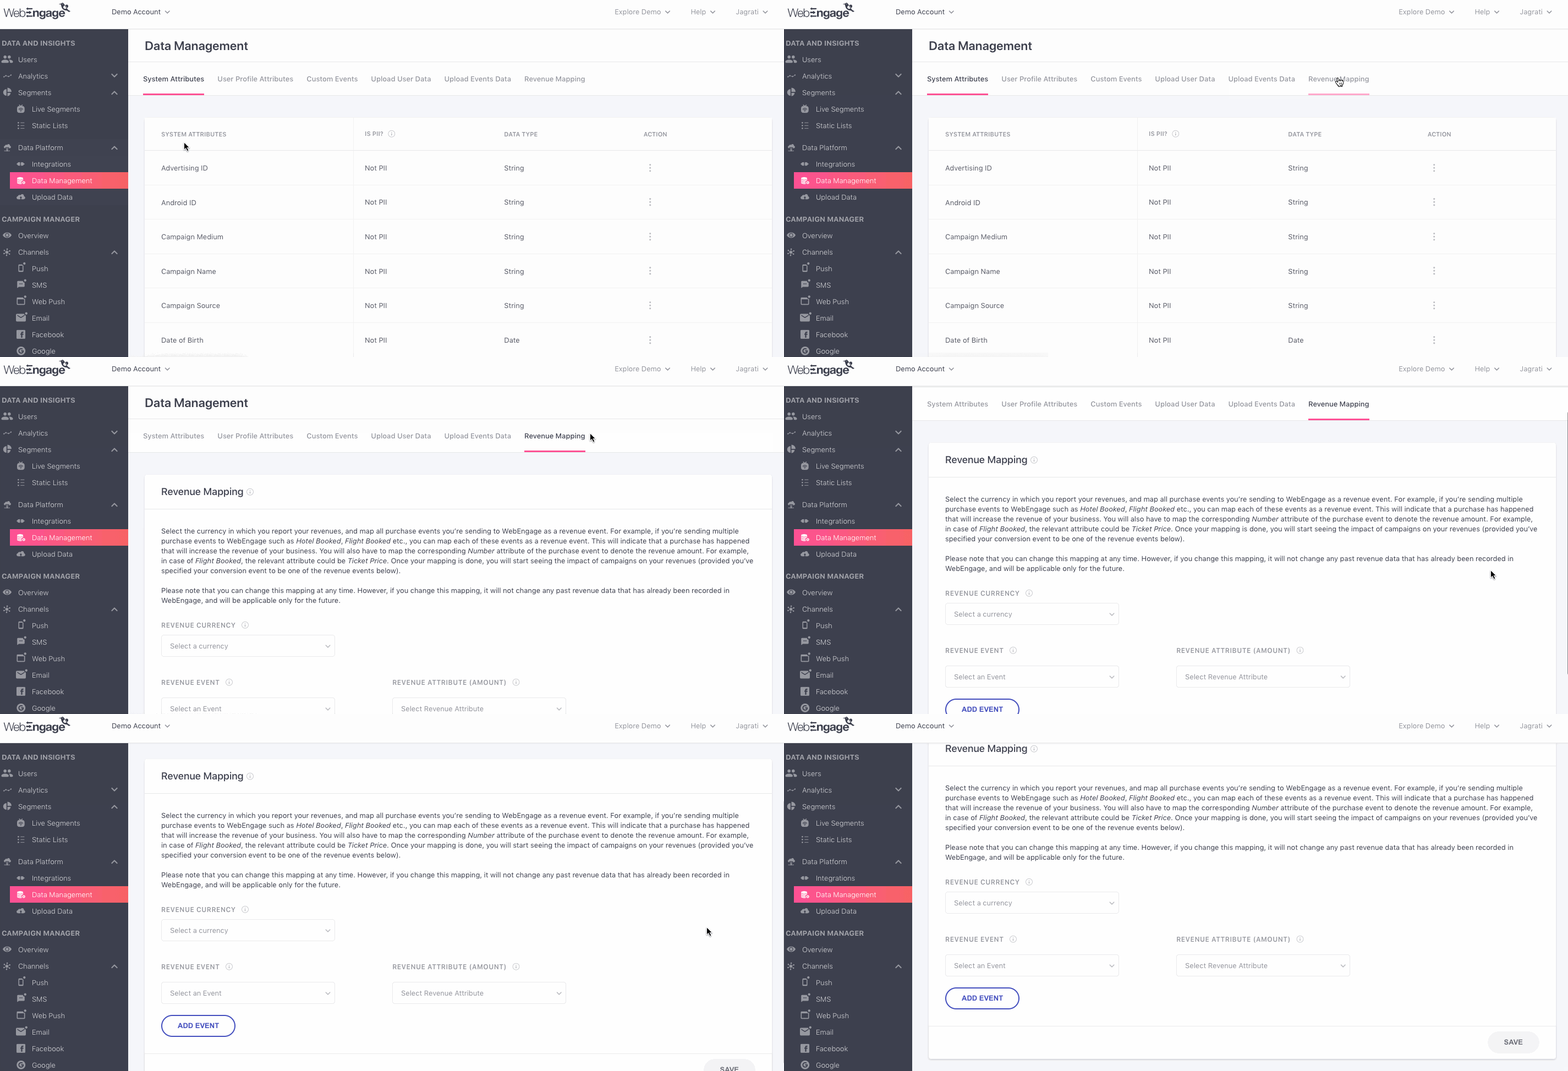
Click to enlarge
How to Map
Please NoteMapping can be configured by only those Admins that have access to Account Management. If you are unable to configure revenue mapping, then please get in touch with the account owner.
Now let’s show you how you can set it up.
Step 1: Select Currency
Using the dropdown nested under Revenue Currency, you can select the currency in which you report your revenues, as shown below.
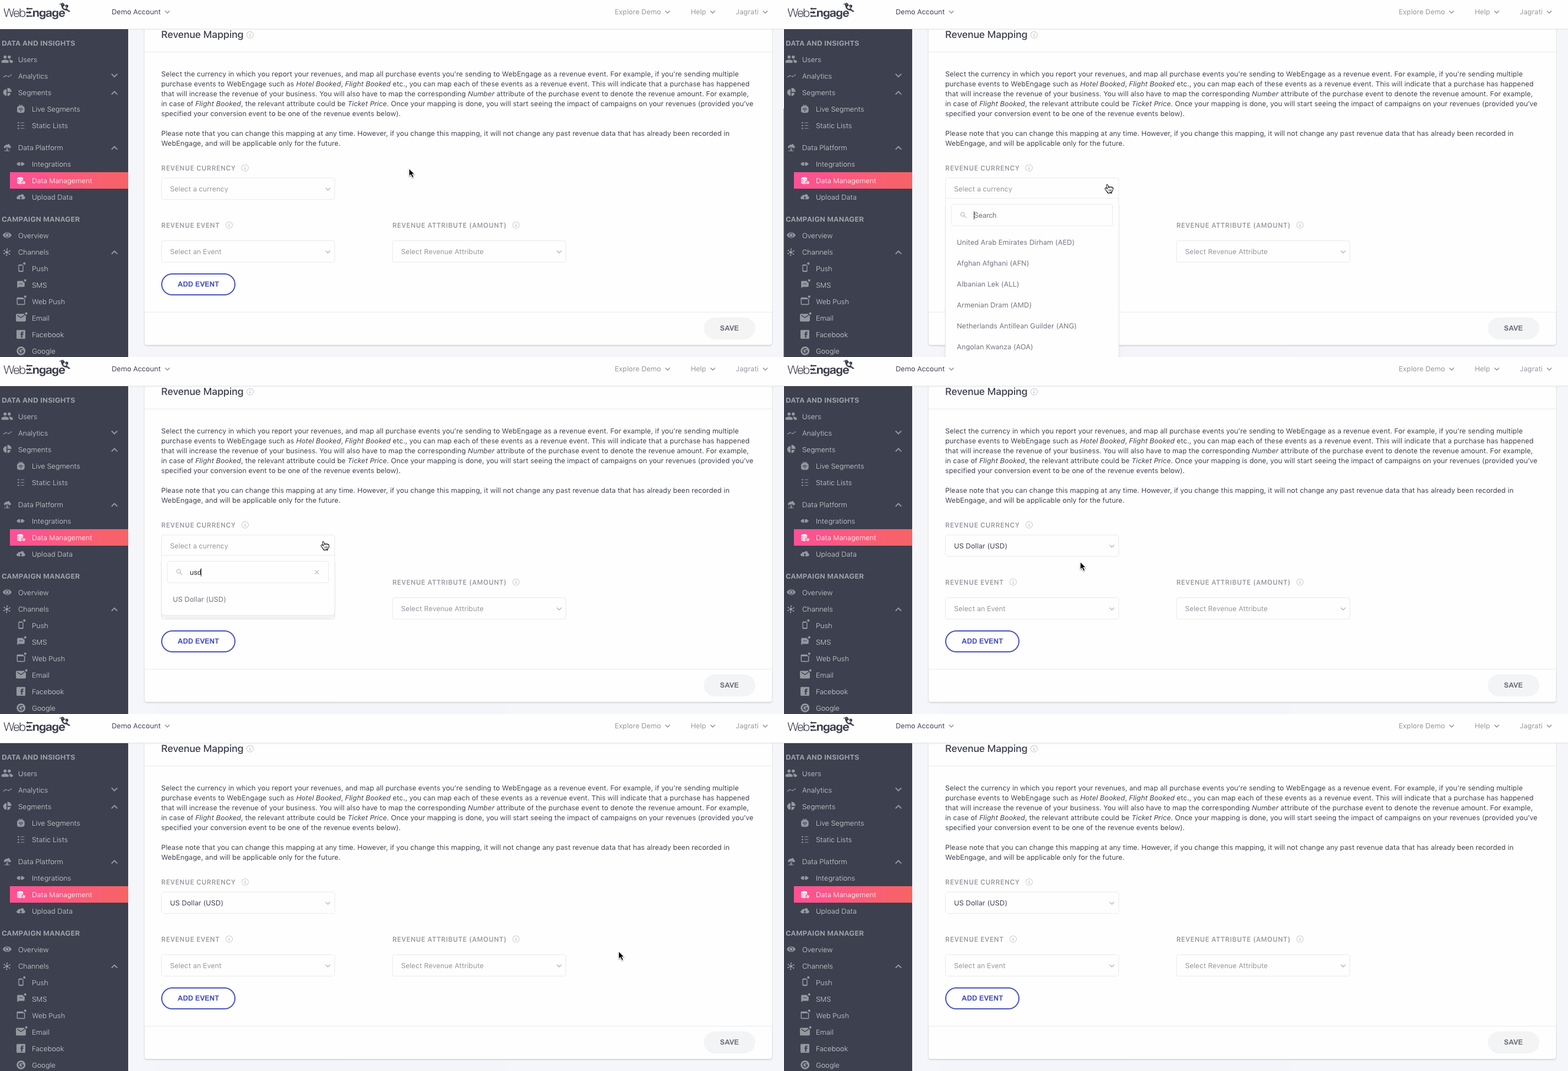
Click to enlarge
Once saved, you will start seeing revenue metrics in the selected currency across your dashboard and scheduled reports.
Please NoteRevenue is simply a sum of the monetary value of the transactions made by your users. No currency conversions are computed in cases where purchases are made in a different currency.
Step 2: Select Revenue Event
The term, Revenue Event is an alias for all the purchase events performed by your users. Depending on your business, this could be anything like, Subscription Purchased, Checkout Complete, Flight Booked, Hotel Booked, Course Enrolled, Test Purchased, Insurance Policy Purchased, Personal Loan Approved, In-app Purchase Complete and so on.
Such user actions are called custom events in your dashboard, and each one can be mapped as a Revenue Event, as shown below.
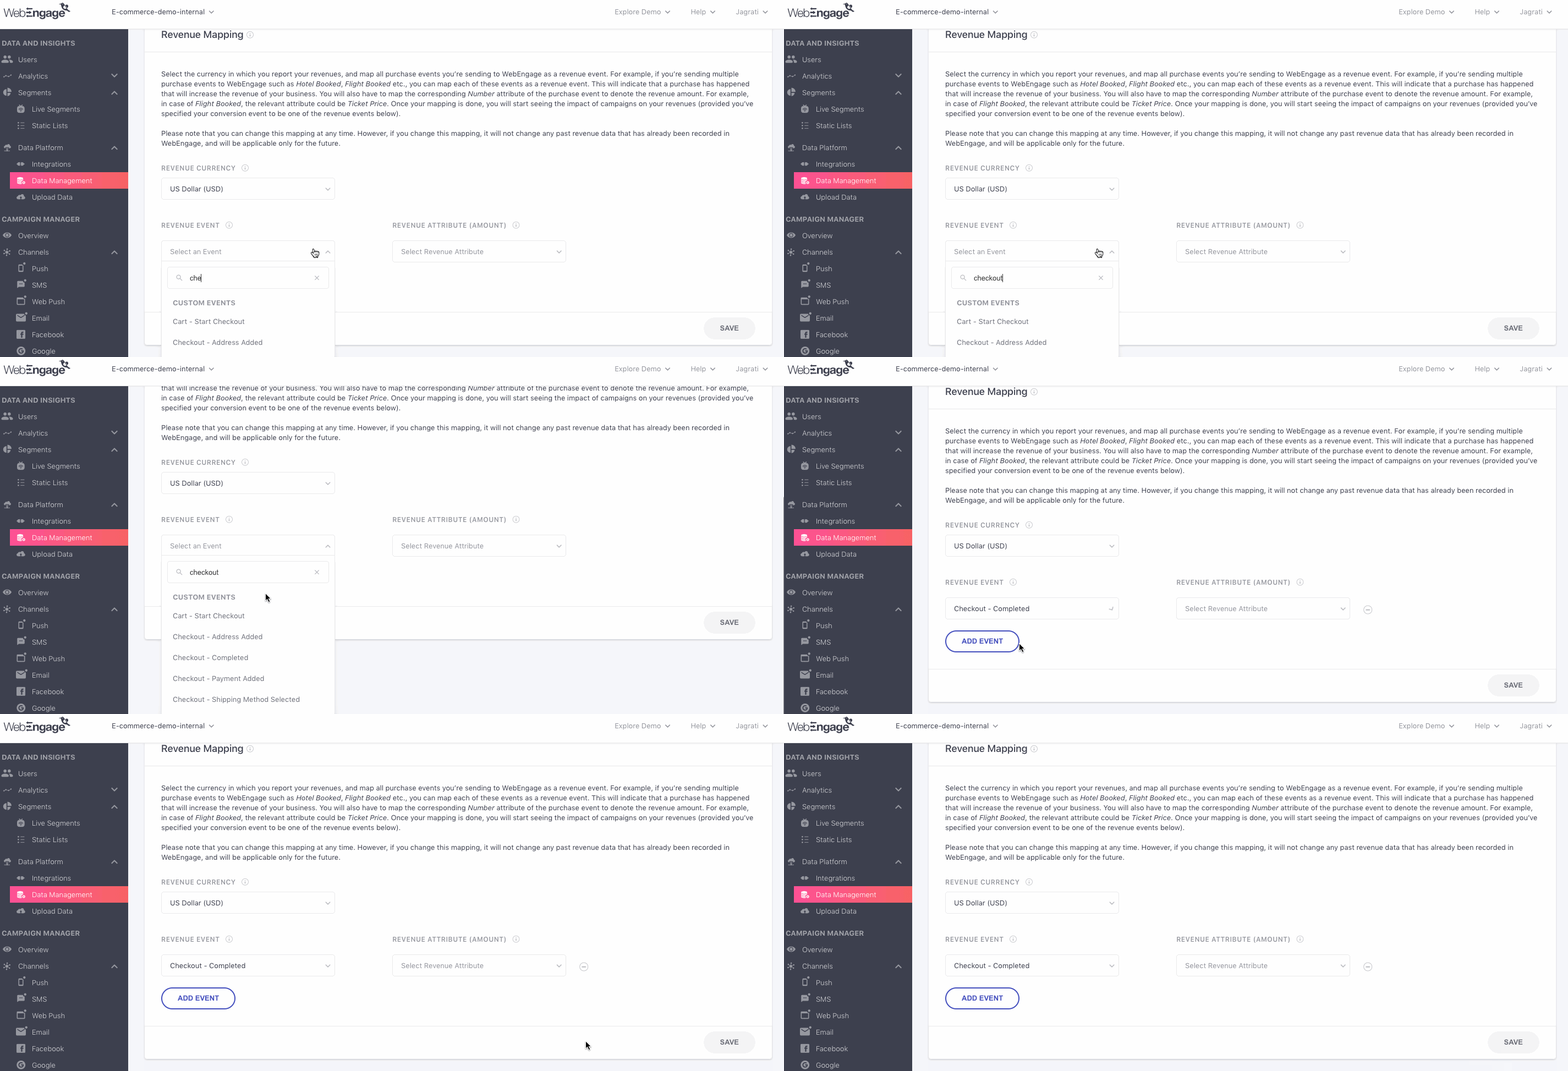
Click to enlarge
Step 3: Add Revenue Attribute
Next, you will need to add a Revenue Attribute to the selected Revenue Event. Doing so will tell us exactly what to compute when calculating the revenue for a campaign or journey.
As discussed under Events and Event Attributes - attributes are details attached to an event that conveys the complete context in which a user performed it. Thus, the term Revenue Attribute is an alias for the attribute that tracks the numerical value of the Revenue Event.
For example, with reference to the purchase events discussed under Step 1, you will need to add the following revenue attributes to each to complete the mapping:
| Revenue Event | Revenue Attribute | Industry |
|---|---|---|
| Subscription Purchased | Plan Price | Media/SaaS/OTT/Music |
| Checkout Complete | Cart Value | E-commerce |
| Flight Booked | Ticket Price | Online Travel |
| Hotel Booked | Booking Amount | Online Travel |
| Course Enrolled | Course Fee | Ed-tech |
| Test Purchased | Test Fee | Ed-tech |
| Insurance Policy Purchased | Policy Amount | Fintech |
| Personal Loan Approved | Loan Amount | Fintech |
| In-app Purchase Complete | Price | Gaming |
As shown below - using the dropdown nested under Revenue Attribute, you can select the appropriate attribute that tracks revenue for the Revenue Event.
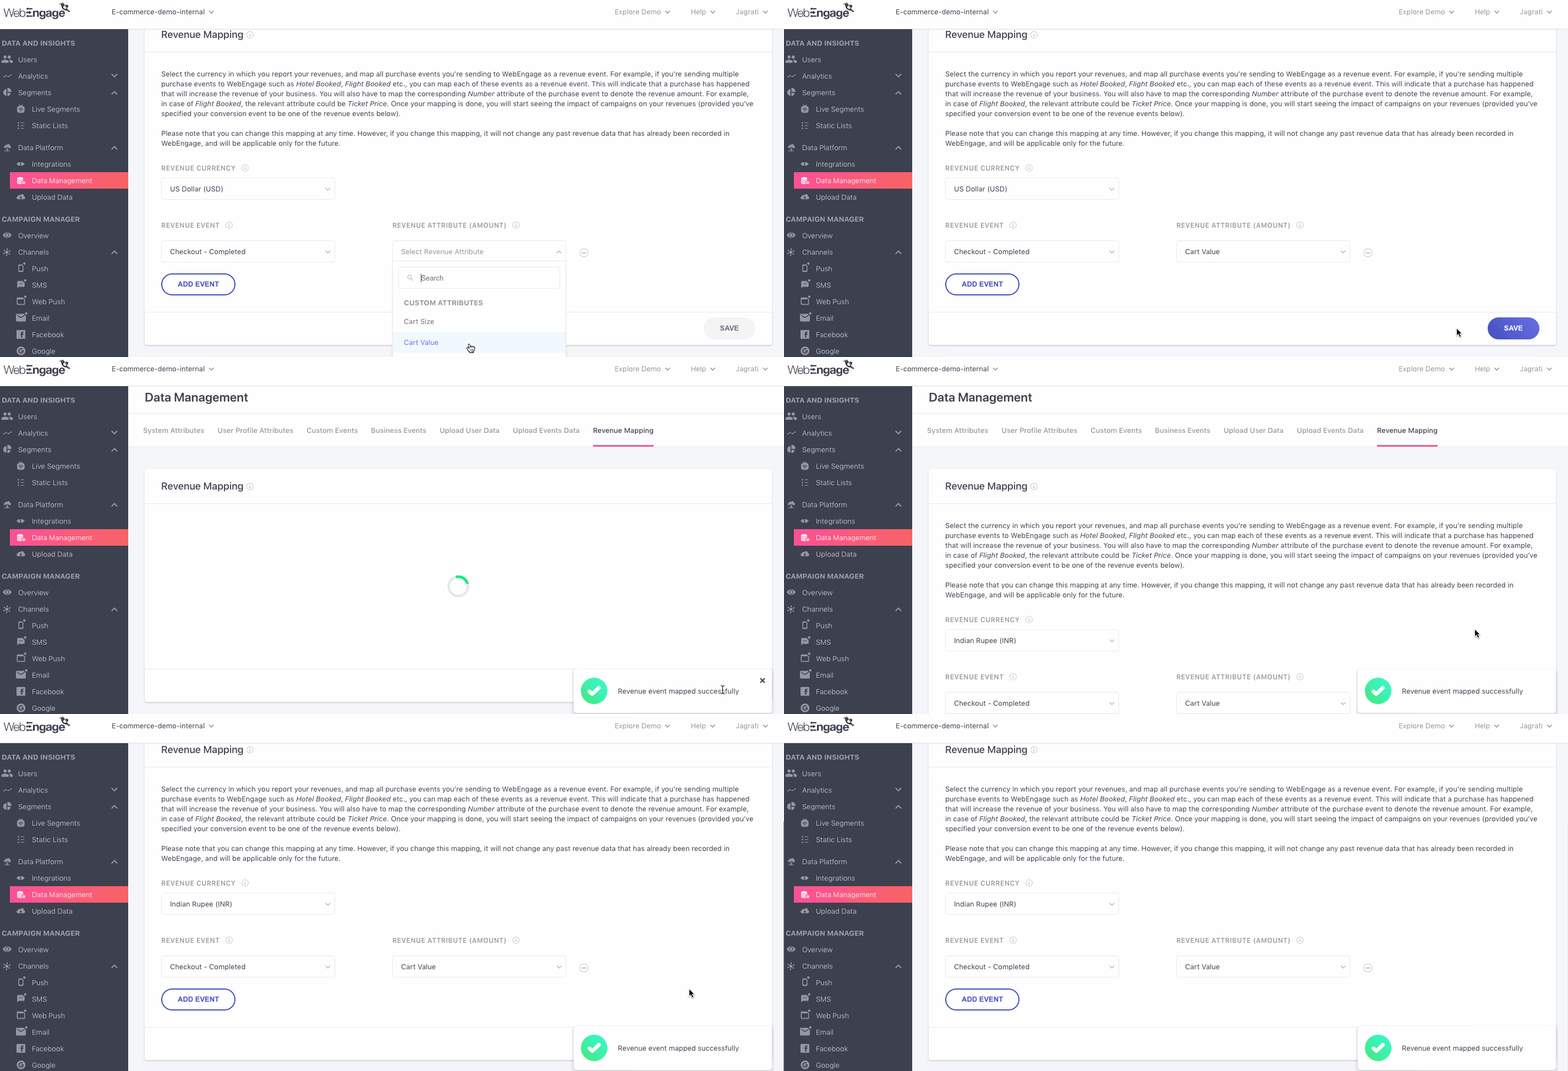
Click to enlarge
Once added, click Save to start seeing the impact of all your campaigns and journeys on your revenue! Detailed read on how Revenue Tracking works.
Mapping Multiple Revenue Events
You can map multiple purchase events by clicking the Add Event button. Doing so will add a row with two dropdowns to the screen, allowing you to define a Revenue Event and its Revenue Attribute, as shown below.
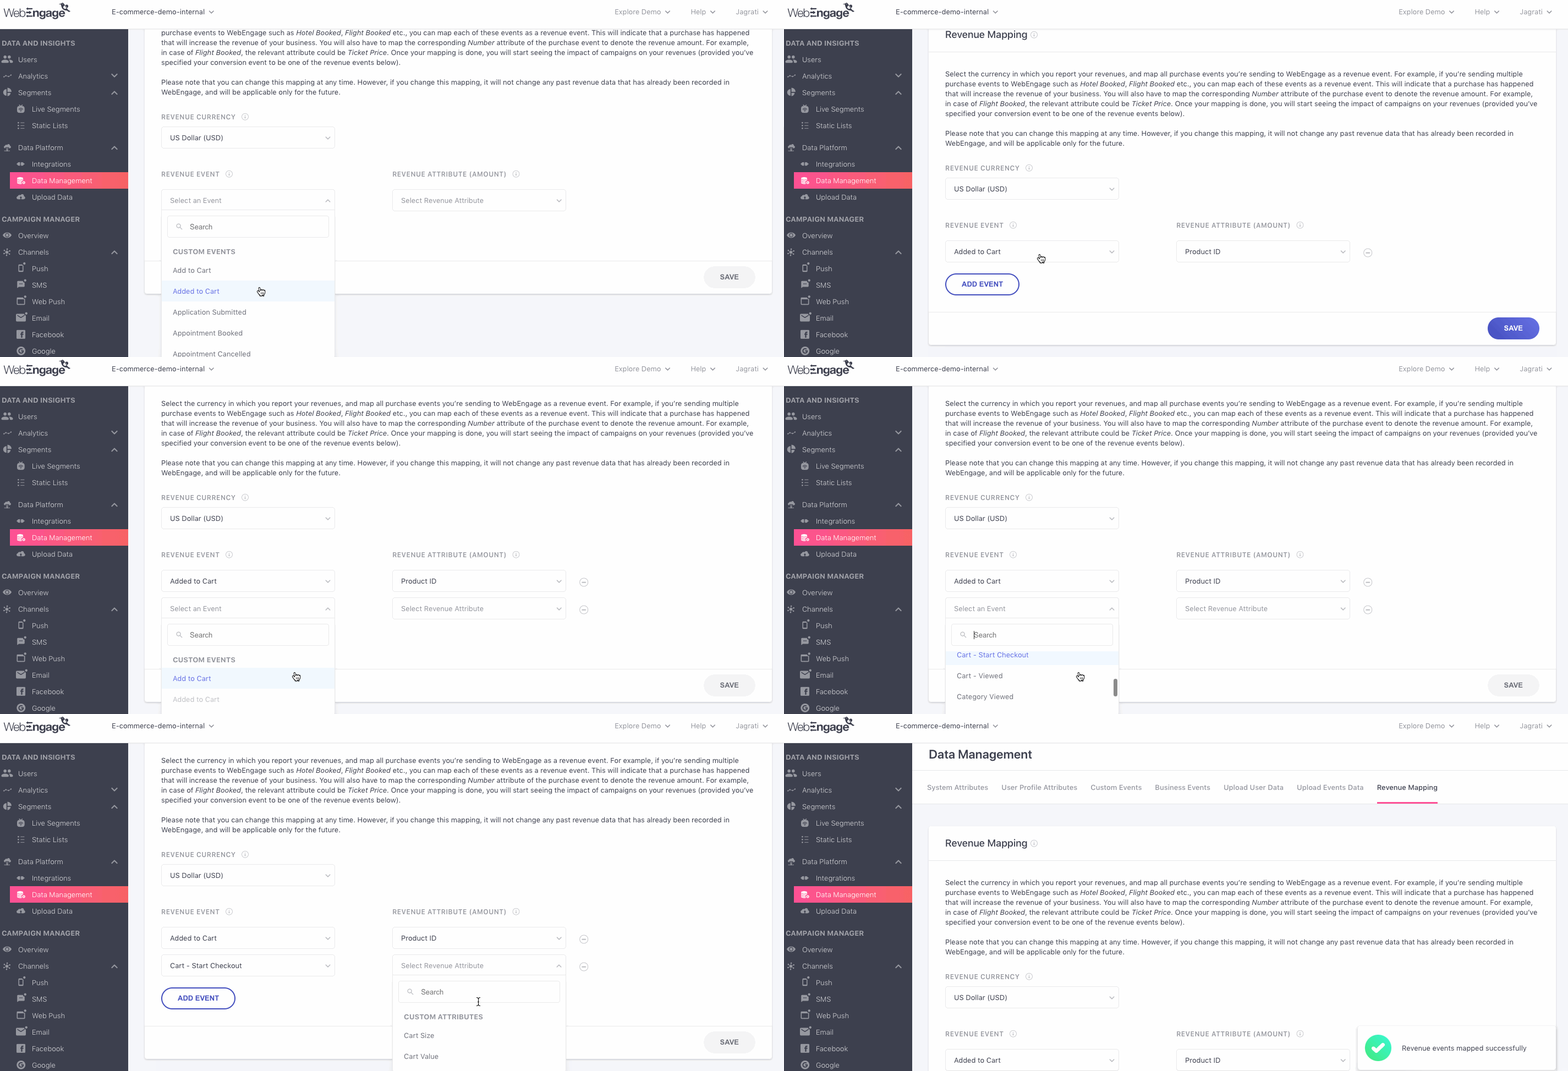
Click to enlarge
Updating Revenue Mapping
All your Revenue Mapping settings can be changed anytime you like. Modifying the currency, adding or removing revenue events will not have any impact on the existing data shown across your dashboard. These changes will be applied only to future campaigns and journeys
Removing a Revenue Event
You can always choose to delete a Revenue Event if it has become redundant. Doing so will disable revenue tracking for all future campaigns and journeys that use the event for tracking conversions. Here's how you can go about it:
Step 1: Click the 'Minus' icon placed beside the attribute dropdown, as shown below. Doing so will prompt you to re-confirm your decision.
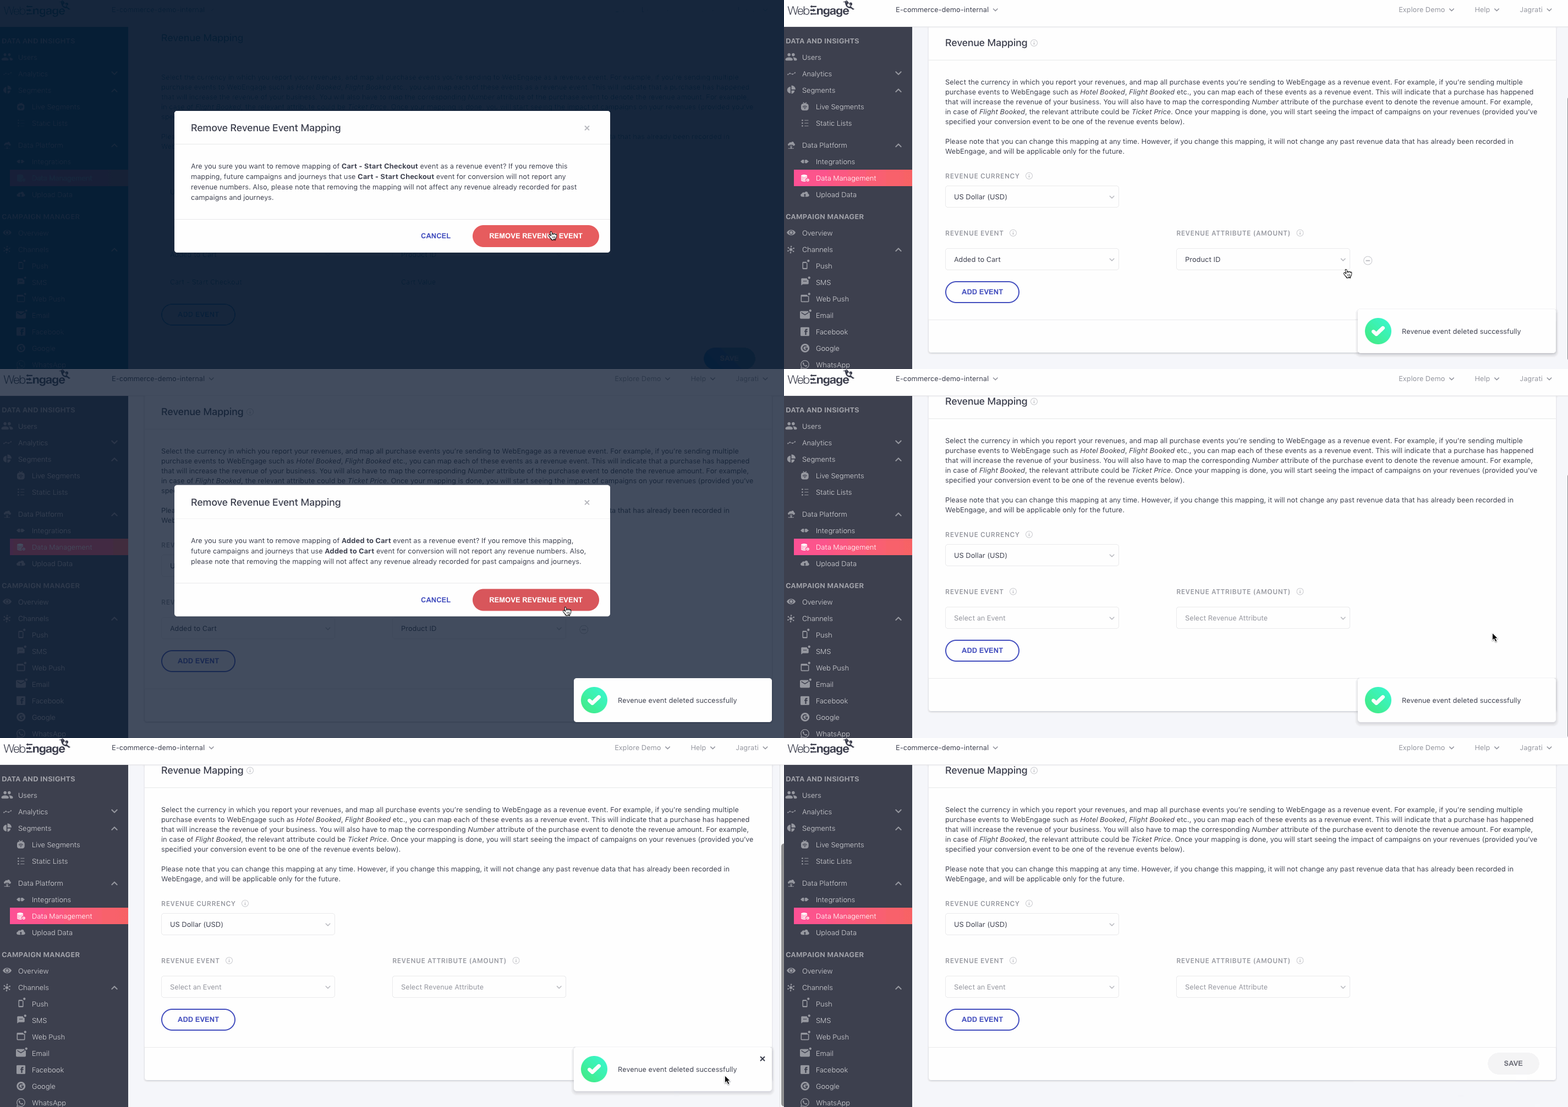
Click to enlarge
Step 2: Click the Remove Revenue Event button to delete the mapping.
- Deletion will be confirmed by a pop-up on the bottom right, as shown above.
- And don't worry, you can always re-map the custom event for tracking revenue if it becomes relevant in the future. :)
We hope this has helped you map all your revenue-critical events in your dashboard. Please feel free to drop in a few lines at [email protected] if you have any queries. We're always just an email away!
Updated 8 days ago
Let's show you how you can set up revenue tracking for all your campaigns and journeys!