Modifying On-site Notifications
Let's show you how you can Edit, Copy, Delete, De-activate/ Activate an On-site Notification and Reset Notification Stats to start collecting fresh data.
How to Edit
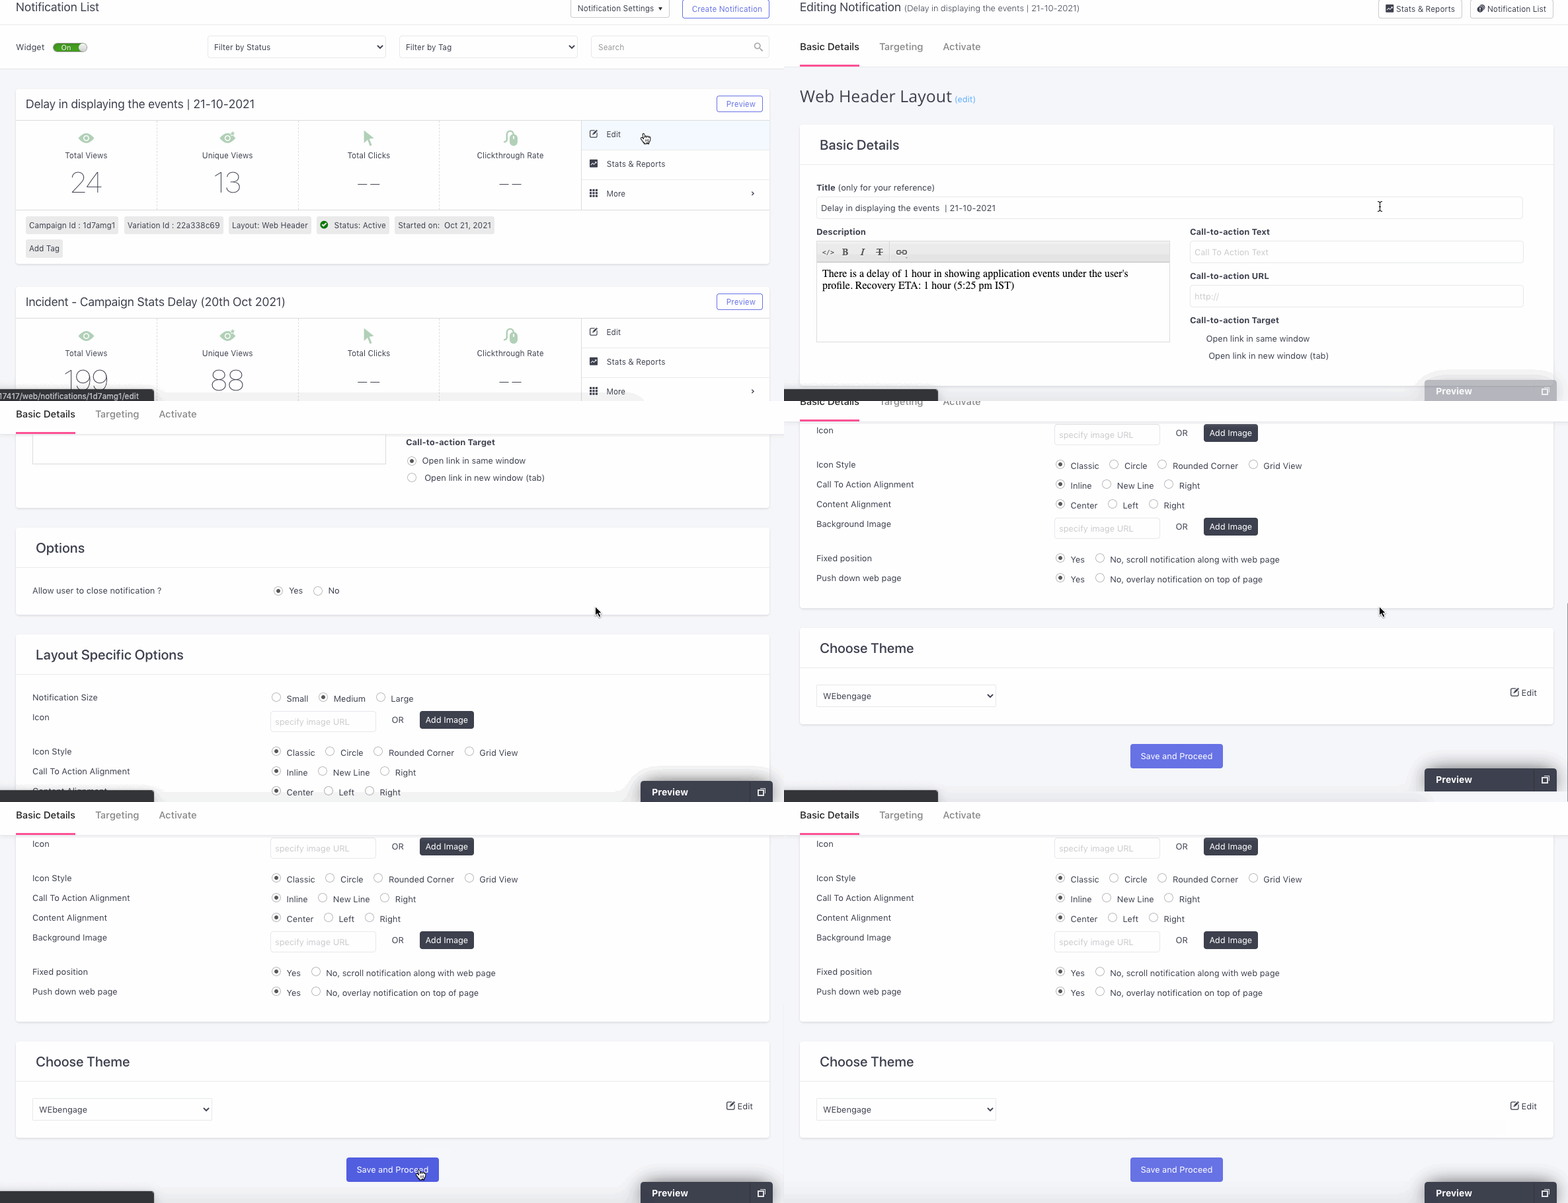
You can edit an On-site Notification anytime, irrespective of its status. Here's how you can go about it:
Click to enlarge
Step 1: As shown above, click Edit on the Campaign Card.
- In doing so you will be directed to the campaign creation interface.
Step 2: Make your changes and click Save. (Here's how you can go about it)
How to Copy
Click to enlarge
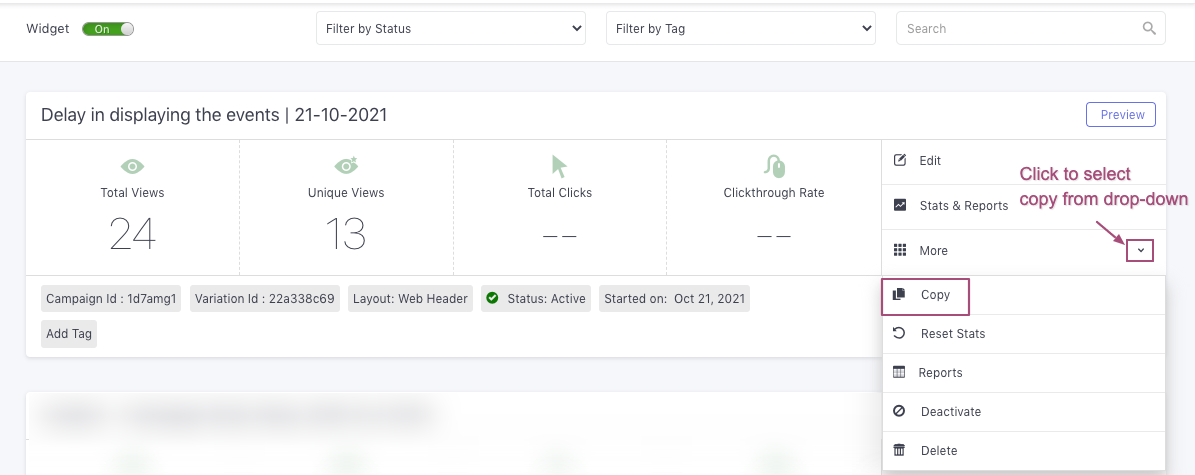
Step 1: As shown above, select More > Copy from the Campaign Card.
- In doing so, the notification's message, targeting rules, and settings will get copied to your clipboard. (Indicated by a pop-up on the top right of your dashboard)
Step 2: Click Paste on the pop-up to create a copy.
Step 3: Edit the copy as per your needs and click Save. (Here's how you can go about it)
How to Delete
Click to enlarge
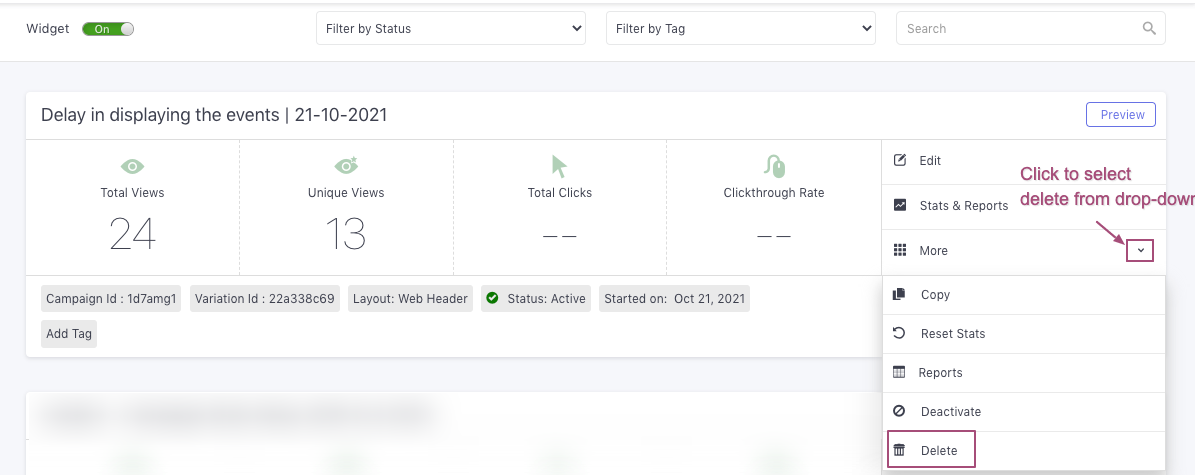
Step 1: As shown above, select More > Delete from the Campaign Card.
- In doing so, you will be prompted by a dialogue box to confirm your decision.
Step 2: Click OK to delete the campaign.
How to Deactivate/ Reactivate
Click to enlarge
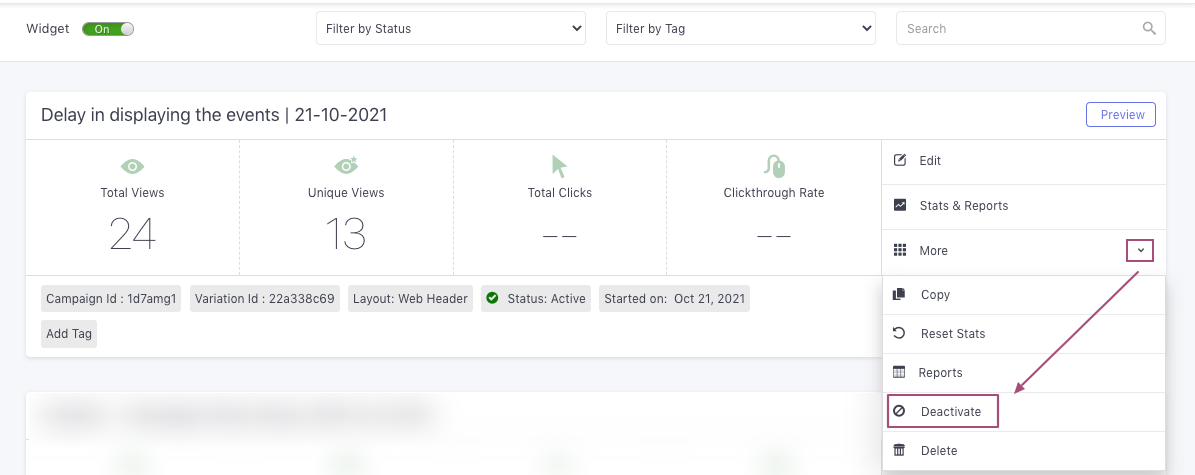
Deactivation: As shown above, select More > Deactivate from the Campaign Card. In doing so, the campaign will be stopped immediately,
Reactivation: You can always re-start the campaign by selecting More > Reactivate from the Campaign Card.
Reset Notification Stats
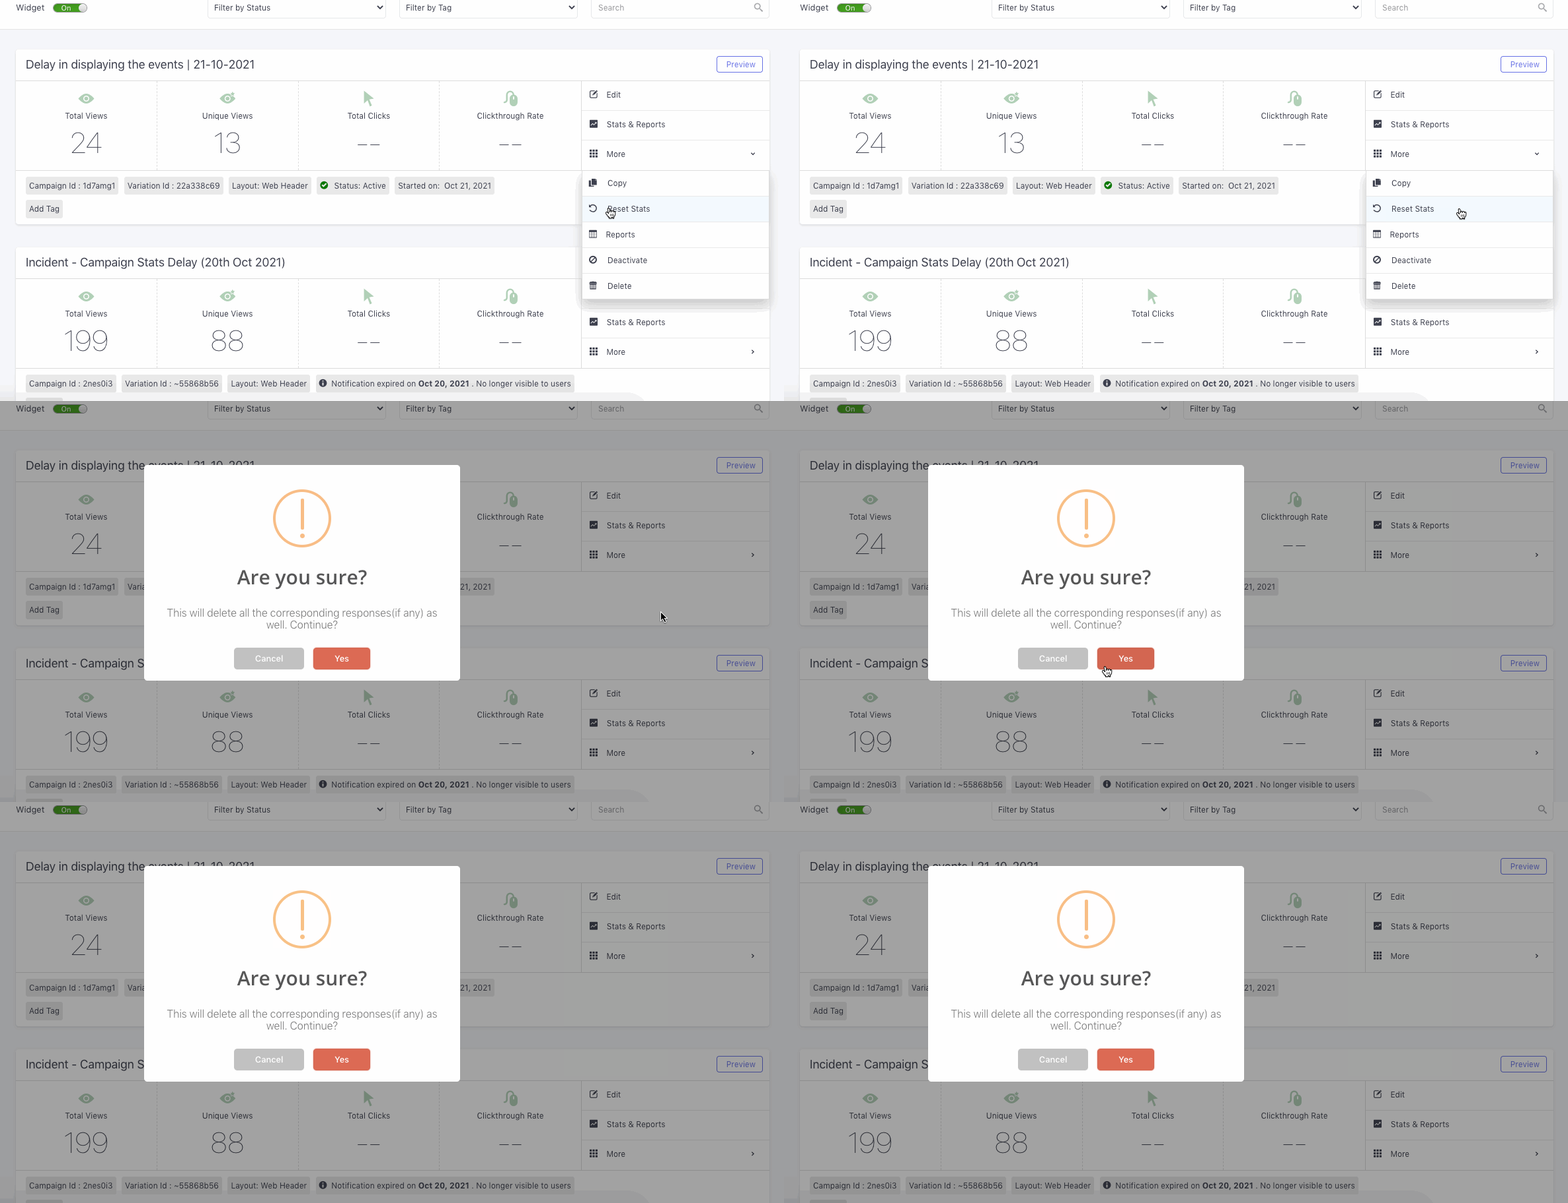
Click to enlarge
Step 1: As shown above, you can choose to reset the existing engagement stats for an On-site Notification by selecting More > Reset Stats from the Campaign Card.
- In doing so, you will be prompted to reconfirm your decision.
Step 2: Click Yes on the pop-up to proceed.
- In doing so, the following performance indicators will be reset to zero - Total Views, Unique Views, Total Clicks, Clickthrough Rate, and Conversions.
Please feel free to drop in a few lines at [email protected] if you have any further queries. We're always just an email away!
Updated 3 months ago