Custom Domain
How to send custom domain links in your SMS, WhatsApp, RCS & Viber messages
How to send custom domain links in your messages?
All links added to SMS, WhatsApp, RCS, and Viber campaigns are automatically shortened to the WebEngage domain - weurl.co, allowing us to track users who click on it. Such interactions are tracked as the following Performance Indicators in your dashboard.
However, you can have these links shortened to a custom domain name of your choice. Here's how you can go about it.
1 Create a Custom Domain
Create a custom domain exclusively for WebEngage to use in link shortening. Please avoid using your existing business domain(s) as it may impact its credibility, SEO prowess, and domain authority.
For ExampleIf your website's domain name is simplepay.com , then your custom domain can be:
smpl.co
msg.smpl.coand so on.
Custom domains are an excellent opportunity to reinforce your brand awareness, so choose a memorable name. You can go for an acronym that resonates with your existing domain name or value proposition.
The next step depends on whether you want your custom domain to work with https.
- Custom Domain with HTTP
- Custom Domain with HTTPS
2.1 Custom Domain with HTTP
If you don't want your custom domain with https support then please follow the below steps:
- Add a CNAME entry for the custom domain and point it to weurl.co with a TTL (time to live) of 30 minutes in your DNS (Domain Name System) zone file.
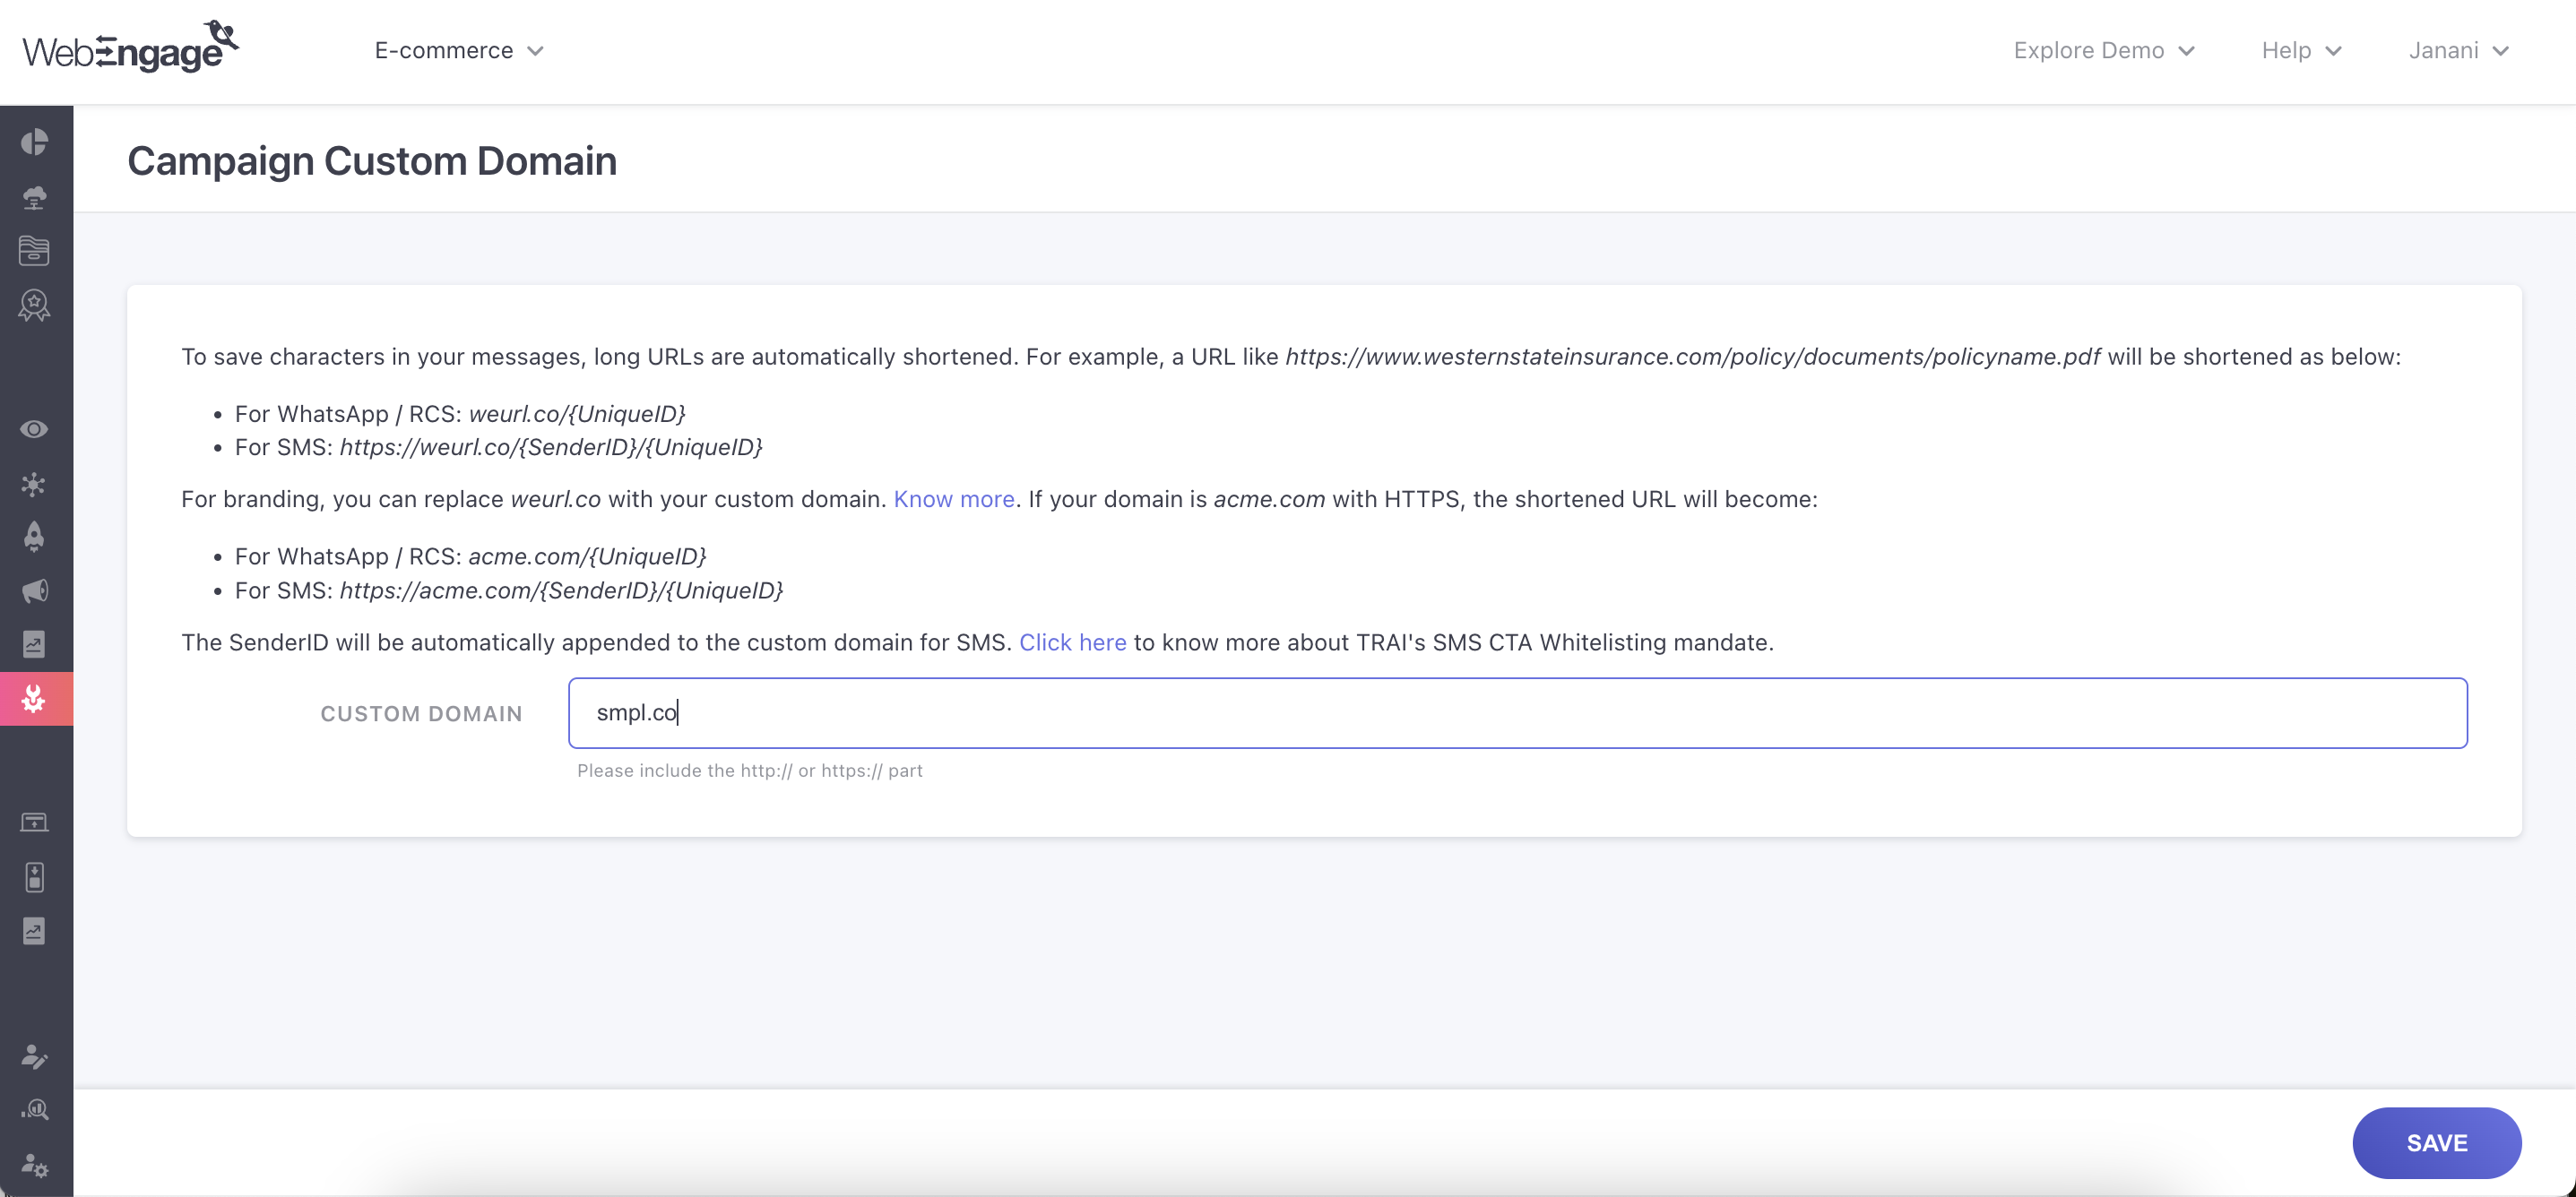
- Add your custom domain to the WebEngage dashboard: Go to Campaign Manager → Configurations → Custom Domain, add the domain, and click save.
2.2 Custom Domain with HTTPS
If you want to configure your custom domain to work with https then please create distribution from your domain provider. For example the process of AWS Cloudfront distribution is given below.
Login to your AWS console and head to Cloudfront and click Create Distribution
2.2.1 Origin Setup
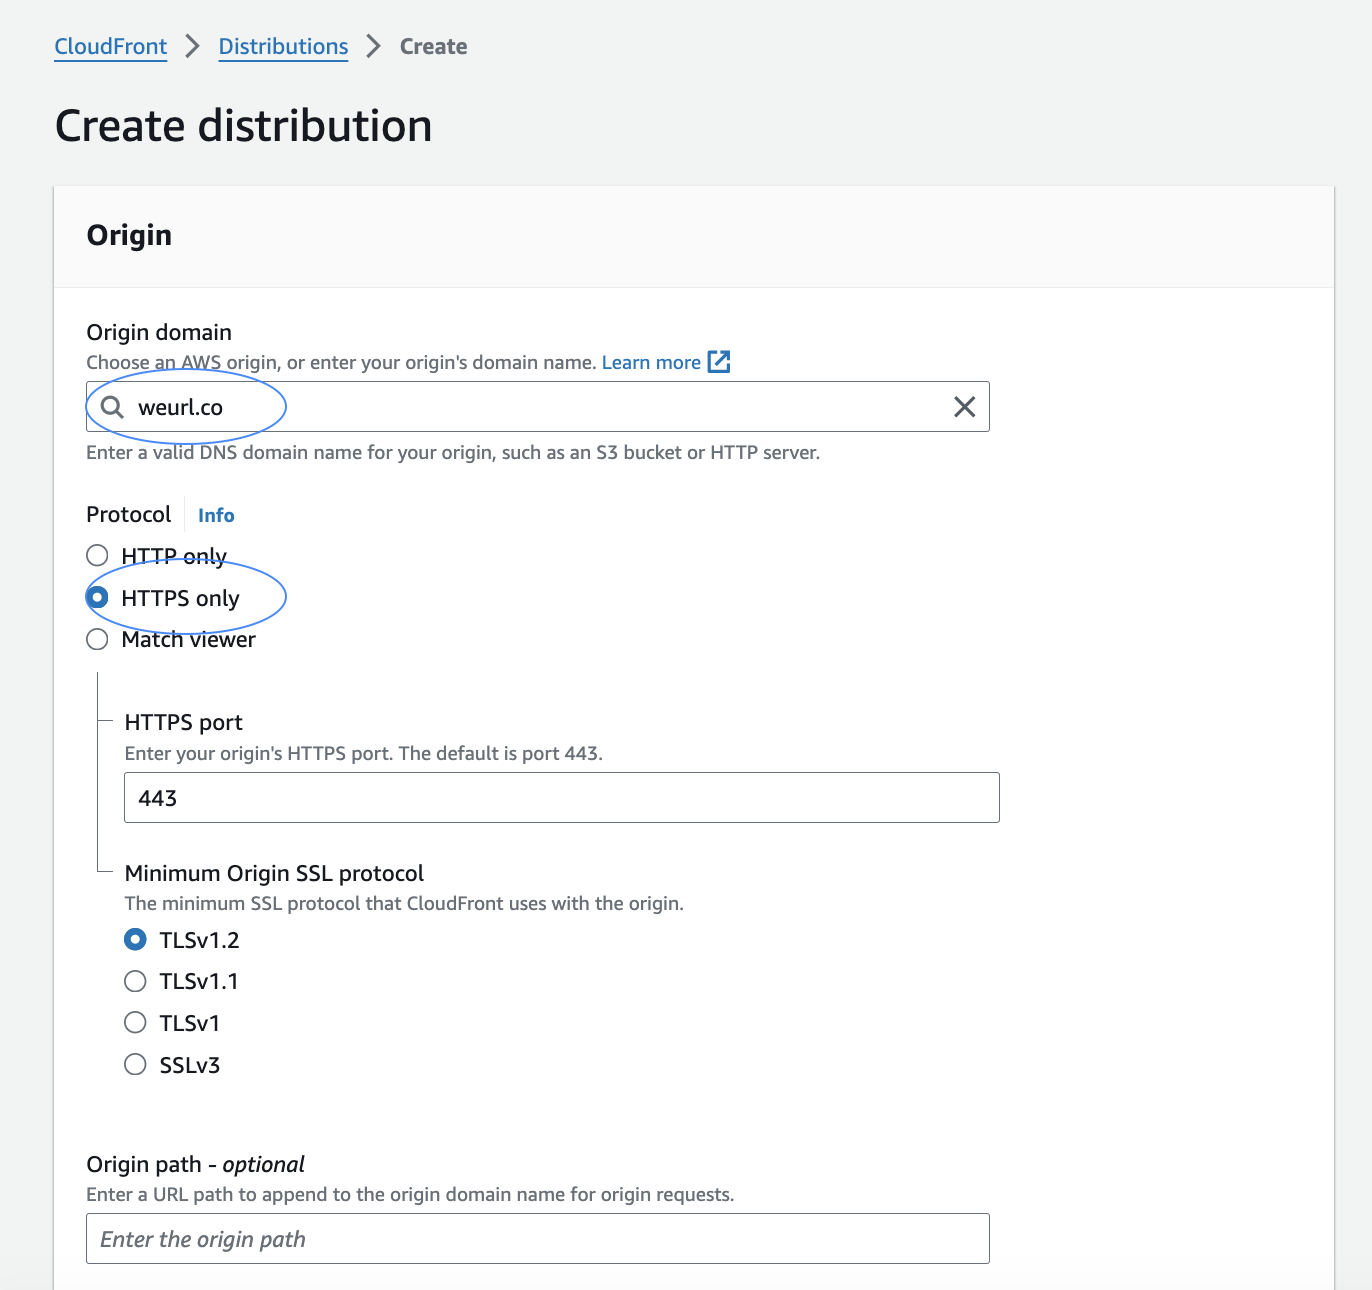
Set Origin domain as weurl.co and choose protocol as HTTPS only
2.2.2 Viewer Policy
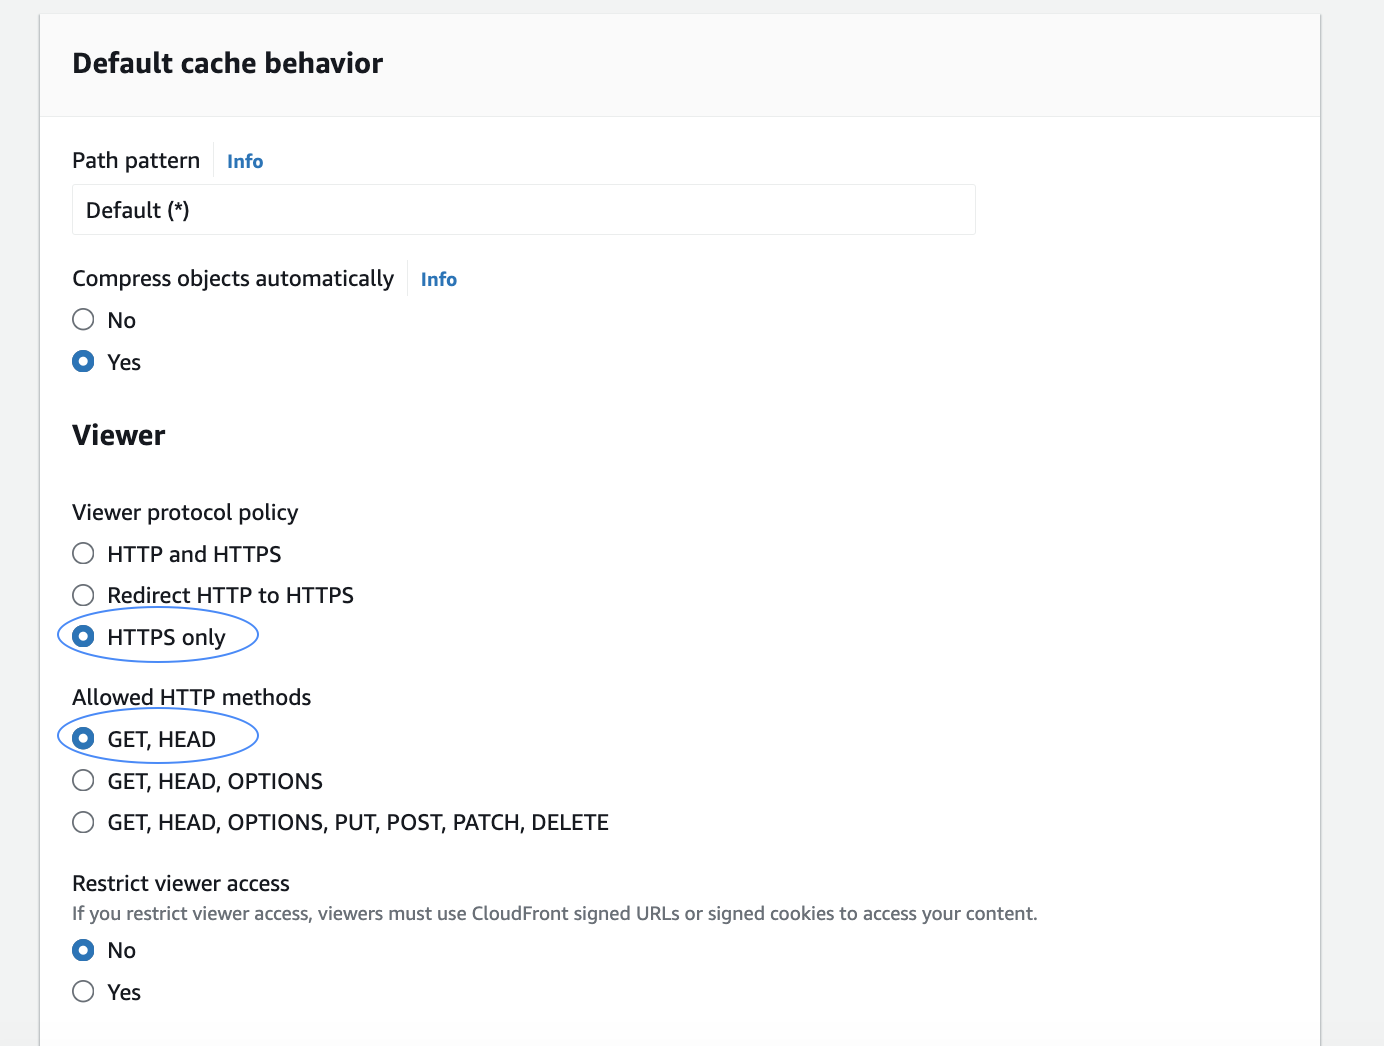
- Select
HTTPS onlyin the Viewer protocol policy - Select
GET,HEADin the Allowed HTTP methods
2.2.3 Cache policy and Origin request policy
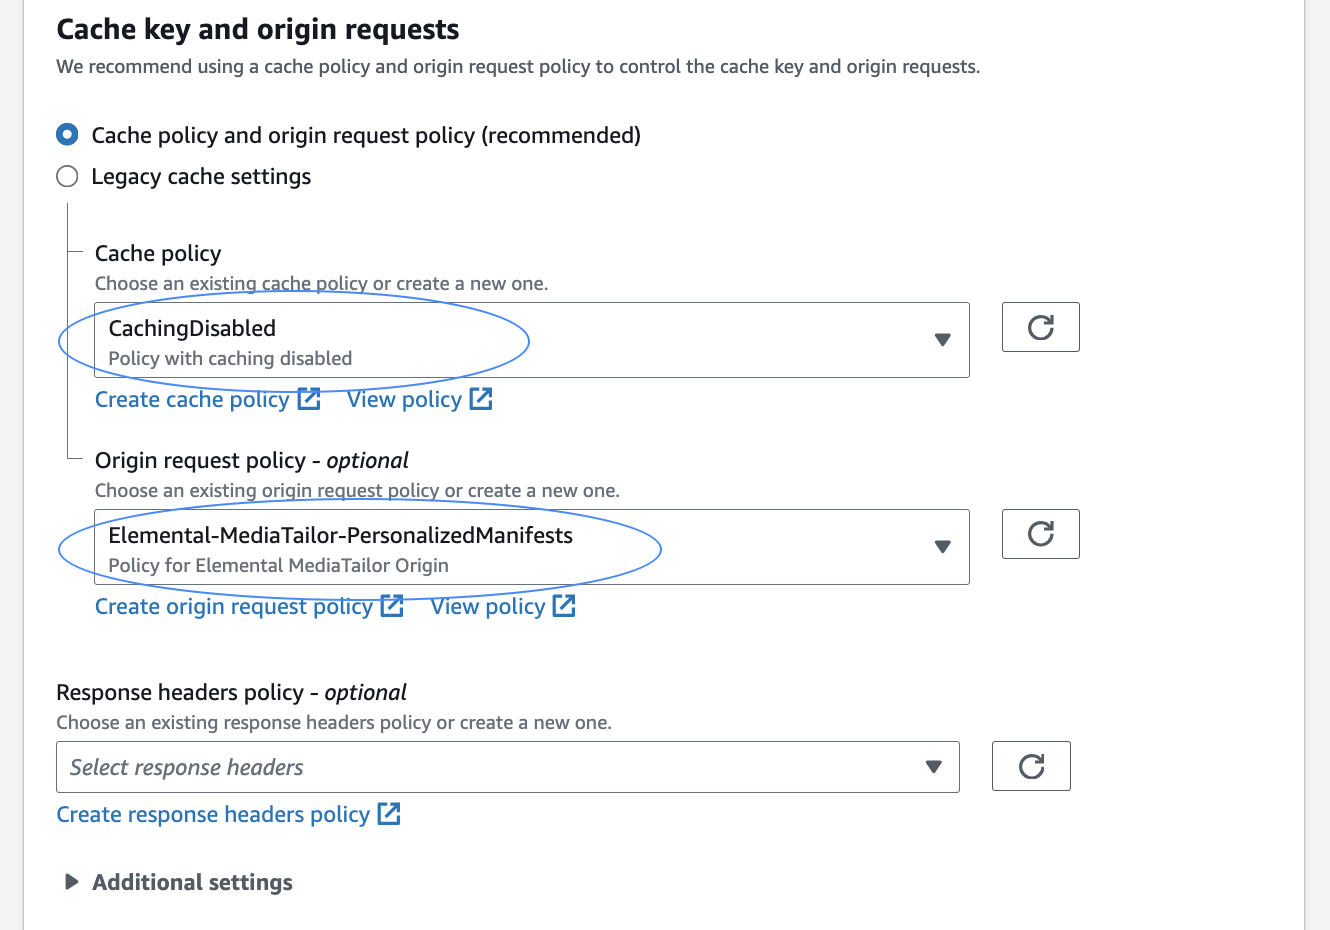
- Use
CachingDisabledpolicy in the Cache Policy section. - Use
Elemental-MediaTailor-PersonalizedManifestspolicy in the Origin request policy section.
However, if you cannot select this managed policy, please create a new custom origin request policy and use it. In this custom policy please pass selectAllQuery Strings ,AllCookies and select the following custom headers to be passed to the origin:X-Forwarded-For,Referer,User-AgentandIP
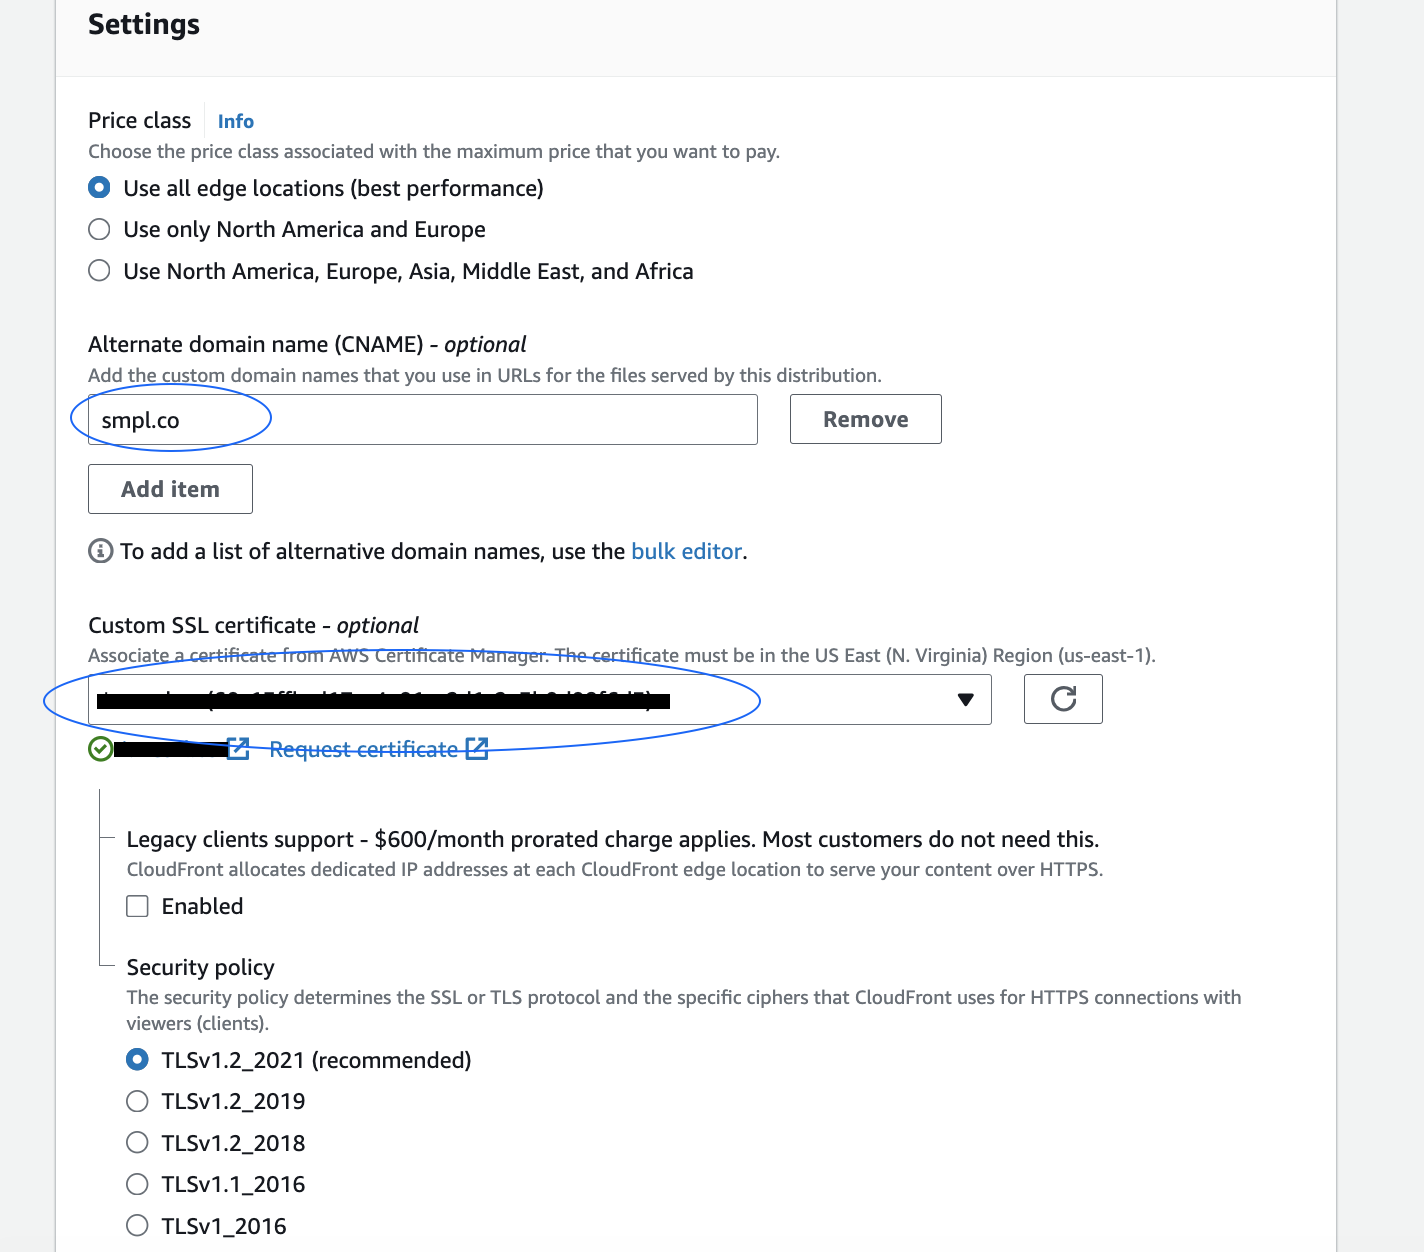
2.2.4 SSL Certificate and alternate domain name
- Add your custom domain in the Alternate domain name (CNAME) section.
- Select the appropriate SSL certificate for your custom domain in the Custom SSL certificate section.
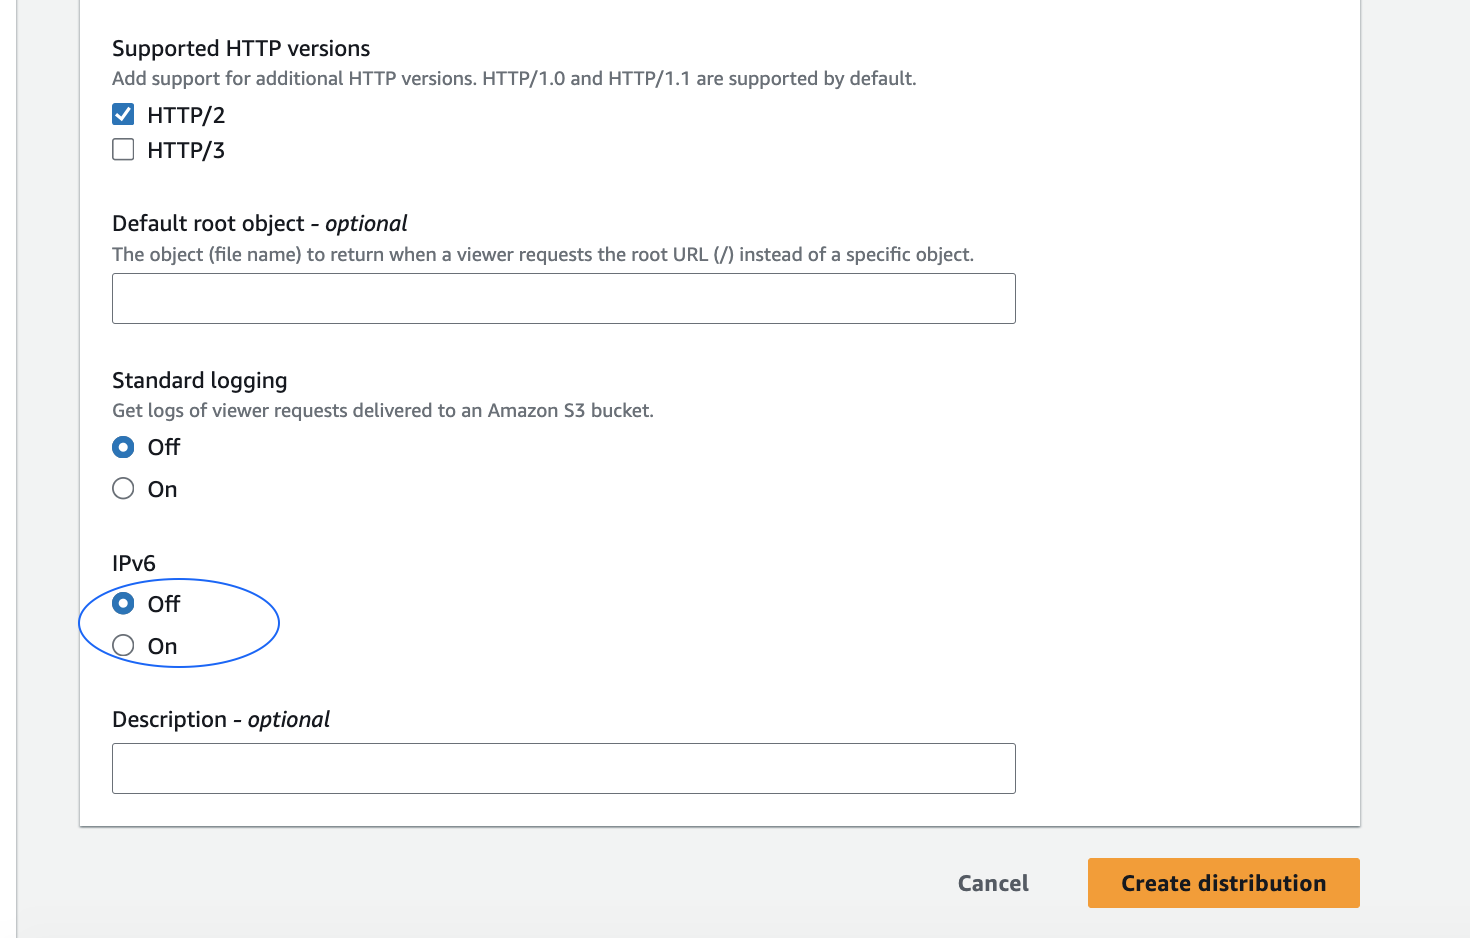
2.2.5 Disable IPv6
By default IPv6 is enabled while creating a new distribution. Disable it and Hit the Create distribution button.
2.2.6 Set your custom domain CNAME entry
Once the distribution is in the Deployed state, go to the general tab, and copy the Distribution domain name of your distribution.

Next, Add a CNAME entry for your custom domain and point it to the copied value of the newly created Distribution domain name with a TTL (Time To Live) of 30 minutes in your DNS (Domain Name System) zone file.
For example, smpl.co CNAME e50xxxxxx555.cloudfront.net
2.2.7 Configure your custom domain in the WebEngage dashboard
Prefix your domain with https:// and add it to the WebEngage dashboard: Go to Campaign Manager → Configurations → Custom Domain, add the domain, and click save.
For e.g: if your custom domain is smpl.co then you should add https://smpl.co in the WebEngage dashboard as shown below.
Updated 3 months ago