List of Scheduled Reports
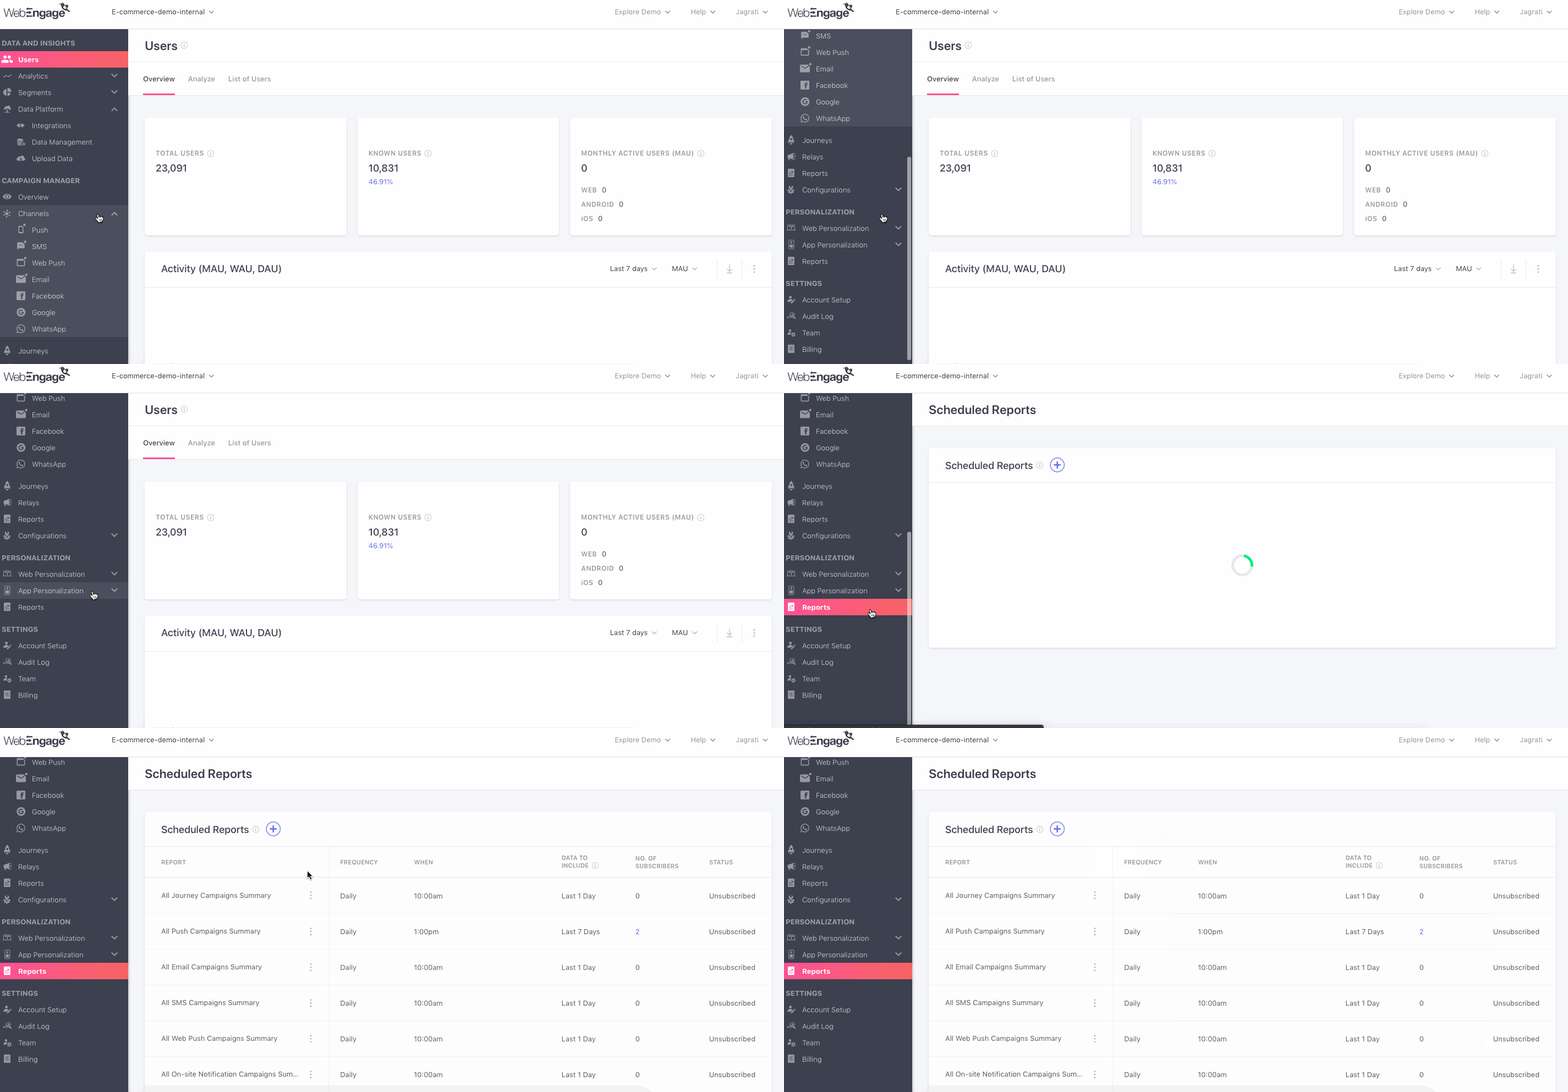
List of Reports is the first interface you'll experience on accessing Reports nested under Campaign Manager in your dashboard. It's a central repository of all the performance reports scheduled by you and your team and enables you to:
-
Schedule new reports for campaigns sent through a channel and all channels combined (Push, In-app, SMS, On-site Notification, Web Push, Email, WhatsApp).
-
Subscribe/ Unsubscribe to a report, as per your convenience.
Click to enlarge
Understanding Report Details
Let's quickly walk you through the details shown against each report in this section:
Click to enlarge
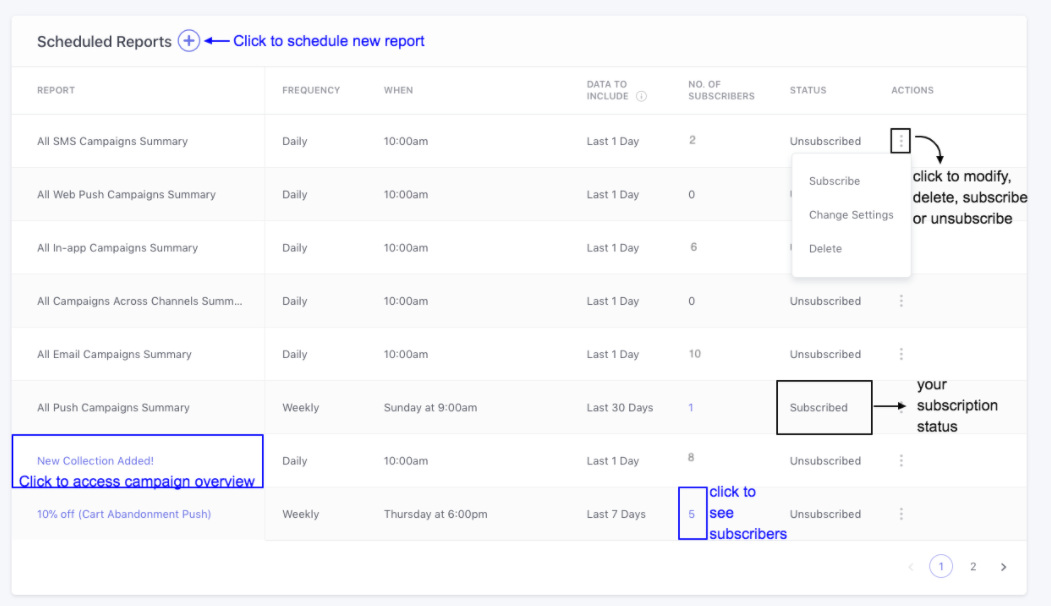
Report: This column lists all the campaign performance reports that have been scheduled for your account, along with a summary of each report's settings including, Frequency, When & Data to Include.
No. of Subscribers: Indicates the number of account users that are currently subscribed to a report.
- Only for campaign reports: As highlighted above, you can click on the hyperlinked number to preview a list of subscribers.
Status: Indicates your subscription status for a report (Subscribed/ Unsubscribed).
- Actions: The overflow menu nested under this column allows you to Modify, Delete, Subscribe to / Unsubscribe to the corresponding report.
Subscribing/ Unsubscribing to a Report
As shown above:
-
Select Subscribe from the Actions menu to start receiving the performance report on your registered email address.
-
Select Unsubscribe to suspend schedule report delivery to your email address.
Related ReadUnderstanding Stats Included in Your Channel & Campaign Performance Reports
Scheduling New Report
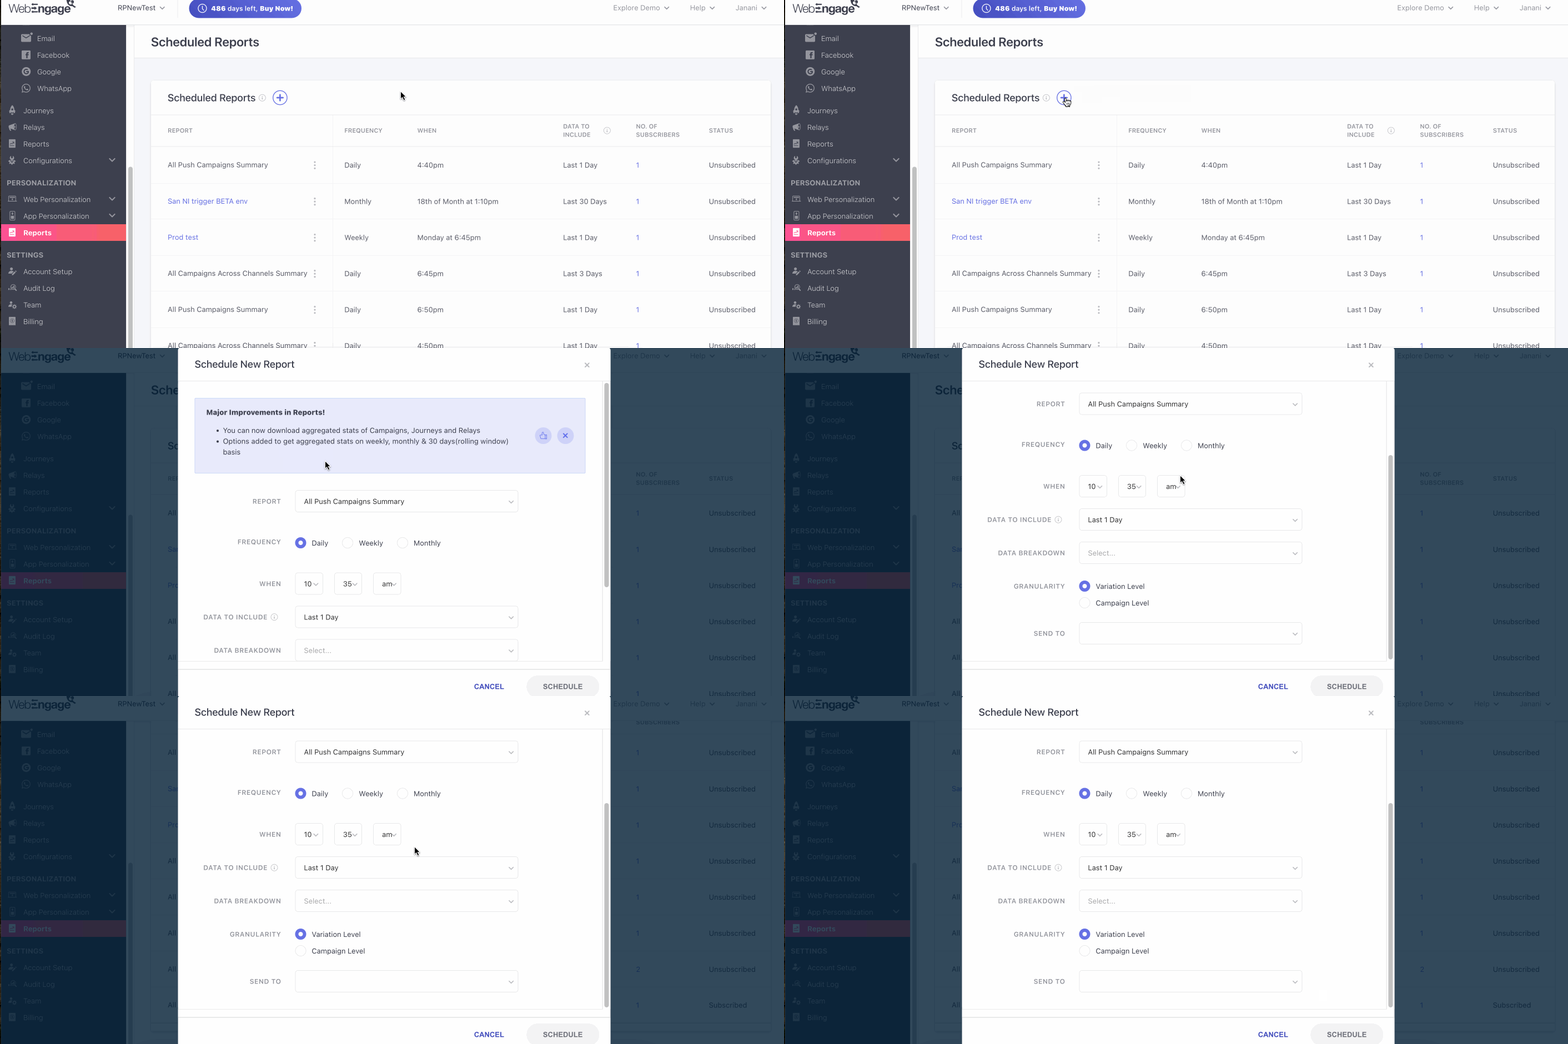
As shown below, click the Plus icon placed on the top left to set up a new performance report in your dashboard.
Click to enlarge
Continue HereScheduling Channel Performance Report
Scheduling Performance Report for Push, In-app, SMS, Web Push, Email campaigns), and WhatsApp campaigns
Modifying Report
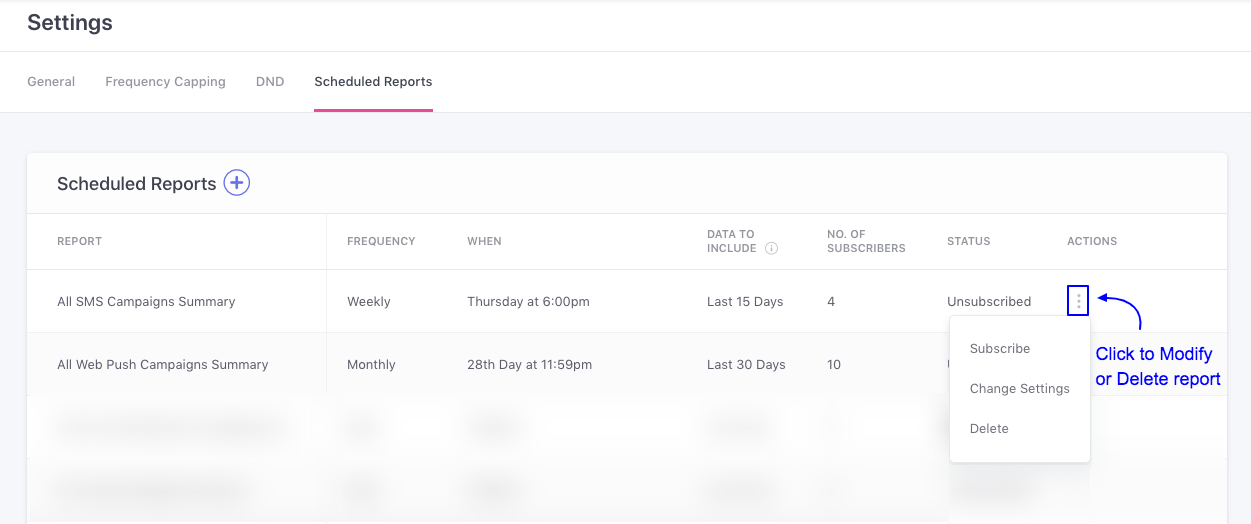
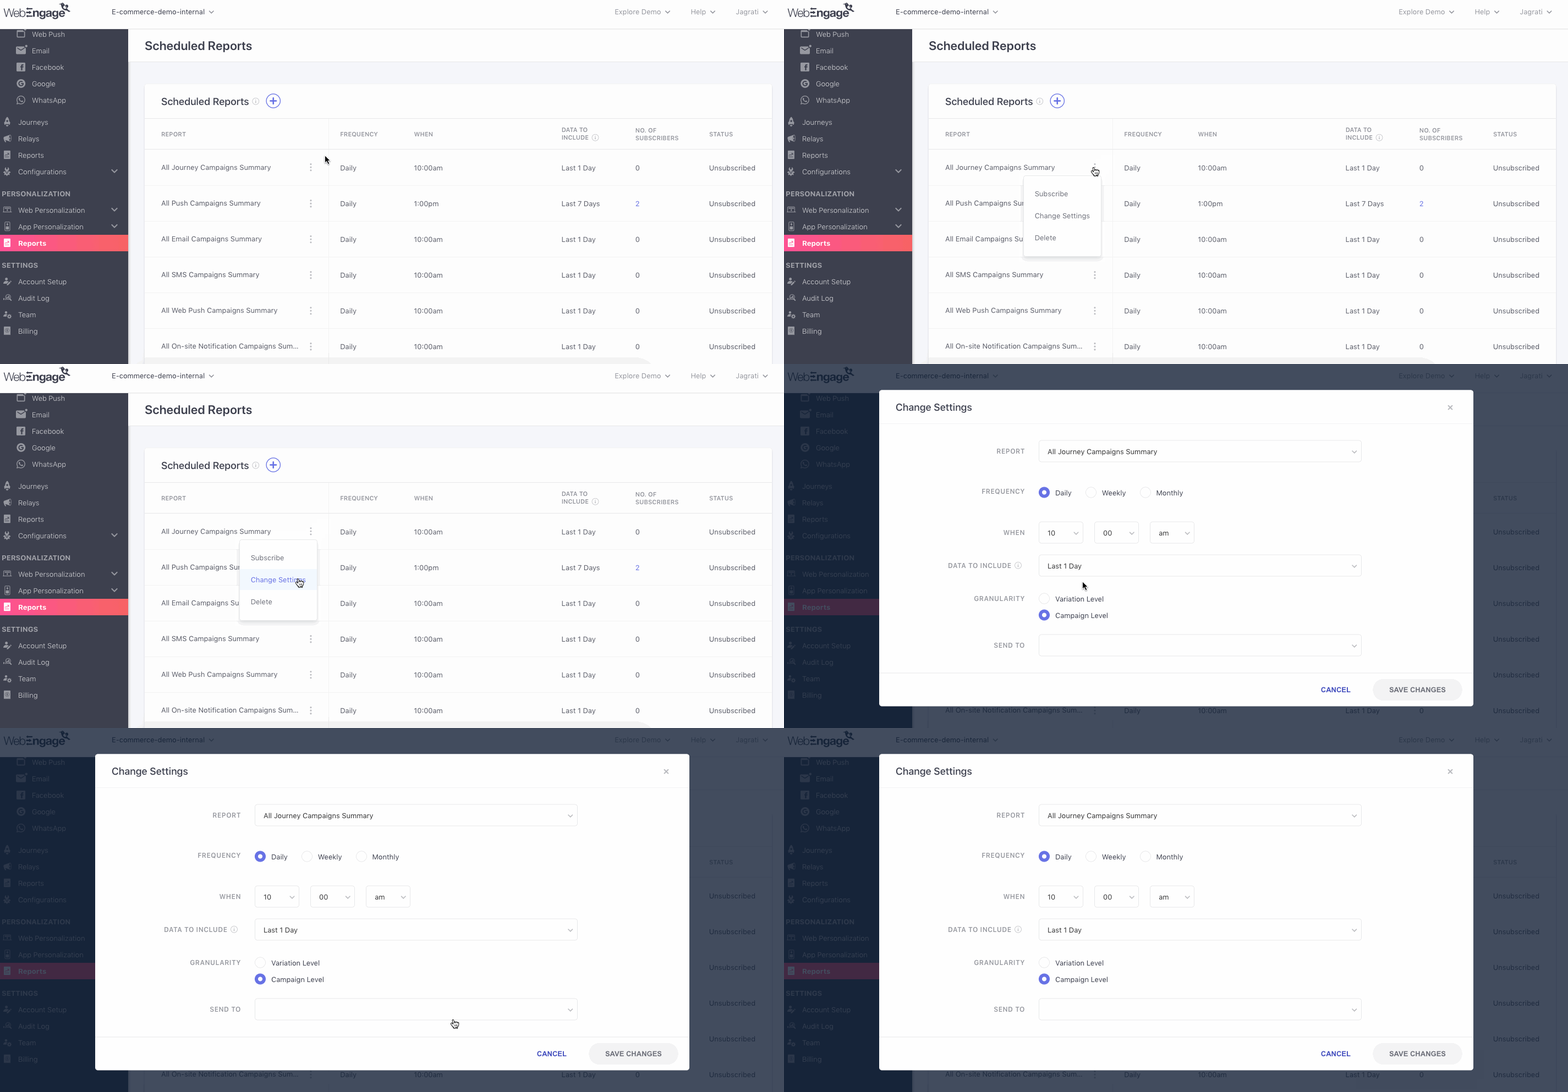
As shown below, all account admins can choose to modify or delete a report by selecting Change Settings or Delete, respectively from a report's actions menu.
Click to enlarge
Change Settings
Click to enlarge
As shown above, select Change Settings from the actions menu to modify a report. In doing so, you will be prompted by a pop-up allowing you to alter all the aspects of the Scheduled Report.
Delete Scheduled Report
Click to enlarge
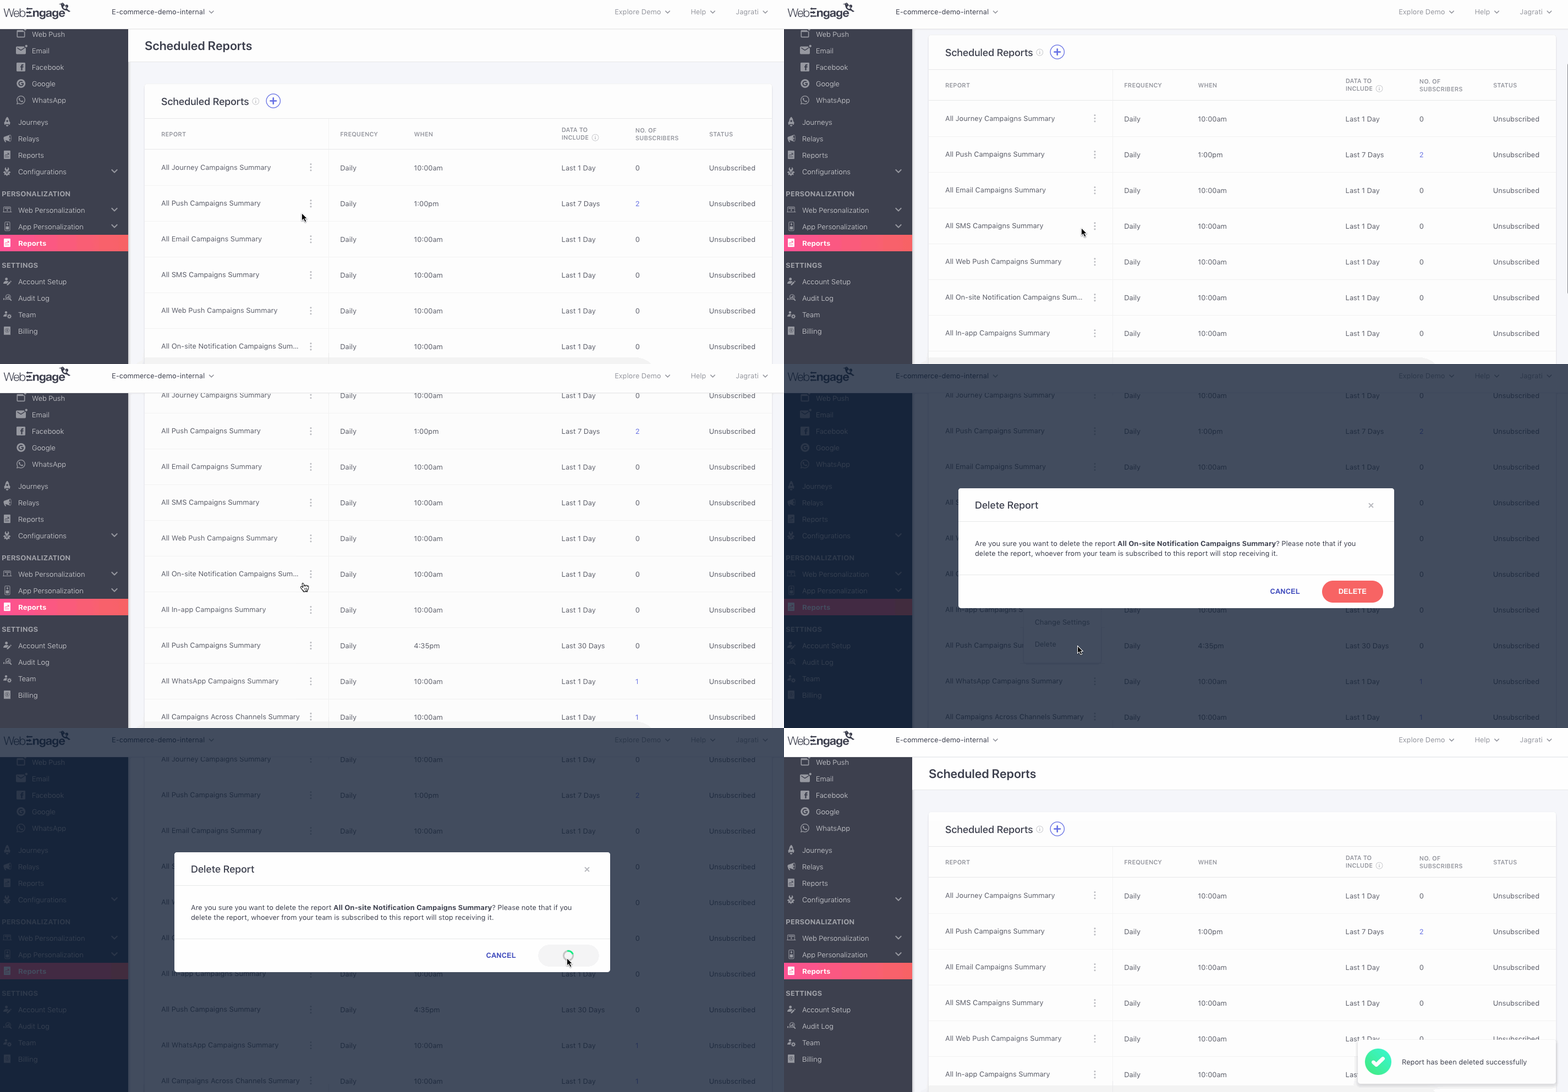
Step 1: As shown above, select Delete from the actions menu to disable the Scheduled Report permanently.
- In doing so, you will be prompted by a pop-up asking you to confirm your decision.
Step 2: Click the Delete button on the pop-up.
- Deletion will be confirmed by a notification on the bottom right corner of your screen.
Please feel free to drop in a few lines at [email protected] if you have any further queries. We're always just an email away!
Updated 3 months ago