Defining Data Model
Previously, any data you sent or new events you created, even if they were not predefined, were directly accepted without any restrictions. However, we have now implemented a new system where events and attributes are categorized as either flexible or fixed.
- Flexible: This is the existing category that accepts all events and attributes, which can possibly lead to potential data corruption. (this is how the current system works)
- Fixed:Events and Attributes must be defined before sending data to WebEngage. Once defined, only data for those events will be accepted, ensuring data integrity.
How to Access this?
- Once you've entered the Data Management tab, you will be able to view the ‘Configuration’ section on the top right corner of your screen tab.
- On clicking the configuration button you will be redirected to a ‘Data Model Configuration’ tab, which presents you with 2 options:
- Fixed: When you select the fixed data model option, then values which are not defined will not be accepted until the data model is not updated.
- Flexible: When you select this option even if you pass new Event or User Attributes which are not currently present in the data model, still those values will be accepted and the data model will be updated automatically. This option is selected by default.
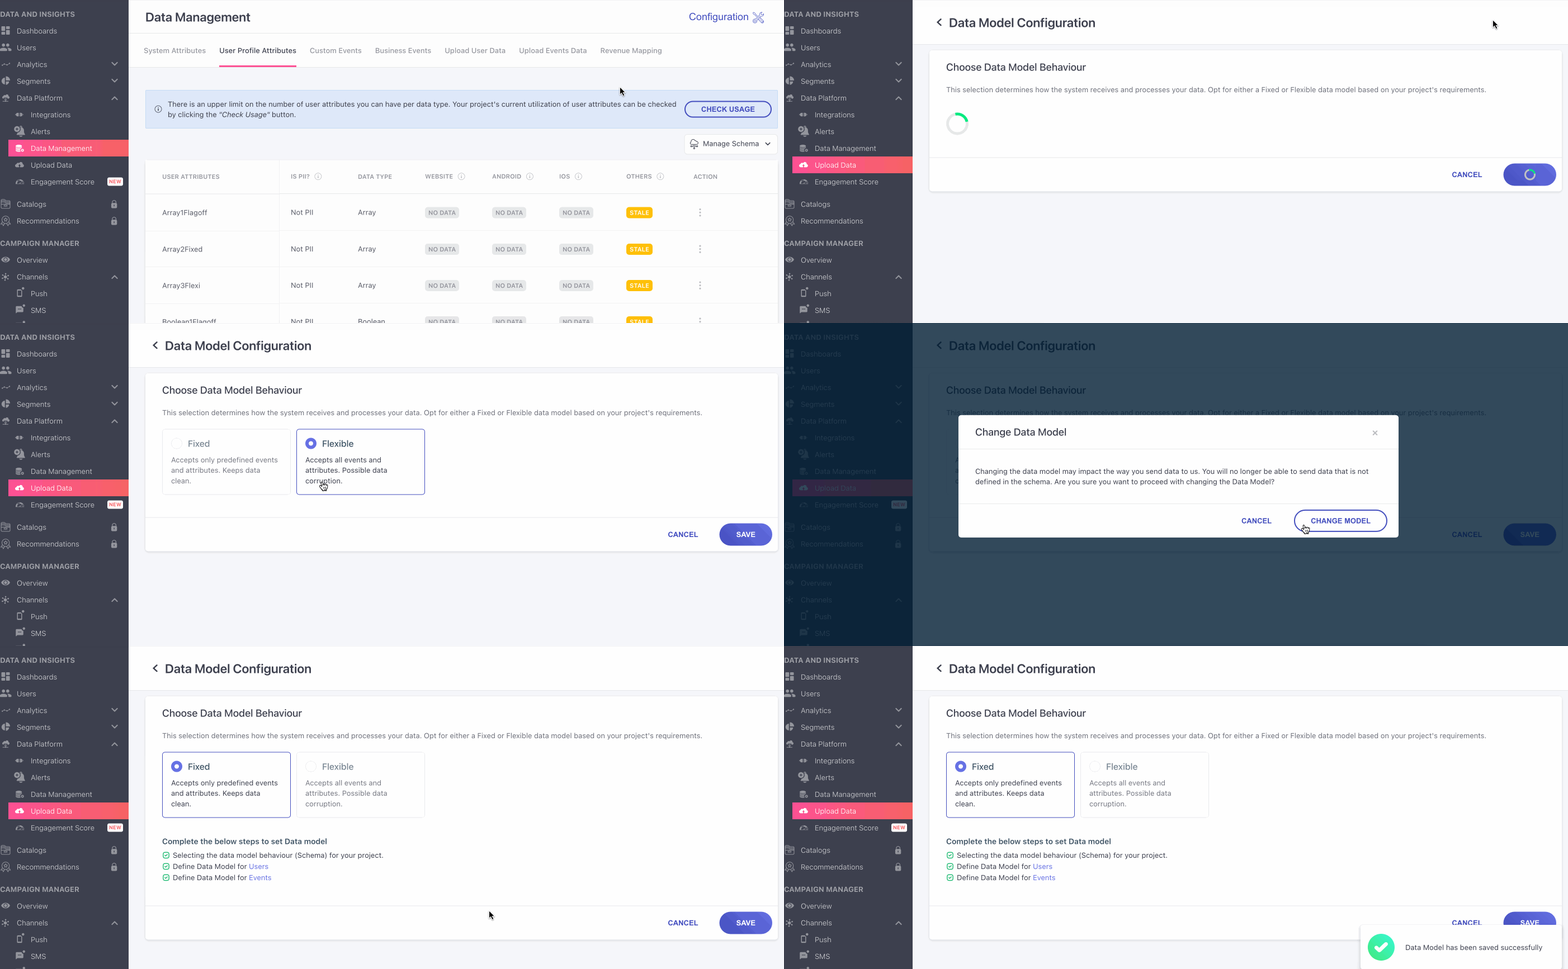
Setting up Fixed Data Model
To set up the fixed data model, you must first complete setting up the following steps.These steps are also shown on the dashboard when you select the Fixed Data Model behaviour.
- Step 1: Selecting the data model behaviour (Schema) for your project, in this case it is Fixed Data Model Behaviour.
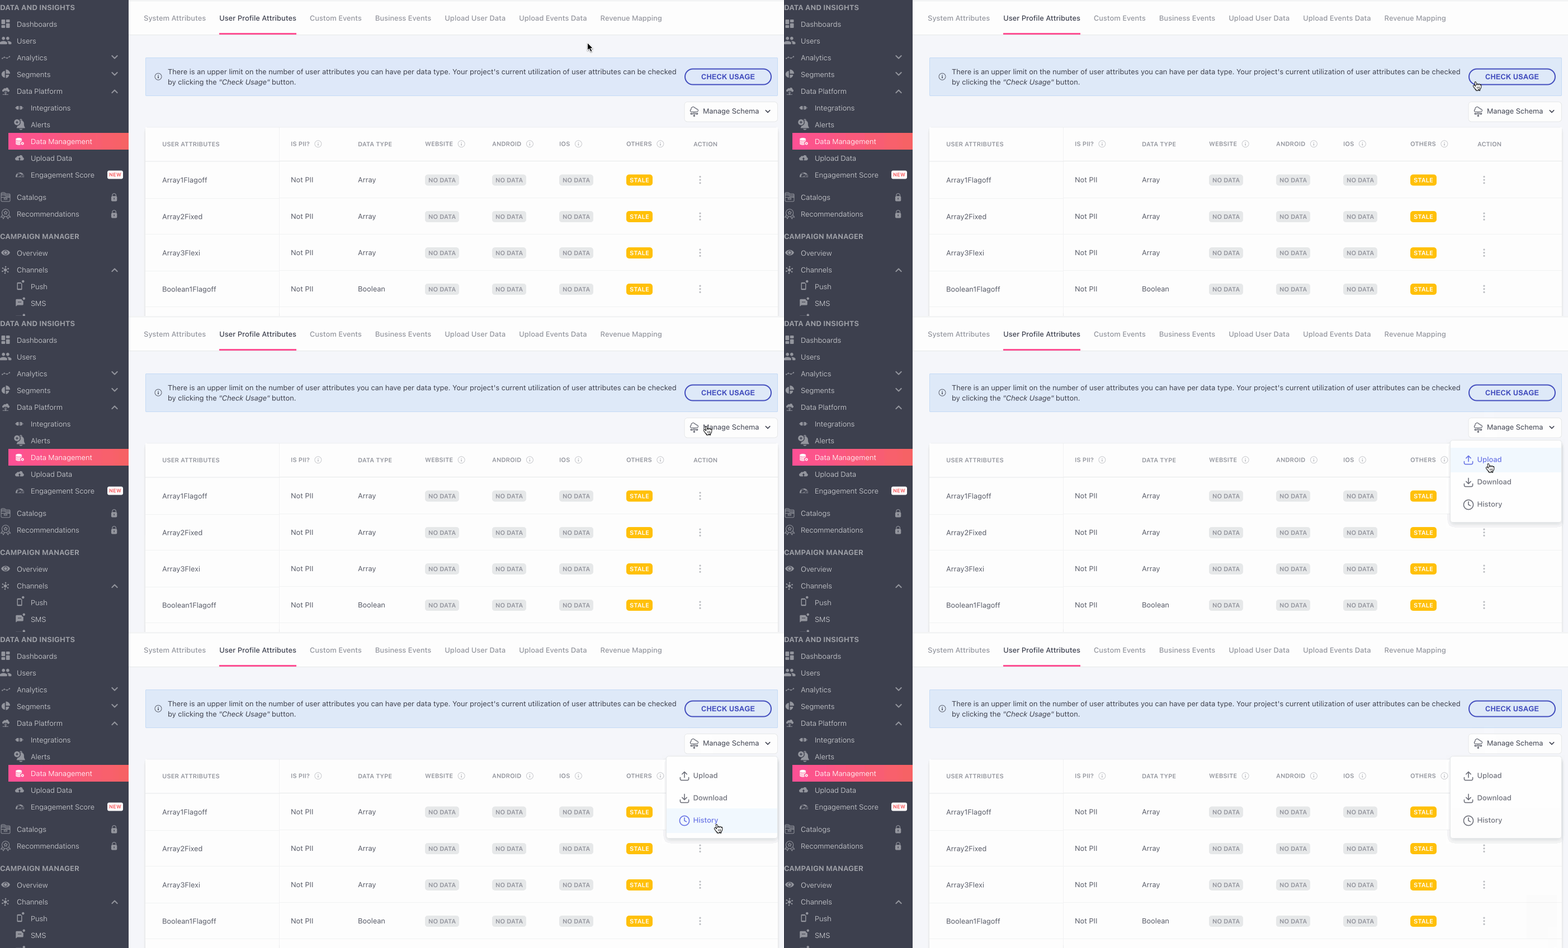
- Step 2: Define Data model for Users, you can do this in the User Attributes tab, and clicking on the manage schema dropdown. You can do this by clicking on upload under manage schema.
- Step 3: Define Data model for Events, you can do this in the Custom Events tab, and clicking on the manage scheme dropdown. You can do this by clicking on upload under manage schema.
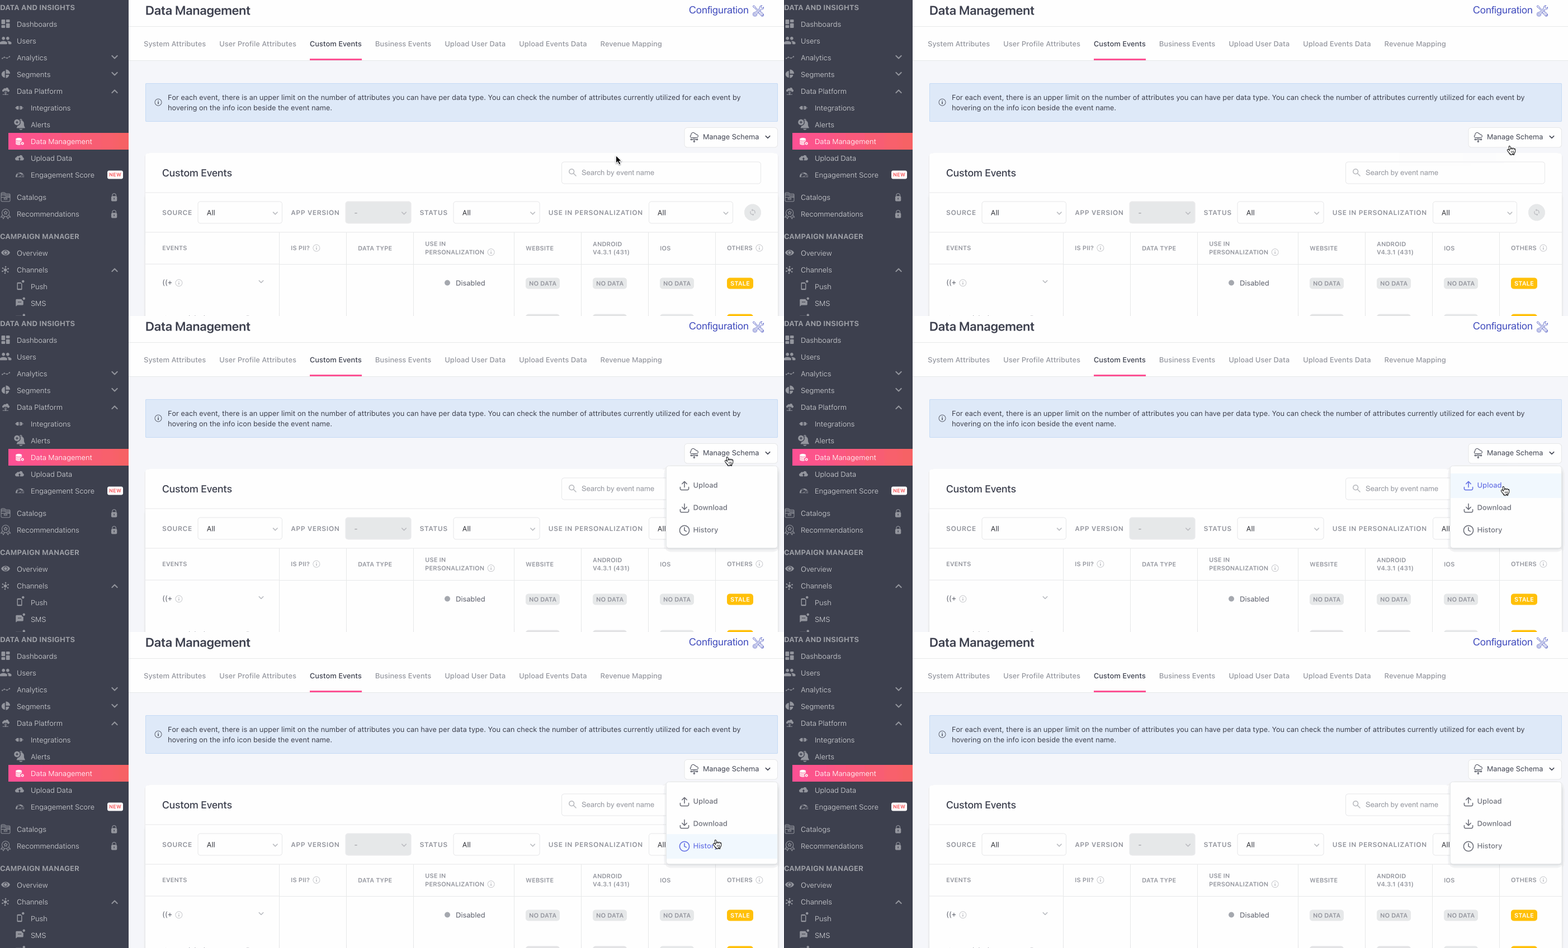
Note: You can download the existing model, by clicking on download option.
Manage Schema
In the user profile attributes and custom events tab within Data Management, you can find the Manage Schema dropdown, that consists of 3 options, Upload, Download and History.
When you select the Upload option:
- Upload: Here you will upload the data model file, by dragging and dropping or choosing the file upload.
- Preview: You can now preview the data in the file that you’ve uploaded and check for errors in the data that will be shown, in case there are errors, you will not be able to proceed to the next steps.
- Confirmation: This will be the last confirmation step before the data model is finalized and is followed by a warning message of the same. Read all the warnings carefully before you save your data models.
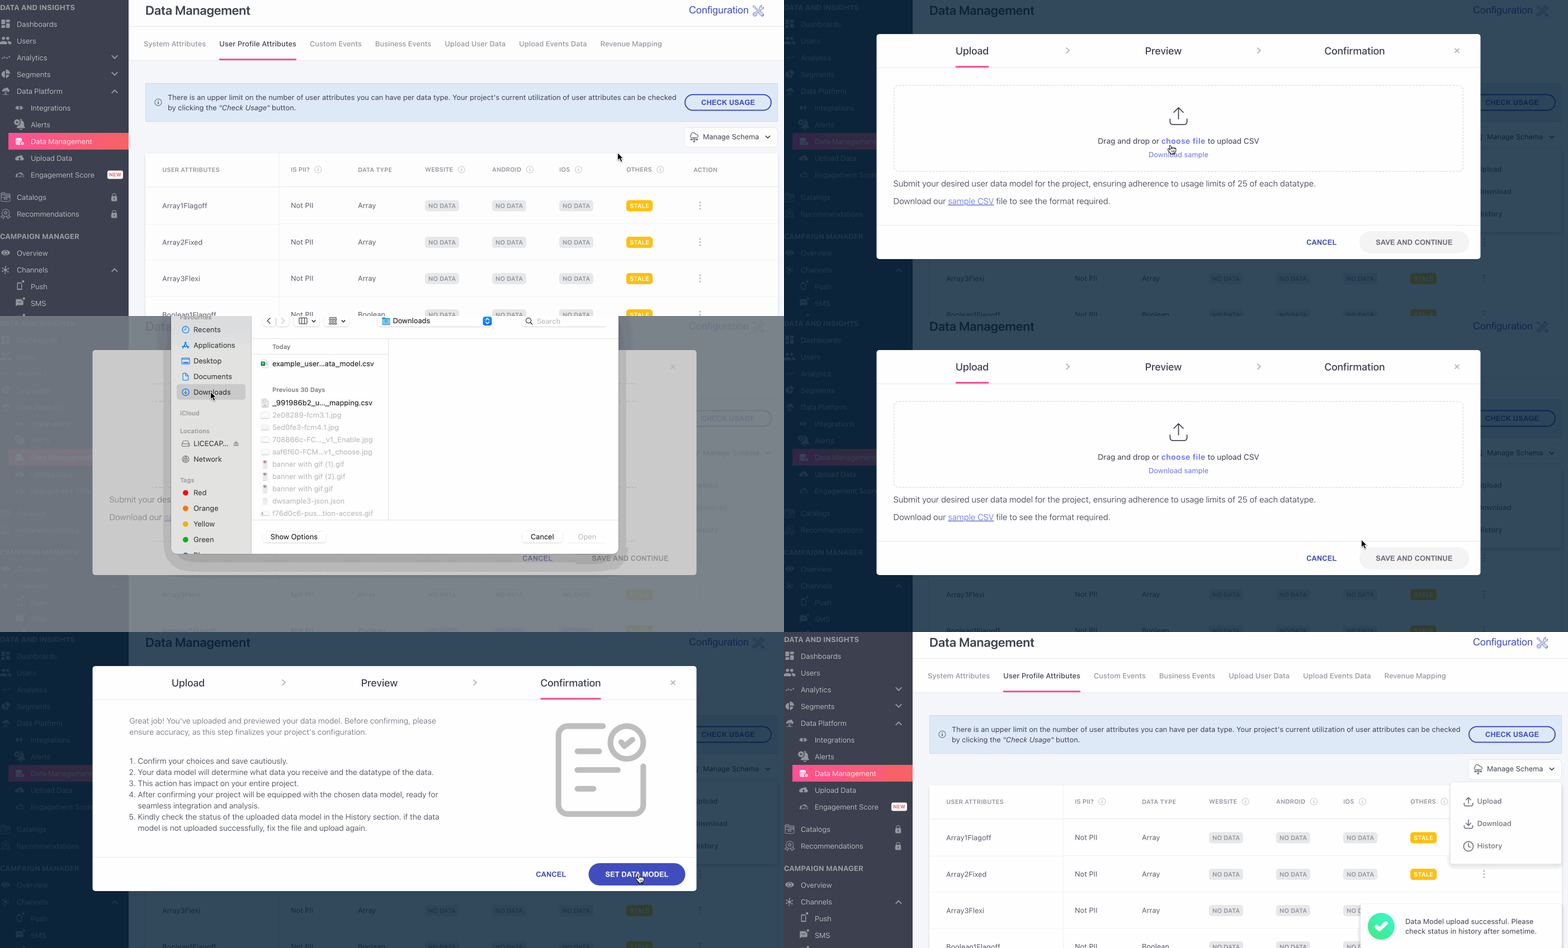
NoteThe steps are the same for both the event and user data models, but data model files are different, hence make sure to upload appropriate files, you can use the sample file provided for guidance.
When you select the Download option:
- Here you can download the latest version of the schema and will be updated based on your actions.
- Whenever you want to update your schema, you can download the latest version of your schema from the download option, update this file and upload the same.
This will be active once you upload a schema.
NoteThis will be available for both the events and the user page. The schema should always be the latest data schema and keep on updating based on user action.
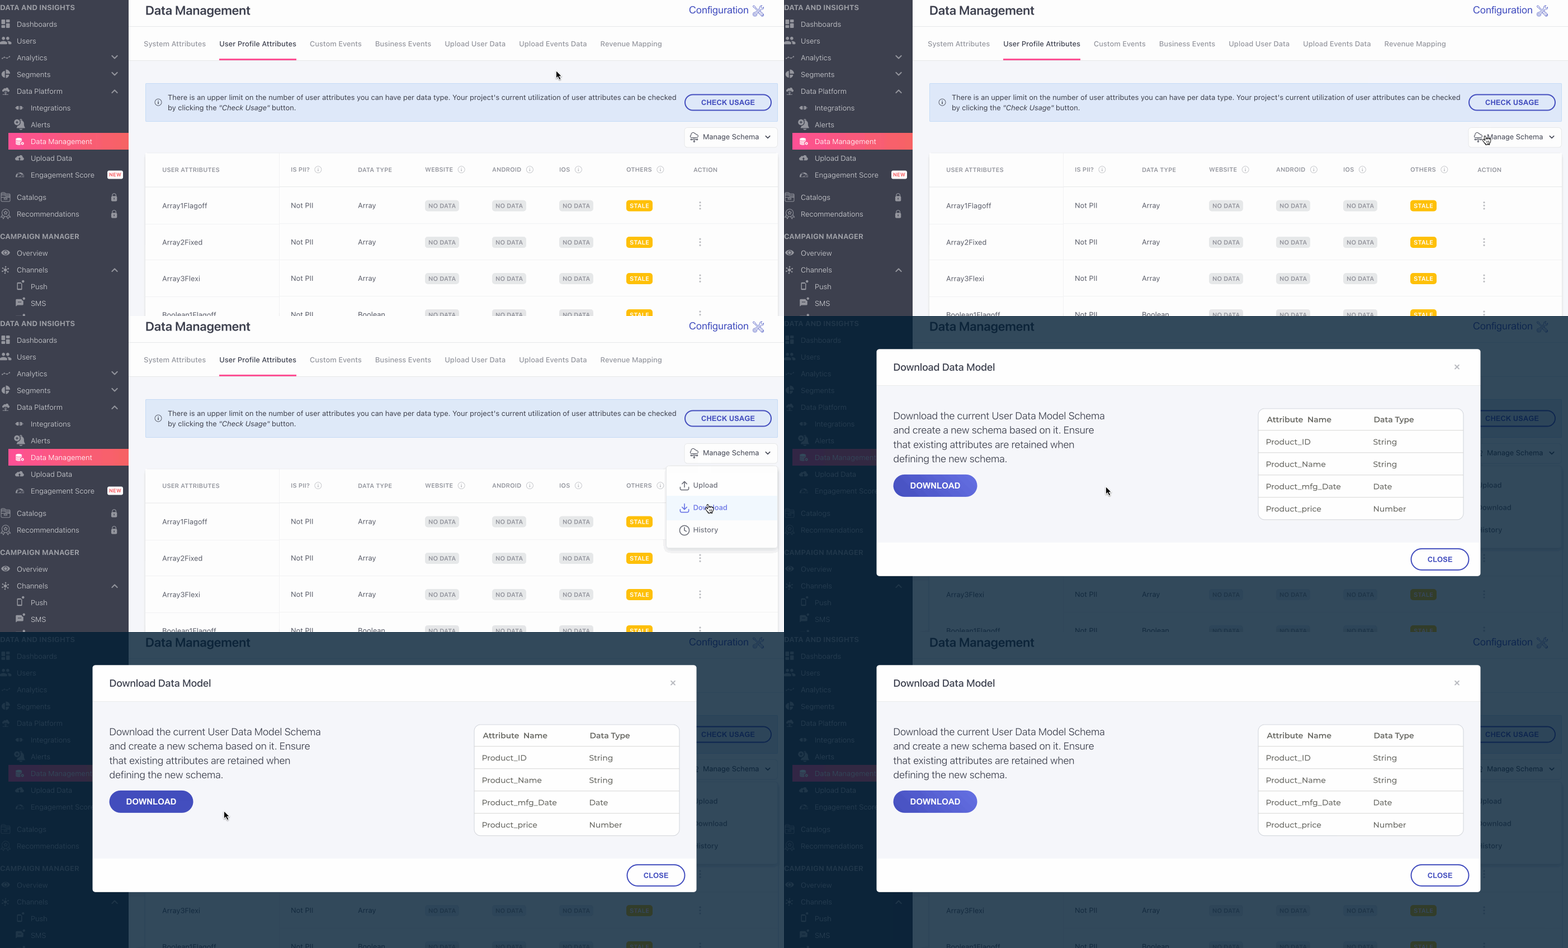
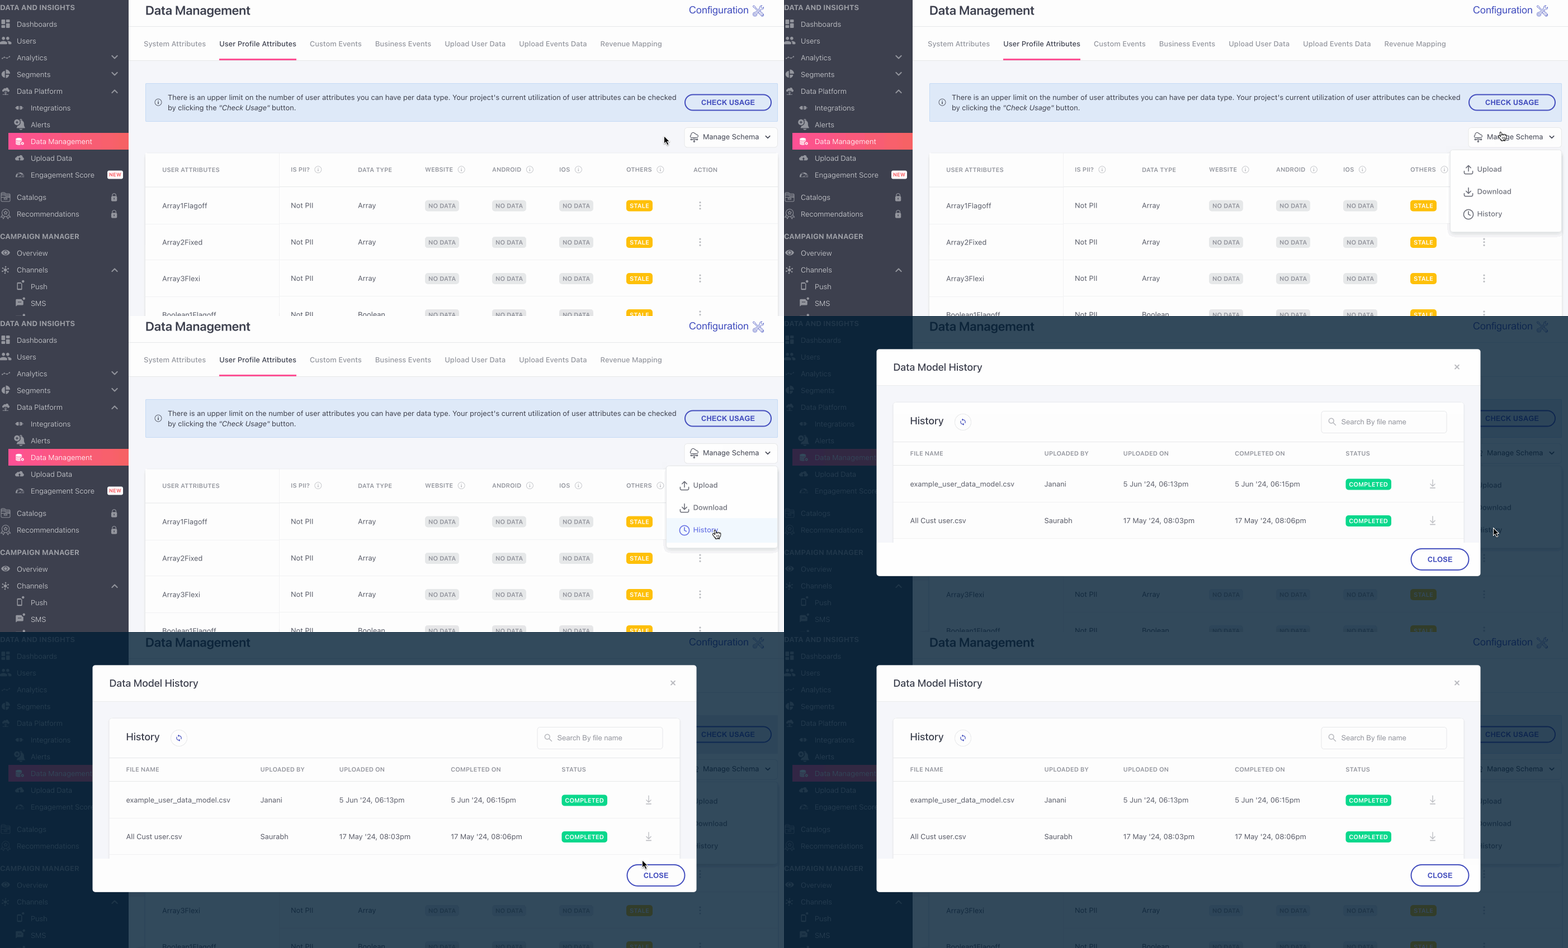
When you select the History option from the dropdown:
You will be shown the history of changes made to the schema. Some of the details that are shown on the table are:
- File name, uploaded by, no of records, uploaded on, completed on, status. The History will also display the data of failed uploads.
Keep in MindBy default, no data model will be selected for new users. Users have to select between Flexible and fixed. For all the existing users by default a flexible model will be selected.
Updated 3 months ago