Custom Response Routing & Acknowledgment
You can configure Feedback Settings to:
-
Direct responses to specific teammates as per the page on which they were submitted or as per the query category. (How to configure)
-
Customize your acknowledgment emails. (How to configure)
Here's how you can go about it:
Feedback Routing
Collecting user feedback is easy - Enable the Feedback Widget for your site, Customize the Form Fields & Implement!
But managing user responses and acting upon it in a timely manner is a different game. This is why we've made it extremely easy for you to relay different types of responses to teammates who own up the respective domains.
You can set up feedback routing in any of the following ways:
Method 1: Route queries as per the Feedback Category selected by a user.
Method 2: Track Website Data & route queries as per the page on which the feedback is submitted.
Let's walk you through each method:
1. Category-wise Routing
By default, all feedback is routed to the registered email address of all your account admins. Let's go over a use-case to show you how you can customize routing.
Routing Category-wise Feedback to Relevant TeamsLet's assume the case of an e-commerce platform. User queries are generally spread across various teams like operations, support, and billing. Thus, you can route:
Payment/Refund related queries to your Billing Team.
Account/ Offers/ Discounts/ Coupons related queries to your Customer Service Team.
Delivery/ Returns related queries to your Operations Team.
And so on.
Here's how you can go about it:

Click to enlarge
-
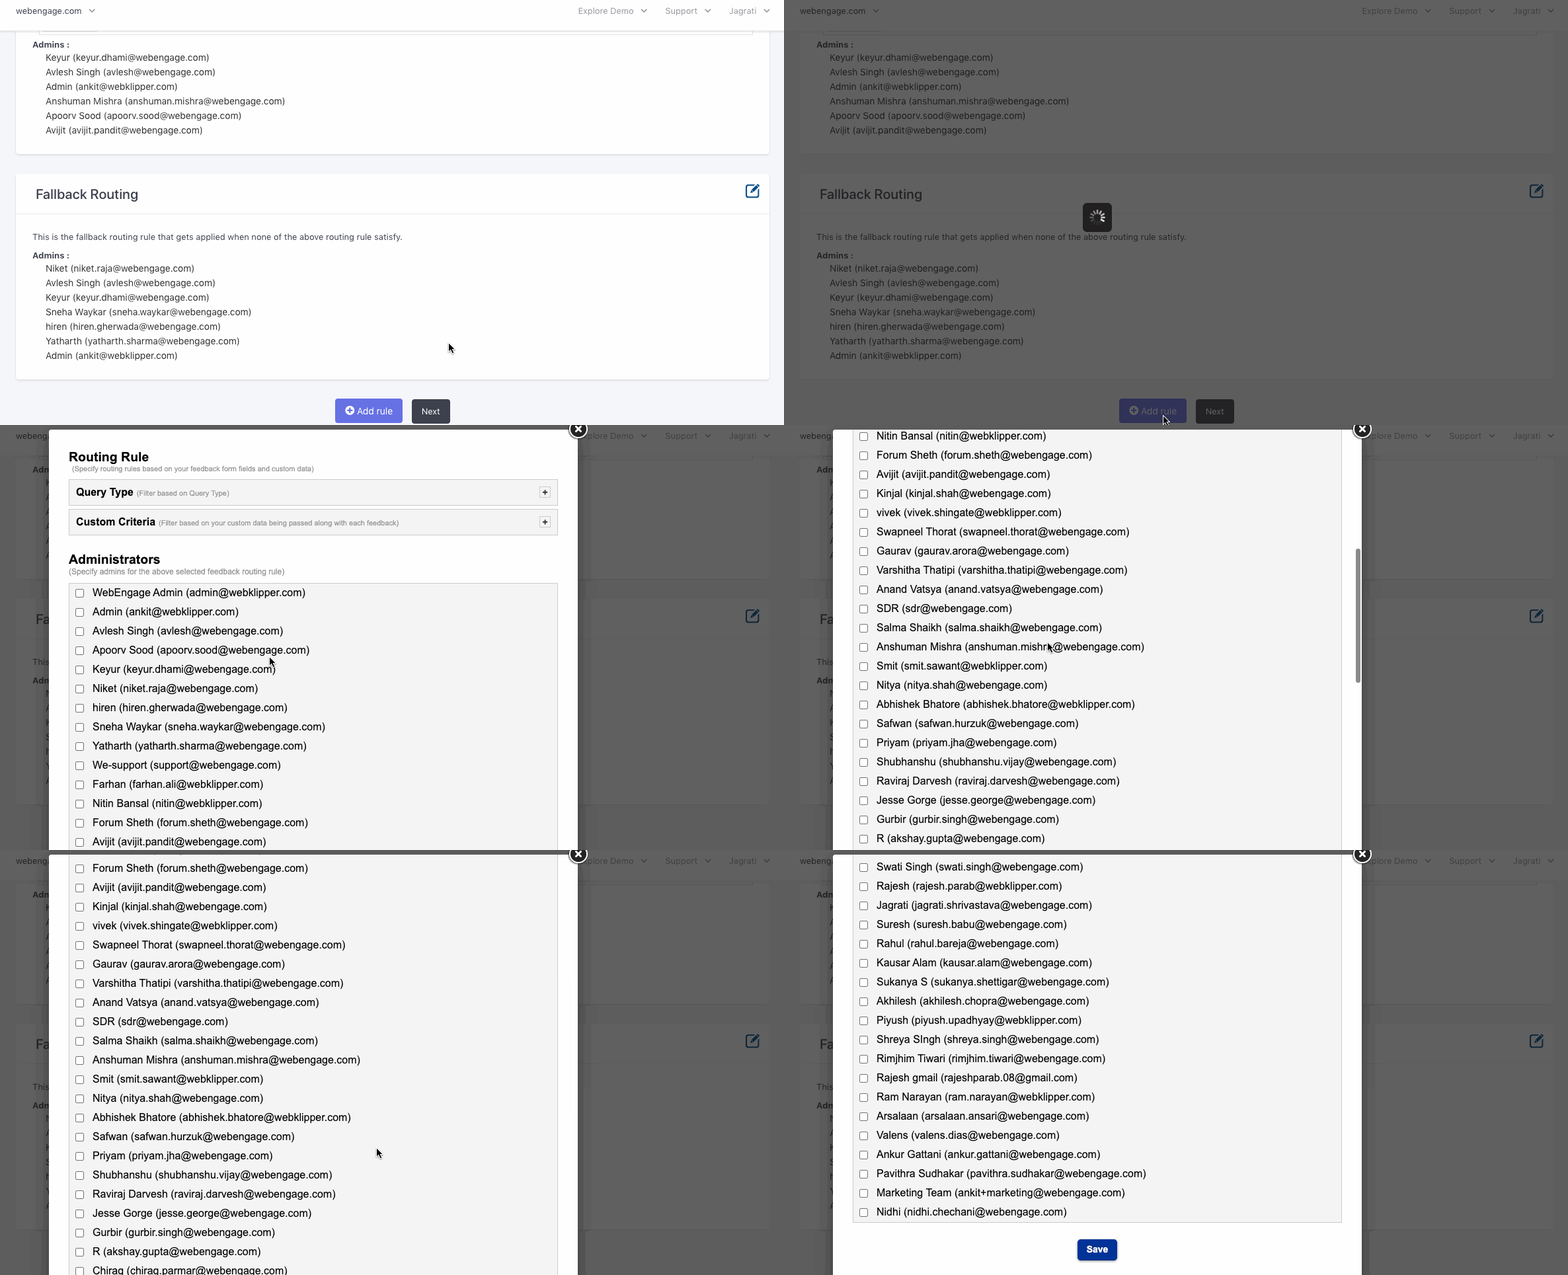
Step 1: Click the Add Rule button to get started.
-
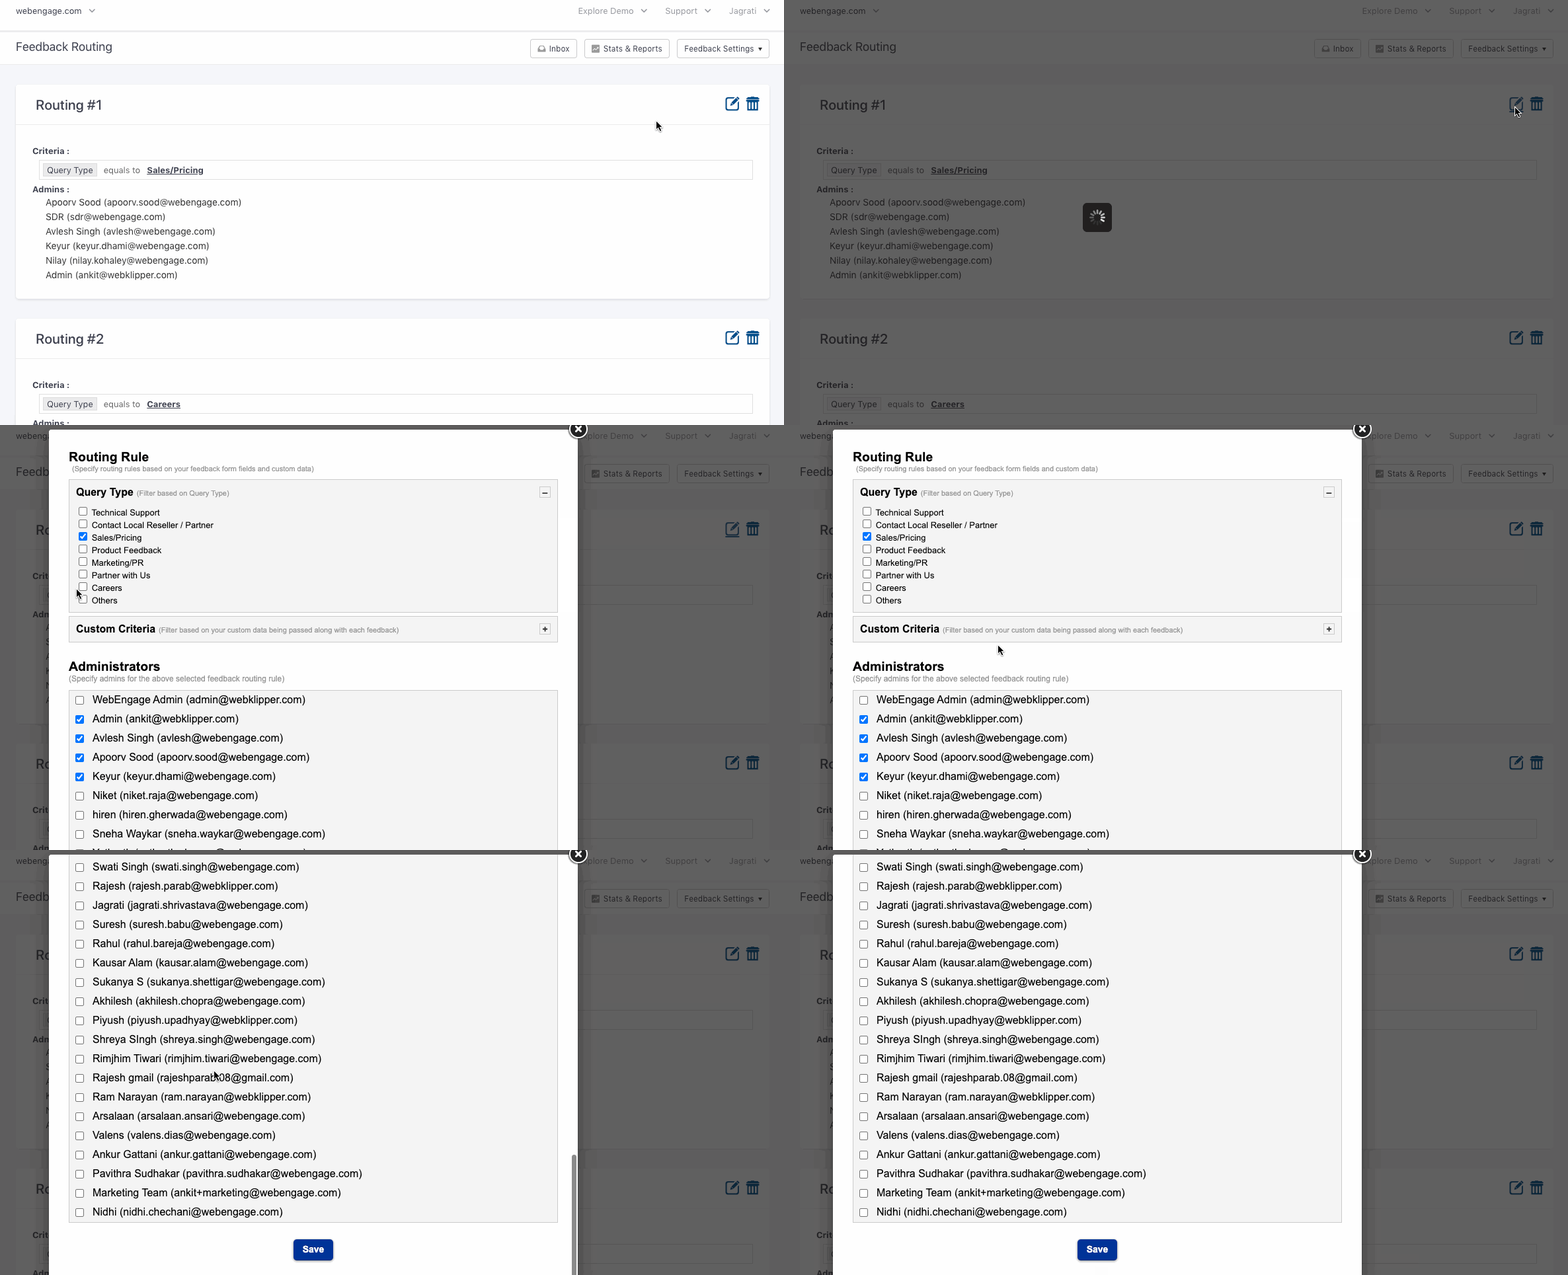
Step 2: Select a Category to create a filter.
-
Step 3: Select Admins to whom you'd like to send the category-specific feedback.
-
Step 4: Click Save to implement!
As shown above, a fallback routing is automatically created on adding a rule. This has been done to ensure that admins get notified if a user submits a message under a category that hasn't been mapped here.
2. Custom-Criteria Based Routing
You can also choose to specify custom rules, on the occurrence of which, the feedback will be routed to specific account admins. (How to Implement) These rules could be anything like:
- The page on which a user submits the feedback.
- The page element that a user was viewing when they submitted feedback and so on.
Let's go over a use-case to help you understand this better:
Routing Feedback for a Travel Booking Site (Custom-Criteria Routing)Let's take the example of a travel booking site that allows users to book flights and hotel stays across the world. Given the massive scale of their operations, they have divided their customer support teams as per their services - Flights, Hotels, Travel Packages.
Thus, feedback is routed based on the page URL on which a user submits their query.
If a URL contains the term, flight, then it's sent to the Flight Ops Team.
If a URL contains the term, hotel, then it's routed to the Hotel Ops Team.
If a URL contains the term, package, then it's sent to the Travel Packages Team.
Here's how they set it up:
Step 1: Collaborate with the tech team to track path parameters of all page URLs. (How to Implement)
- The e-commerce team tracked the terms as the Data Attribute,
path-parameter.
Step 2: Specify the following Custom Routing Rules:

Click to enlarge
-
Custom Rule 1: When Data Attribute,
path-parameterof Data Type, String is equal toflight, send user responses to [email protected] -
Custom Rule 2: When Data Attribute,
path-parameterof Data Type, String is equal tohotel, send user responses to [email protected] -
Custom Rule 3: When Data Attribute,
path-parameterof Data Type String is equal topackage, send user responses to [email protected]
Step 3: Click Save to implement!
Email Templates

Click to enlarge
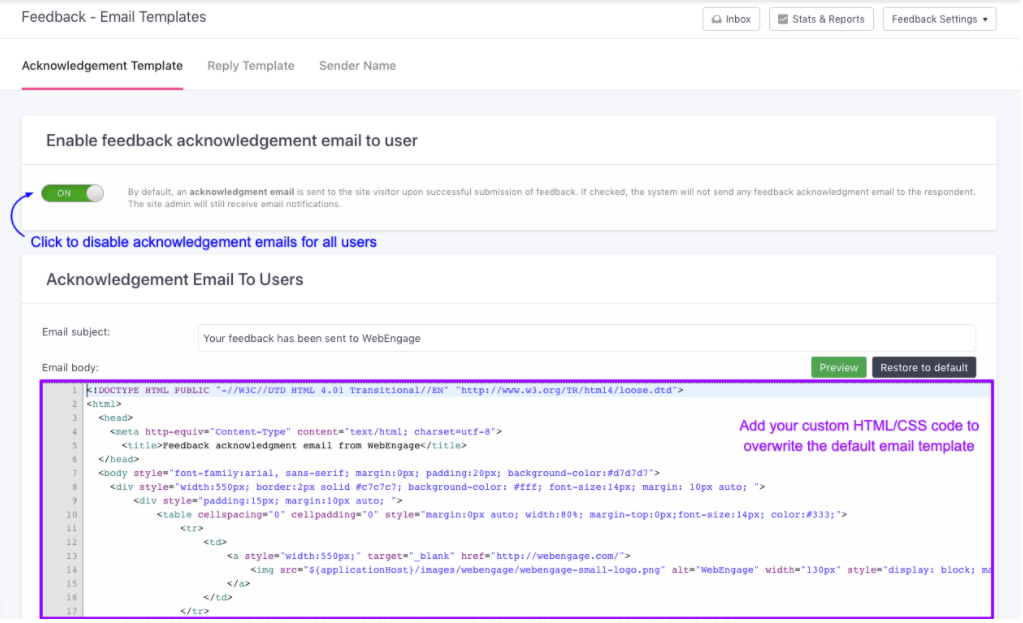
By default, users receive an auto-generated acknowledgment email each time they submit feedback. And whenever an account admin responds to their query, they are notified via the email address shared by them.
The Acknowledgment Template and Reply Template can be customized as per your brand guidelines and engagement strategy. Here's how you can go about it:

Click to enlarge
-
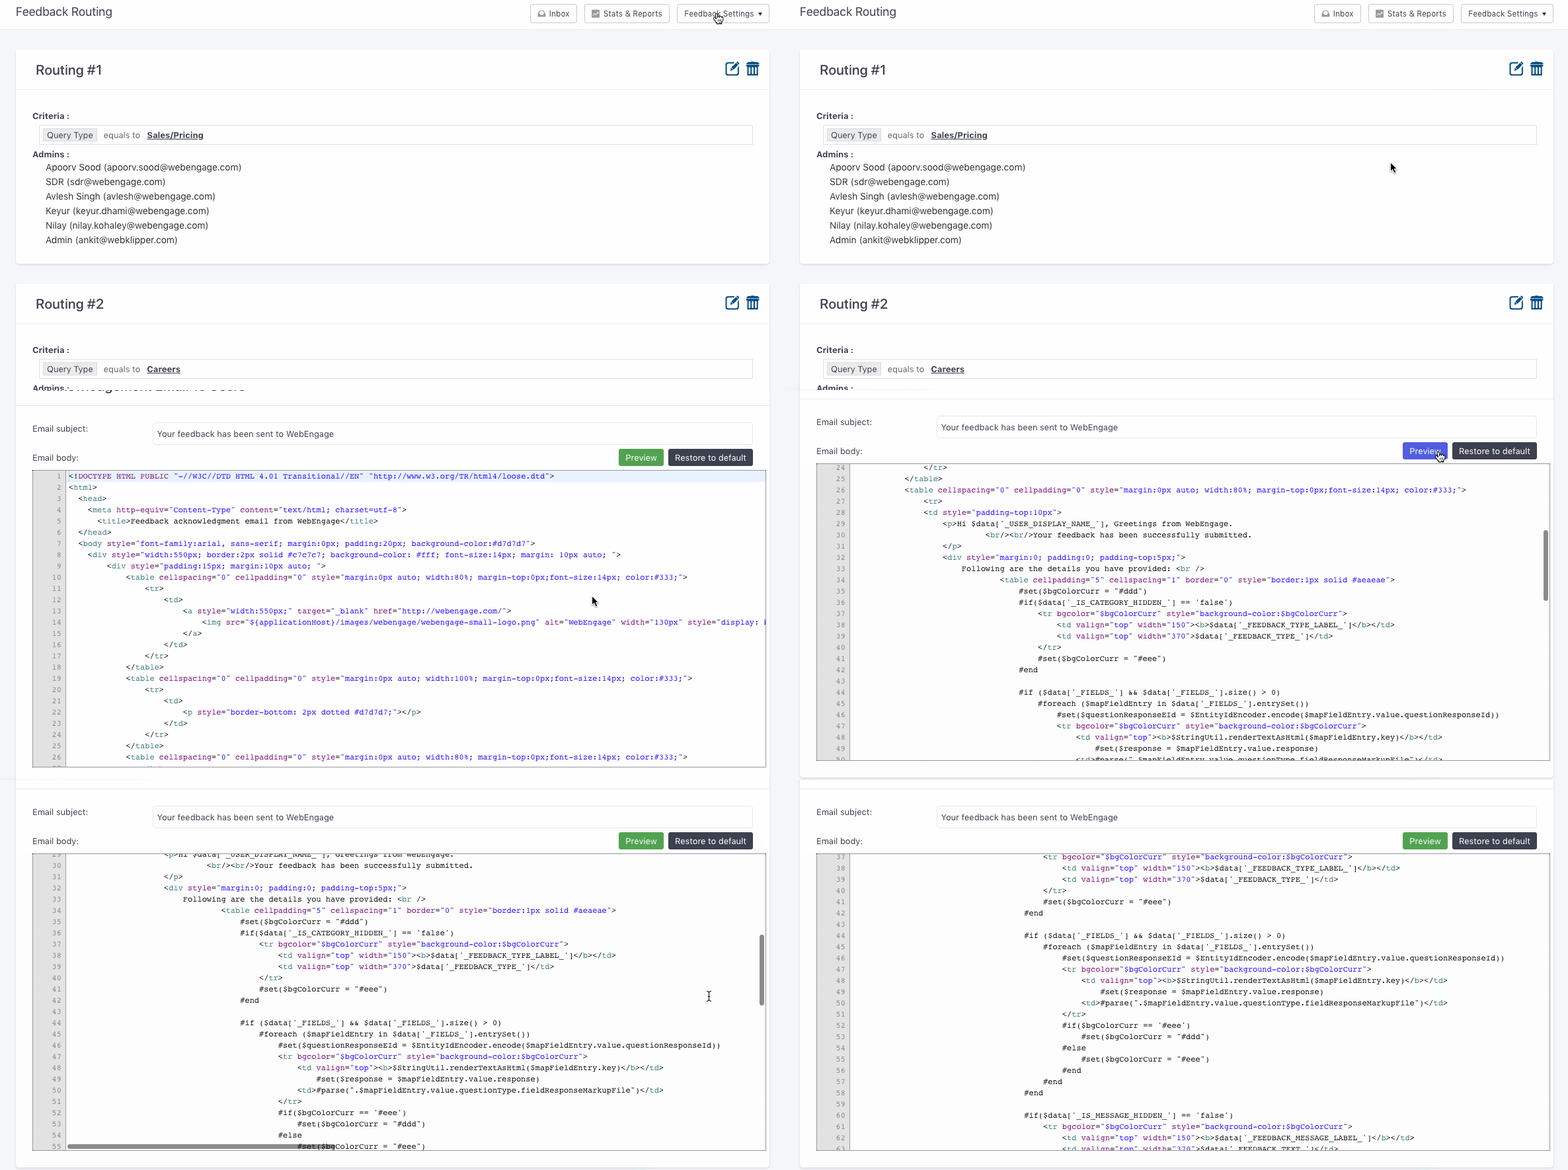
Add a custom Subject Line for the emails.
-
You can override the default email template by adding your custom HTML/CSS code in the Email Body. We recommend that you test the template on mobile, desktop, and various inbox providers before adding it here.
-
You can view the acknowledgment and reply emails as a user by clicking the Preview button (in the respective sections).
- Click Restore to Default to use the auto-generated email template.
-
As shown above, you can customize the sender's name for both emails. We recommend using a Sender Name that helps users identify you like, Jake from Example.com.
-
Lastly, you can choose to disable the Acknowledgment Email by clicking the toggle switch highlighted above.
Updated 4 months ago