Google Ads
A step-by-step guide to exporting Segments to Google Ads
Please NoteBefore exporting your user data to Google Ads, kindly ensure you have integrated your Google Ads account to your WebEngage dashboard. You can refer to this guide to integrate the same successfully.
Introduction
Google allows third-party platforms like WebEngage, to export to a limited pool of details to any Ads Account in a specific format. For the same reason, the format of the user details listed below could be different from the User Attributes shown under a User Profile or other sections of your dashboard.
Google Ads allows you to connect with new customers and retarget existing customers to grow your business. By integrating WebEngage with your Google Ad Account, you will be able to target ads to the users who have already visited your website.
Details Exported
Here's a list of all the user details that are exported to your Google Ads Account:
User Details | Corresponding User Attribute in WebEngage | What It Means |
|---|---|---|
|
| User's registered email address |
|
| User's registered phone number |
|
| User's first name |
|
| User's last name |
|
| Country, as per the user's current location |
|
| Postal code/ ZIP code of the user's current location |
|
| ID of a mobile device registered to the user in their WebEngage user profile |
After the user attributes are exported to Google Ads account, three user lists are created on the client's account. However, there are some restrictions, as one segment cannot contain all the user details.
-
One list will contain the user's personal details like First Name, Last Name, Country, Phone Number, and Zip Code.
-
Another list will contain the Mobile Device ID or MDID.
-
Afterward, a combination list will be created, which will include details of all these segments. The number of user lists created depends on the number of devices registered to a user. The data is then exported as Customer Lists & Combination Lists.
How to Export
Please Note
A segment must include a minimum of 100 users for it to be eligible for export to Google Ads, as per Google's guidelines.
WebEngage only supports exporting Live Segments currently.
Step 1: Initiate Export
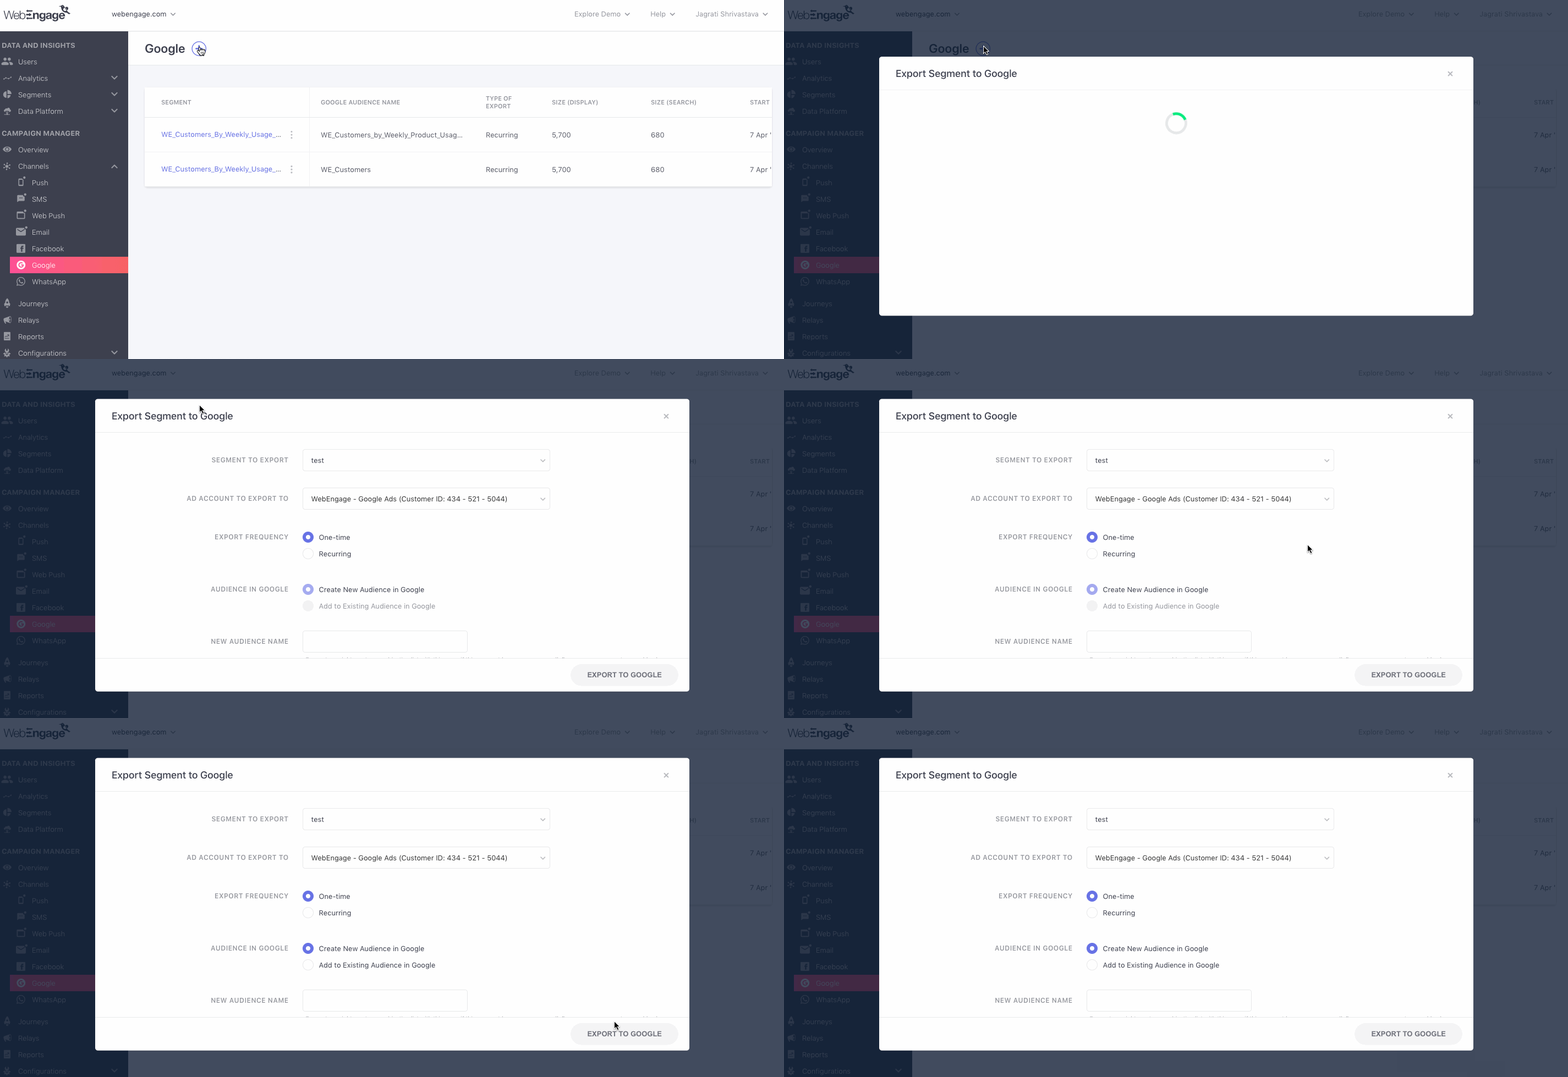
Once you create a segment in your dashboard, you can export it to multiple Google Adword Accounts through the following sections:
- Channels > Google
- Segments > List of Segments
- Segments > Segment Overview
- Segments > List of Users
Click to enlarge
Choose the segment that you wish to export. When the segment opens, click on the Export Segment to Google option.

Click to enlarge
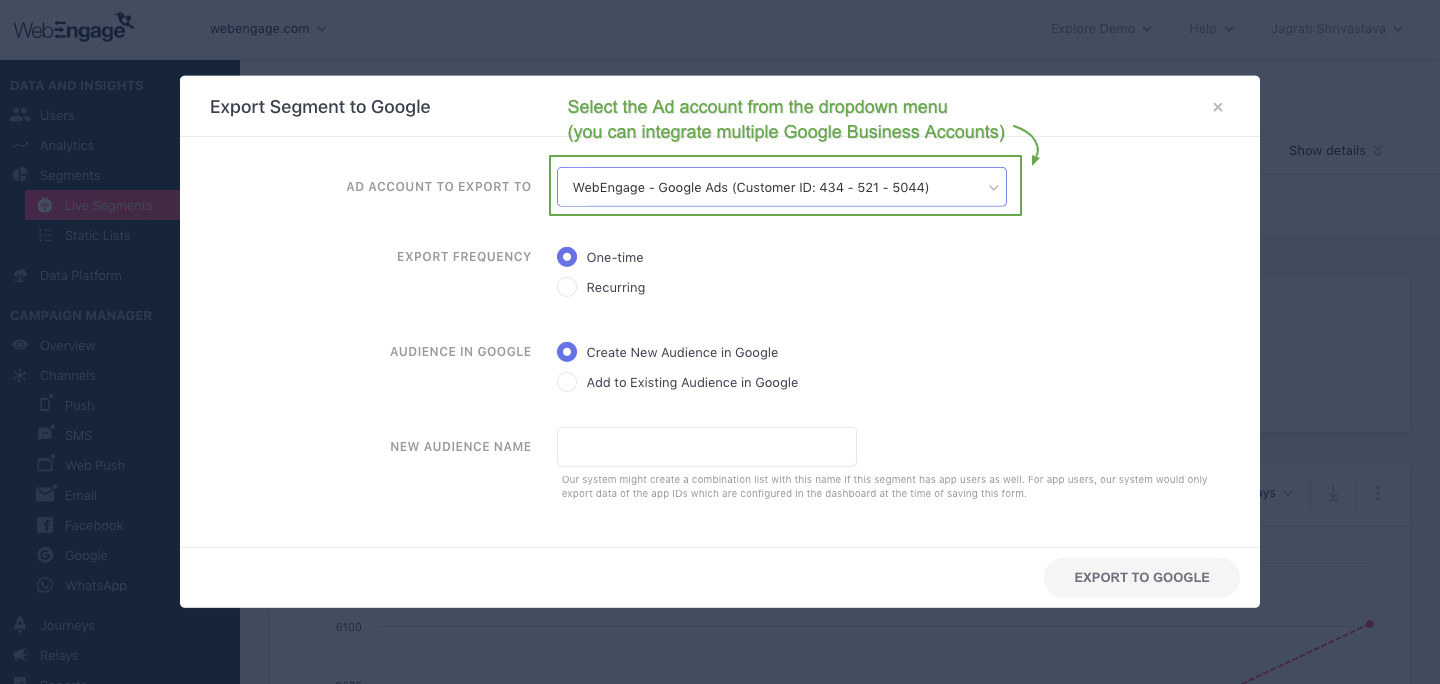
As indicated below, you can export a segment to only one Ad Account at a time. You can always repeat the process to export the segment to additional Google accounts integrated with your WebEngage.
Click to enlarge
Step 2: Select Export Frequency
Click to enlarge
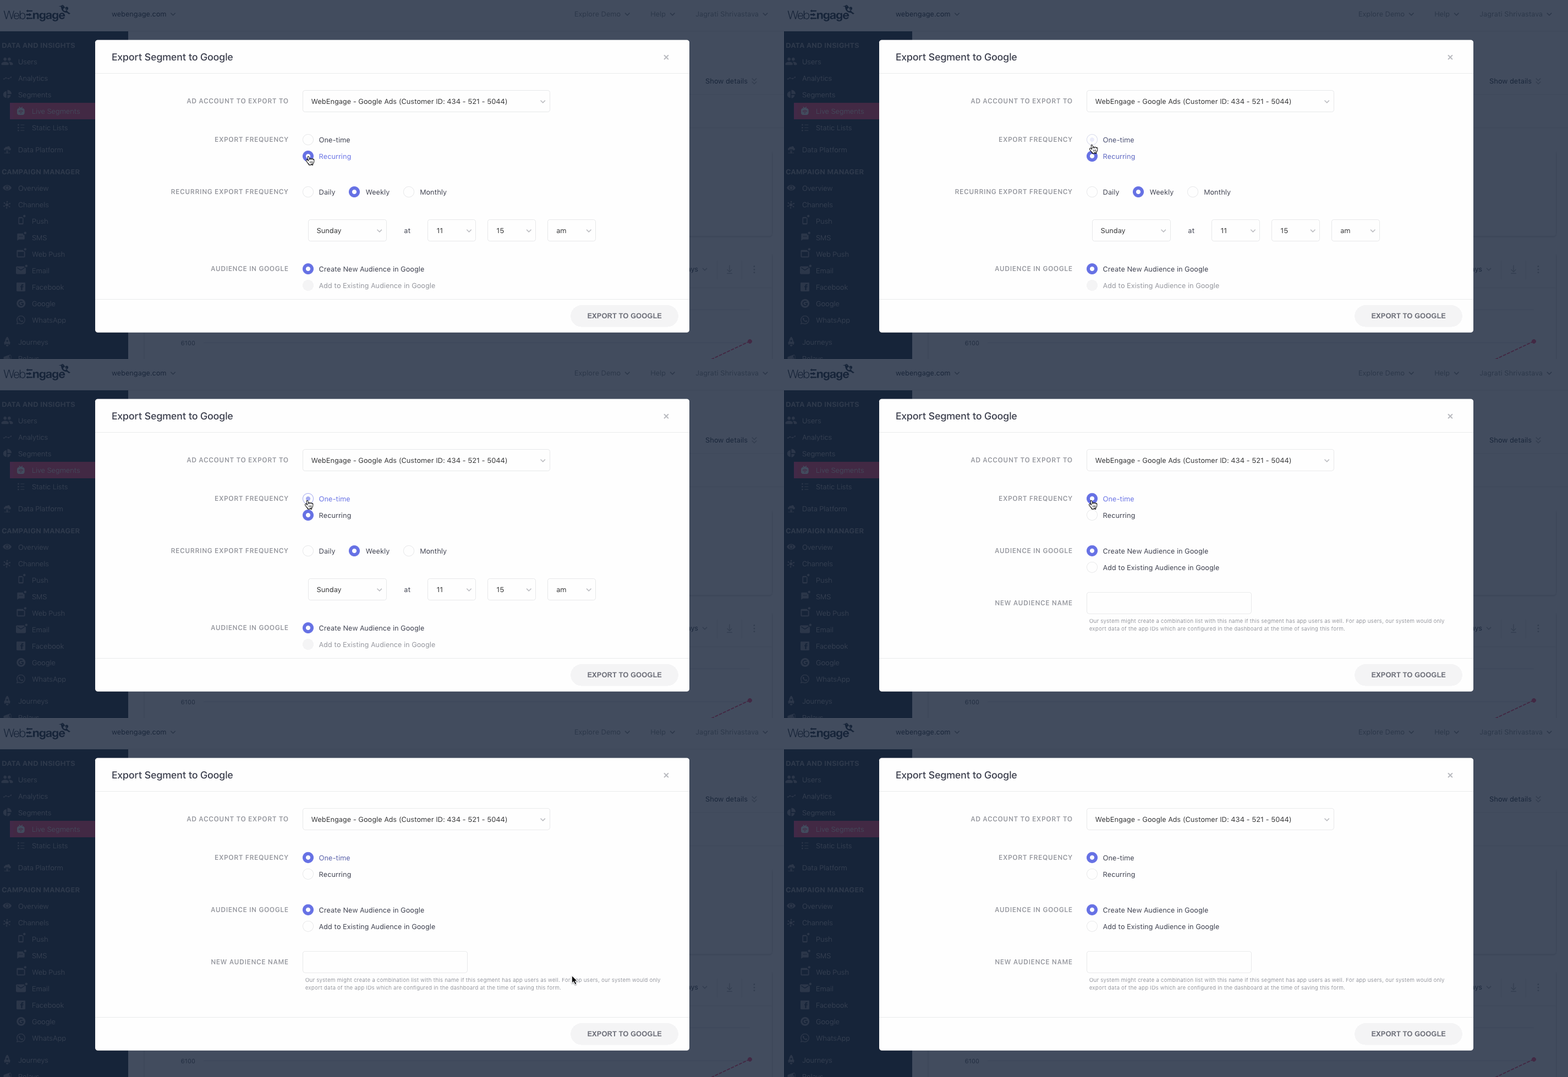
When exporting a segment to Google Ads, you can choose from two types:
One-time Export
The segment will be exported only once to the selected Ad Account. This means that if new users are added to the segment or removed from it in the future, you may have to export the list again.
Specify Audience Type
Click to enlarge
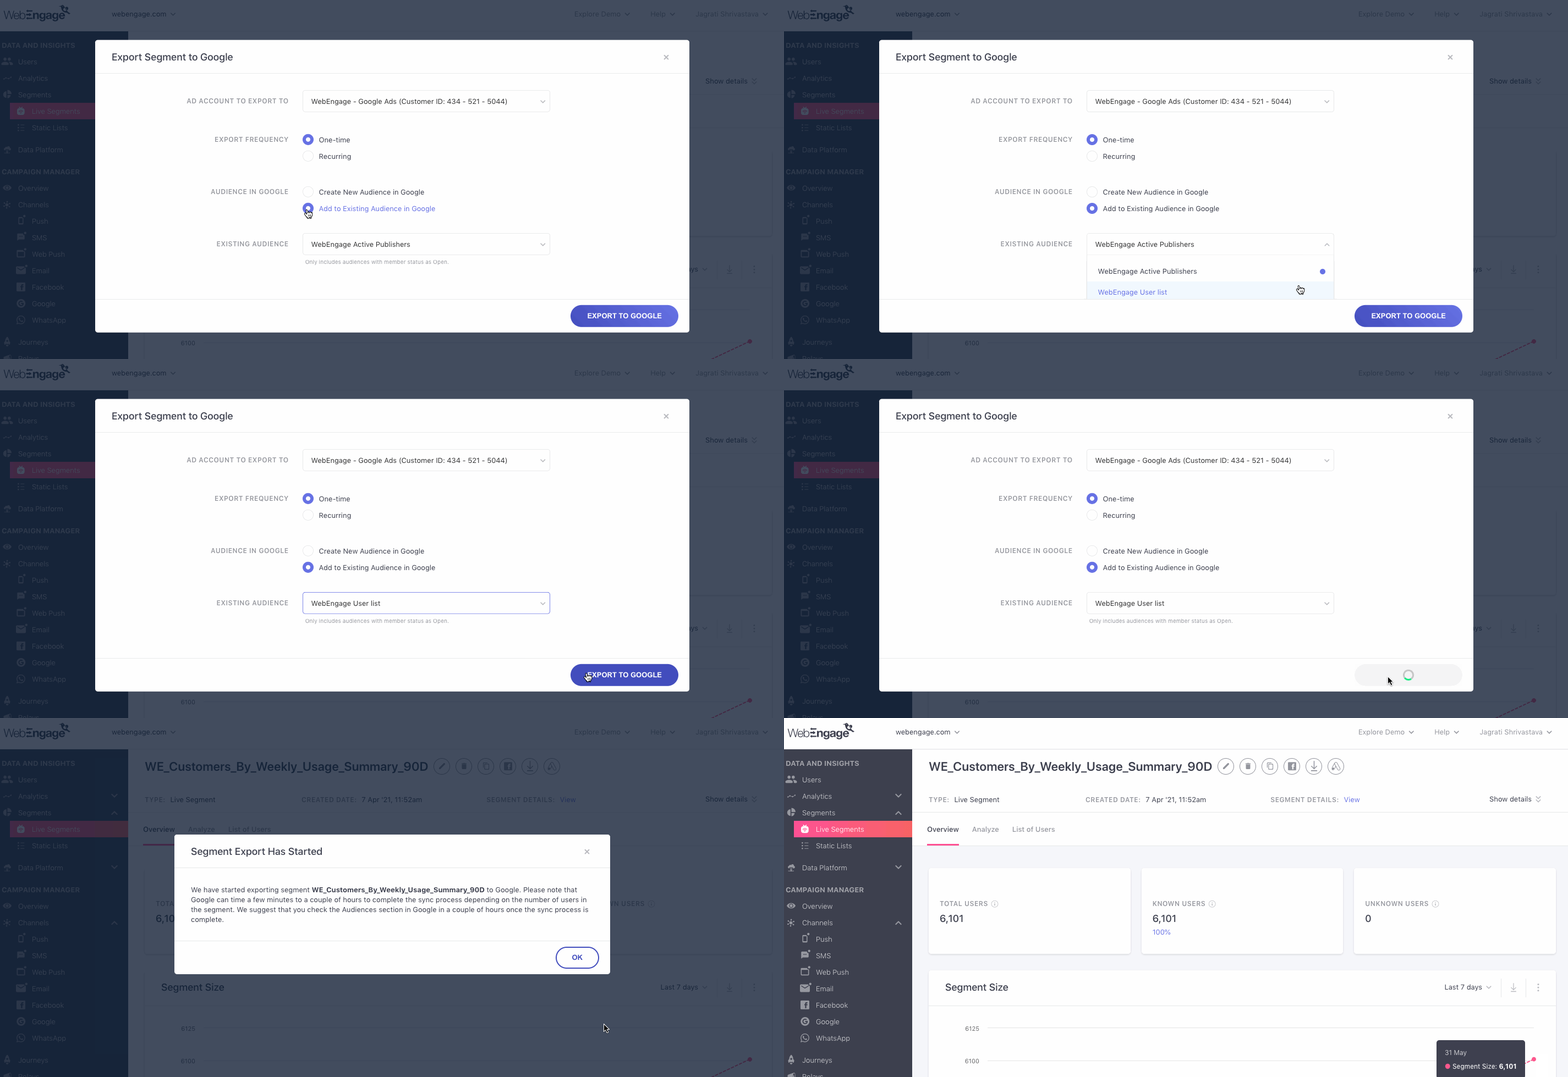
As shown above:
-
SelectCreate New Audience in Google to export the segment as a separate list in your Business Account\
-
SelectAdd to Existing Audience in Google to export segment to an existing list
- In doing so, you will be prompted to select from a list of Existing Audiences (in the selected Ad Account) in the following field.
Recurring Export
Please NoteIf you have chosen Recurring Export atStep 2, then the segment will be exported as a New Audience by default.
The segment will be exported as a Customer List by default. This allows us to sync the Google Ad Audience in real-time with the Segment. Hence, before each sync cycle, all the users are removed from the particular Customer List, and it's populated again with details of the new users that are currently a part of the segment created in WebEngage.
-
SelectOne-time to export details of all the users who are included within the segment at present
-
SelectRecurring to sync Google Audience with the segment in real-time
- In doing so, you will be prompted with an additional field, allowing you to specify the frequency and time of data export.
Specify Frequency
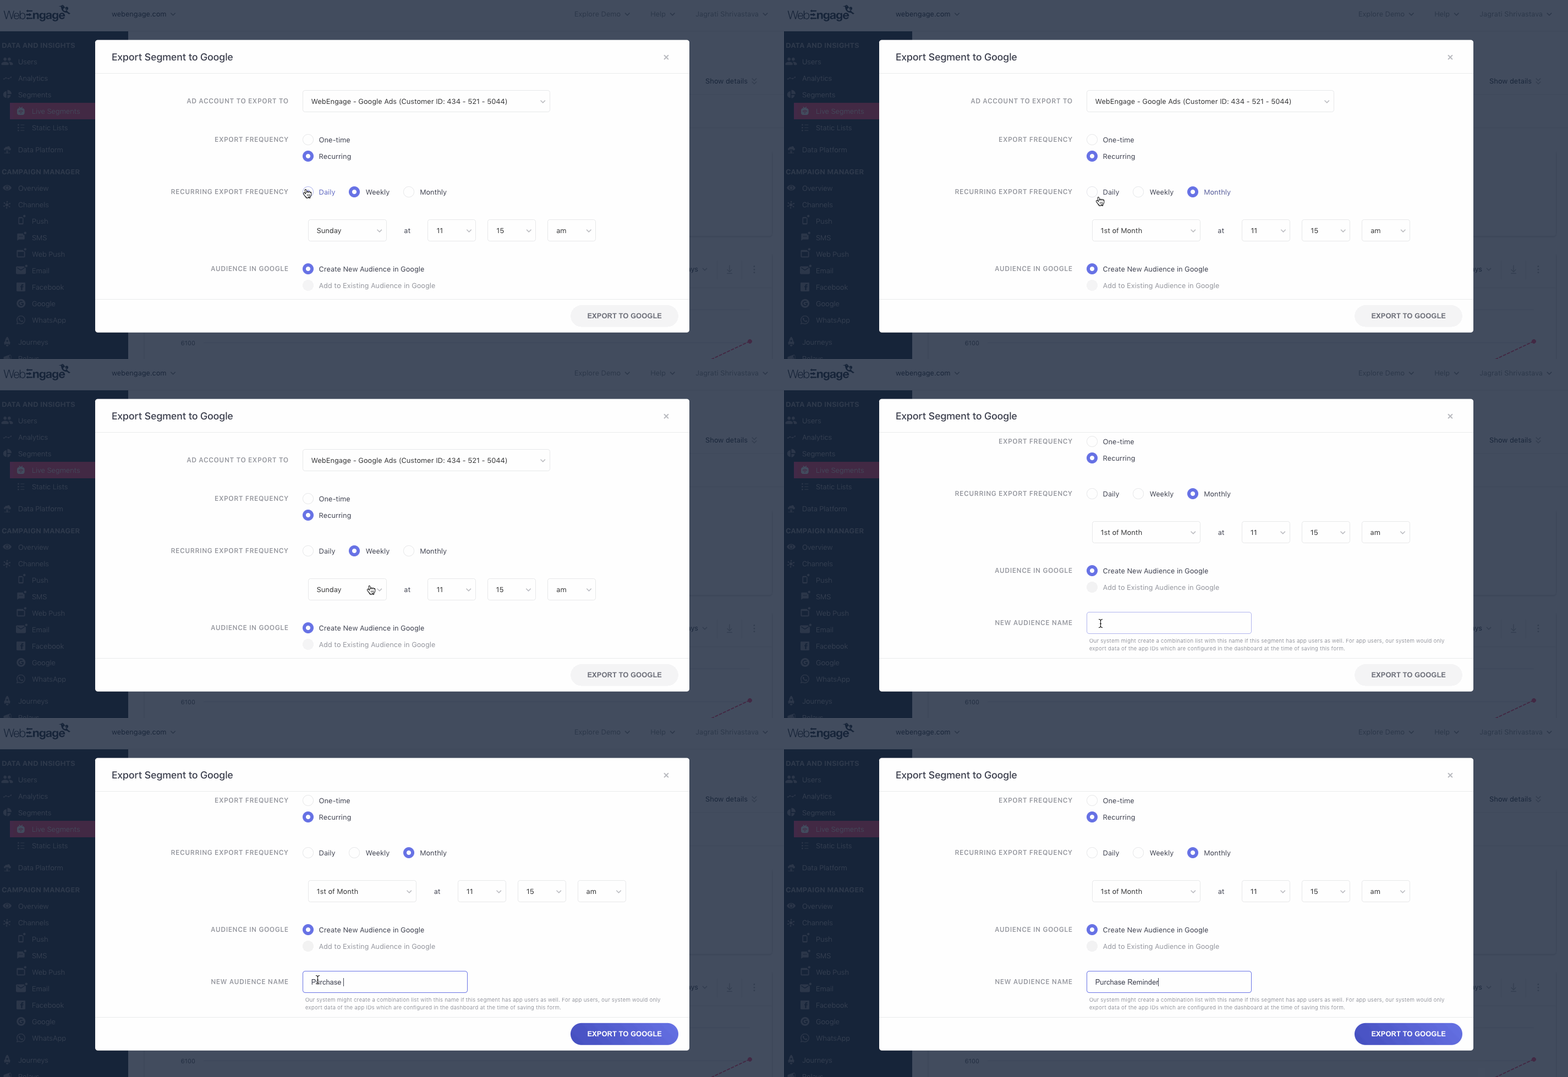
Click to enlarge
As shown above, you can select the frequency of a recurring export as Daily, Weekly, or Monthly, depending on the rules of segmentation and your re-engagement strategy.
Step 3: Selecting Audience
-
If you have chosenCreate New Audience... at Step 3, then give it a unique name that helps you instantly identify its purpose and user properties in your Google Ad Account.
-
If you have chosenAdd to Existing Audience... at Step 3, select the name of the Google Audience to which you'd like to add the user details.
Step 4: Export to Google
Click on Export to Google and start working on a solid Google re-targeting strategy. Here are a few ideas to get you started.
Impact of IDFA on Apple iOS 14According to Google, there will be some impact on google ad performances due to Apple IDFA policies. Detailed Read.
We hope this has enabled you to export segments to your Google Ads Account successfully. Please feel free to drop in a few lines at [email protected] if you have any further queries or related feedback. We're always just an email away!
Updated 4 months ago