Contextual Journeys
Contextual Journeys let you run parallel trips for the same user, simultaneously, based on different contexts such as product categories, loan types, or policy IDs. Instead of limiting journeys to a single user instance, the system now treats a journey trip as User and Context.
This is particularly useful for businesses where a single user may have multiple ongoing relationships (e.g., owning more than one car, taking multiple loans, or having multiple active policies).
A Contextual Journey is a journey that does not only track the user but also the specific context tied to that user. A context is a user-defined attribute, such as product ID, loan ID, policy number, or category.
Each journey trip is now identified by User and Context, meaning the same user can be in same journey with multiple trips at once if they have different contexts. Think of it as:
- User-based Journey- 1 active trip per user at any given moment.
- Contextual Journey - Multiple active trips per user (One trip for each context)
Why do you need Contextual Journeys?
Previously, journeys were defined only at a user level. This meant that if a user was already part of one journey, they couldn’t re-enter the same journey at the same time. For industries with multi-category interactions, this created gaps:
- Insurance: A customer holding multiple policies could not receive reminders for each policy separately.
- Banking: A customer with multiple loans couldn’t be tracked or nudged individually for each loan.
- E-commerce: A shopper browsing multiple categories couldn’t be engaged contextually for each one.
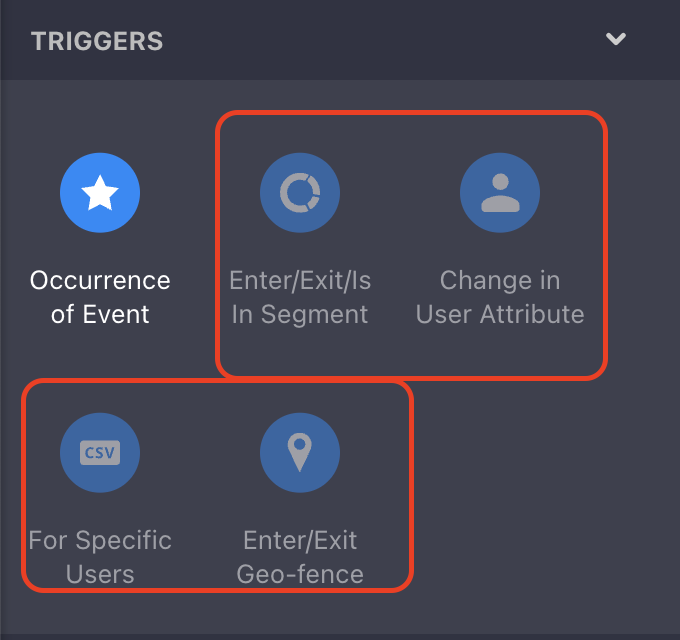
Note: Before you start to create a contextual journey keep in mind that it is only supported with a specific trigger i.e. Occurrence of an event.
How to add Context to your Journey?
- Start off by creating a journey as usual, but to create a Contextual Journey you need to add the ‘occurrence of an event’ trigger.
- Now set up the trigger by selecting the event that your user must complete to enter the journey
- Below this option you are provided with an option to ‘Add Context’, that turns it into a contextual journey.
- On clicking this you will then be provided with a space to provide a ‘Context Name’.
- Click on ‘Save’, once you provide it.
- You will now be provided with a new dropdown to Select attribute that represents the context name that you provided.
- Click on ‘Save’.

You can also add context to the ‘Wait for event’ and ‘Exit trigger’ blocks of your journey, by using the same method.
Once that’s done you will realize that the other triggers on your left panel will be disabled except the ‘occurrence of an event’ trigger.
Wait for Event
When a journey is contextual, the Wait for Event block allows you to define how the event should be evaluated within that context.
How does it work?
- Assign a context to the block: Select a context based on the label configured in the Context component. This ensures the event is evaluated for the correct entity.
- Use “No Context” when applicable: Choose No Context if the event should be evaluated independently and not follow the journey’s context.
- Missing context indicators : If the block is added before the journey is marked as contextual and no context is assigned, the block is highlighted to indicate that context selection is required.
Add an Exit Trigger with Context
- You can now add an exit trigger to a contextual journey.
- To add an exit trigger, look for the Add Exit Trigger option under the Journey name.
- Choose When the user does an event as the exit condition.
- Define the specific event that should end the journey.
- While configuring the event, you can choose whether the journey context should be applied or not
- You can now continue to build your journey as usual.
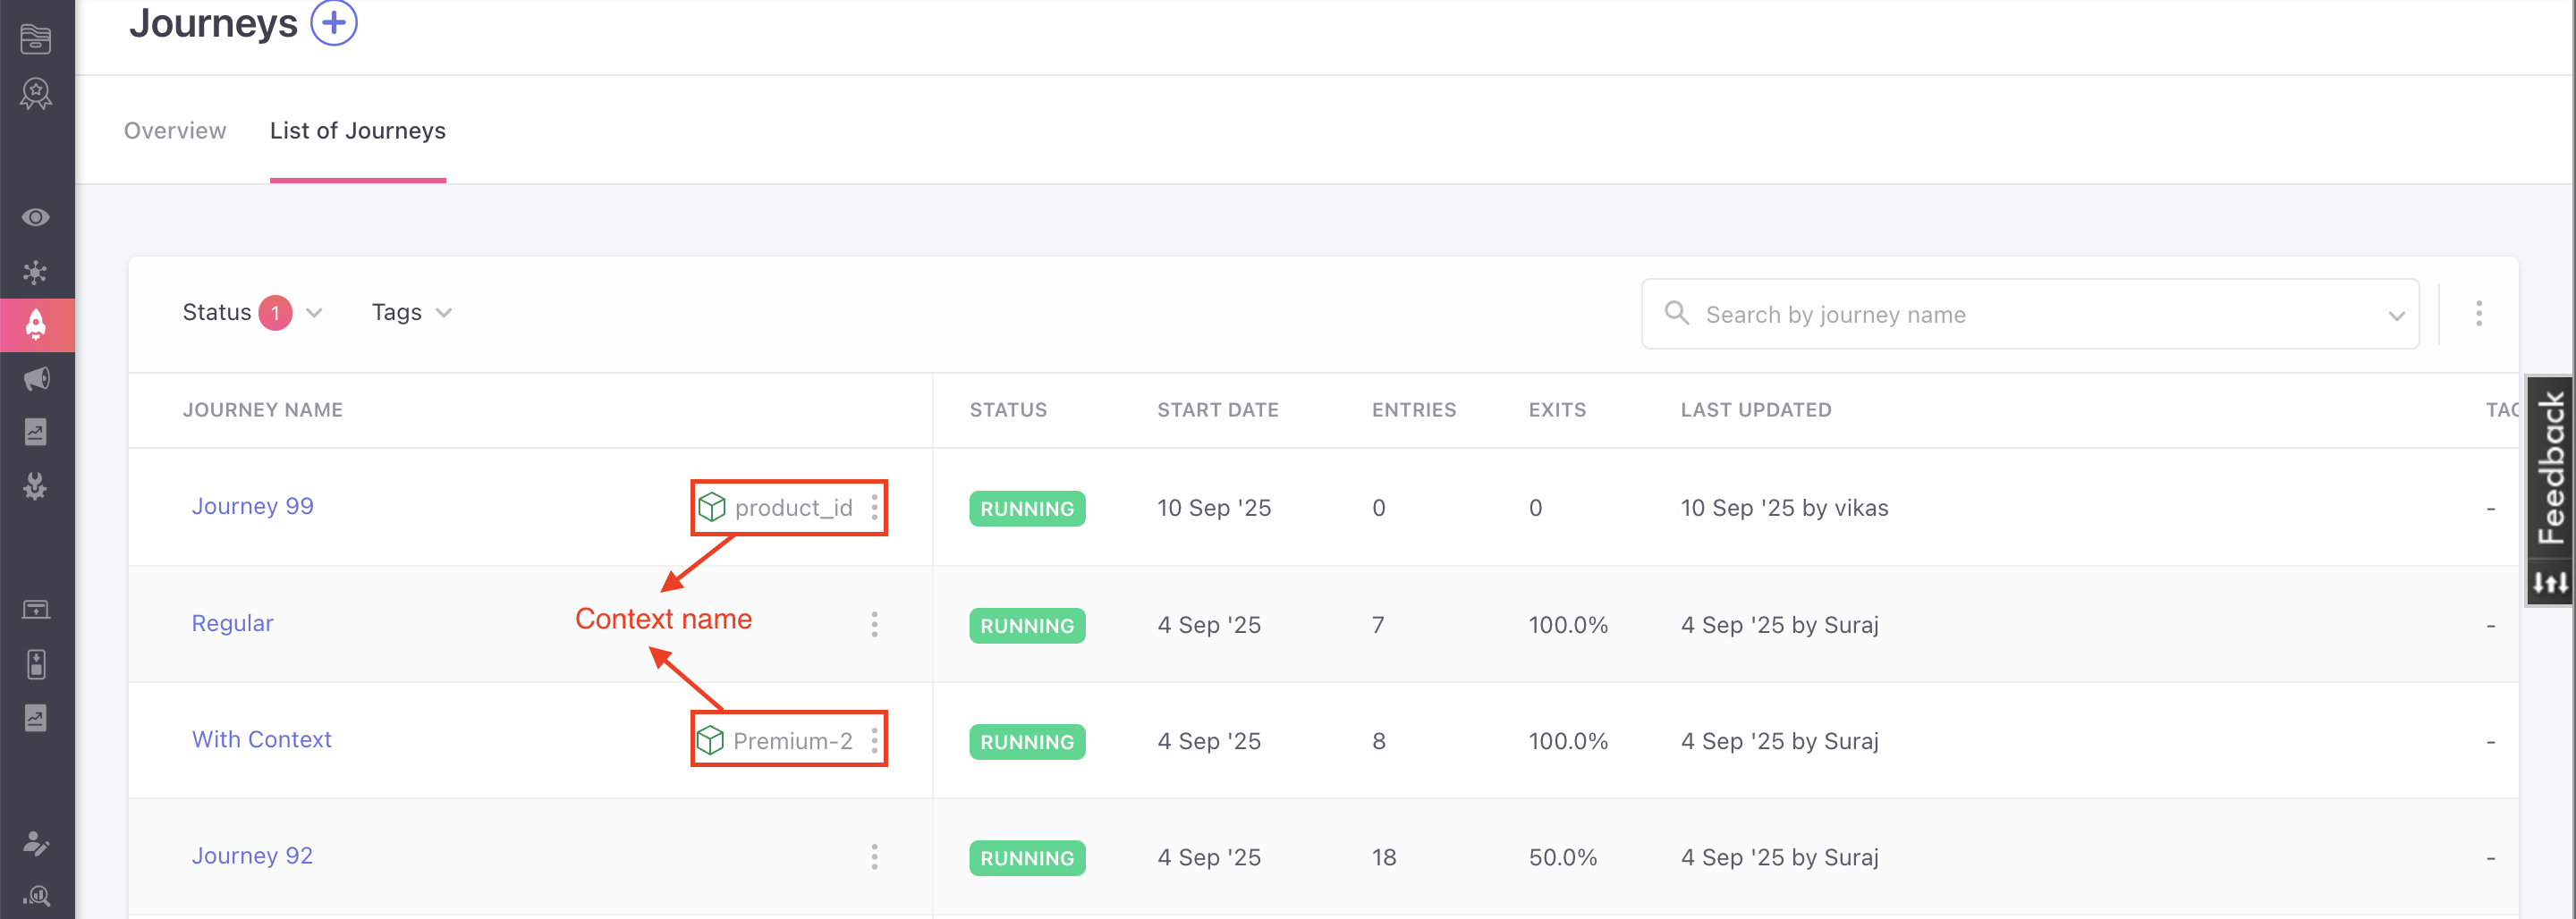
- You can differentiate between a normal journey from a contextual one from the list of journeys page, where you can find the context name adjacent to your journey name.
Journey Debugger
The Journey Debugger helps you quickly identify and resolve journey-related issues directly from the dashboard. It enables you to understand user movement within a journey and troubleshoot unexpected behavior. With the Journey Debugger, you can answer questions such as:
- Why did a user enter the journey?
- Why didn’t a user enter the journey?
- Why did a user exit the journey?
- Why didn’t a user exit the journey?
For deeper analysis, the debugger also surfaces relevant event data and user information, giving you better context for each outcome.
