Object Based Access Control (OBAC)
Large organizations often operate with complex marketing structures, where teams are segmented by factors such as region, product category, or functional focus. In such setups, different teams may manage distinct business lines or markets while working within the same engagement platform.
To streamline operations, marketers require a unified dashboard while maintaining logical separation of user bases to prevent cross-communication.
OBAC (Object-Based Access Control) allows admins to grant selective access to user data, events, segments, and campaigns. These controlled access levels are referred to as Views.
Why Introduce Views?Marketers with restricted access to specific user segments should not accidentally engage audiences outside their designated scope.
How 'Views' work?
- Only Admins and Managers can create Views.
- Views can be created using custom user attributes with an AND condition between criteria.
- 'Segments without View' and 'Campaigns without View' are accessible to all users for unrestricted content.
- If no views are assigned, users can access all segments and campaigns.
- If views are assigned, users can access only the assigned segments and campaigns.
- Unassigned views remain inaccessible to users.
- Views cannot be assigned to existing segments or campaigns- they will appear under "Segments without View" & "Campaigns without View".
- During campaign creation, the "Send to" dropdown will show:
- Live Segments of the selected view
- All Lists
- All Users (Restricted based on View permissions)
Steps to Setup New View
Use the following steps to setup the New view
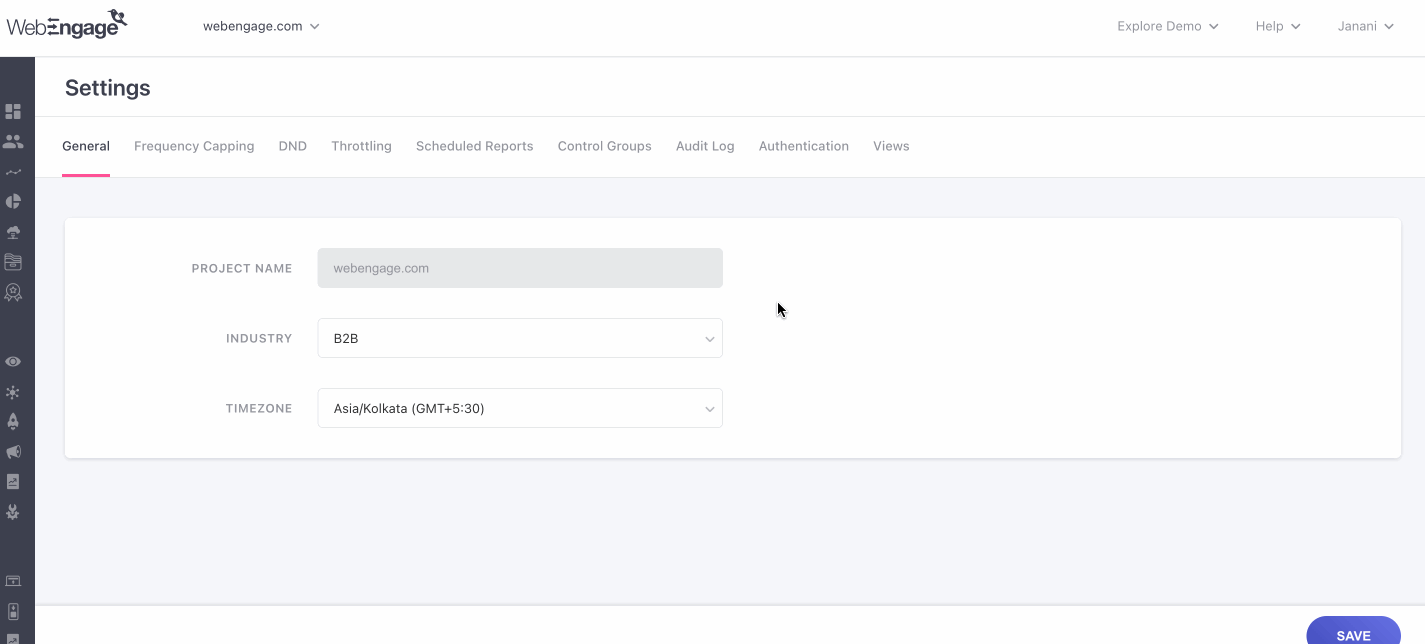
- Click on your profile name at the top right corner of your dashboard.
- Navigate to Settings in the dropdown.
- Once you're here, navigate to the Views tab
- Click the plus (+) icon to open the View CRUD interface.
- Enter a View Name.
- And define the criteria for using the User Attributes. To add additional criteria, click "Add More".
Steps to View Assignment
- From the Dashboard menu on the left, navigate to the Team section.
- Locate the user you want to assign a view to and click on the three-dot menu towards the extreme right.
- Select Edit.
- Choose and assign the relevant Views for the selected user.
- Save the changes.
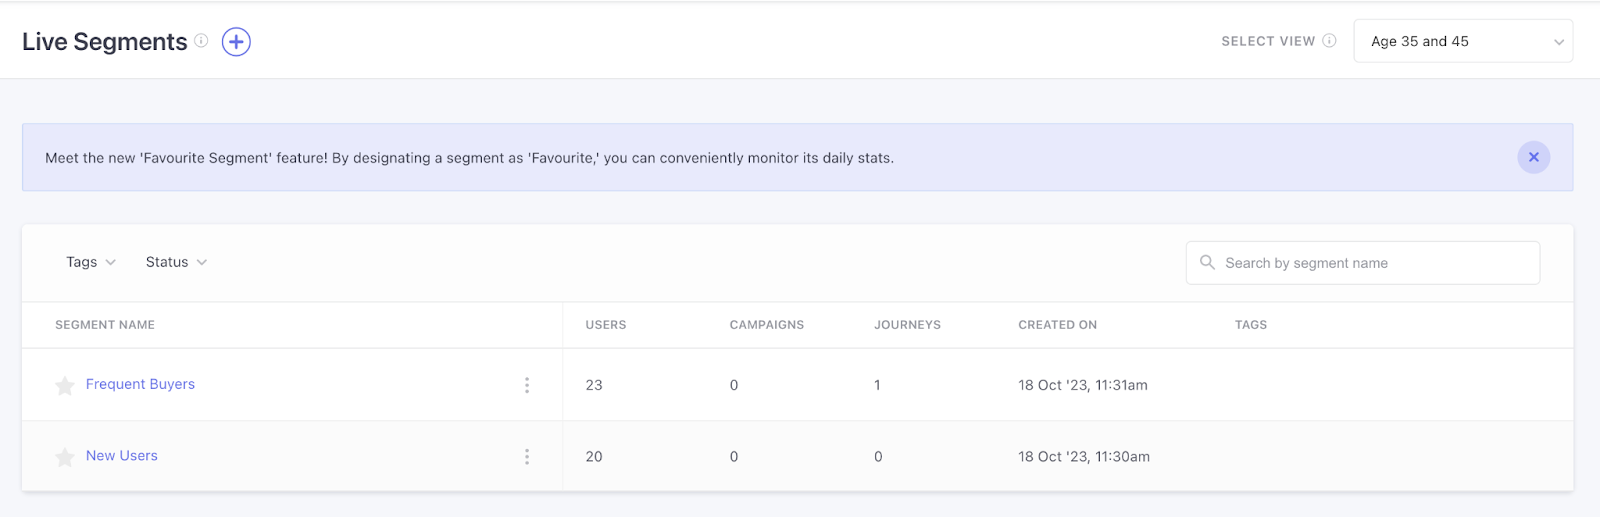
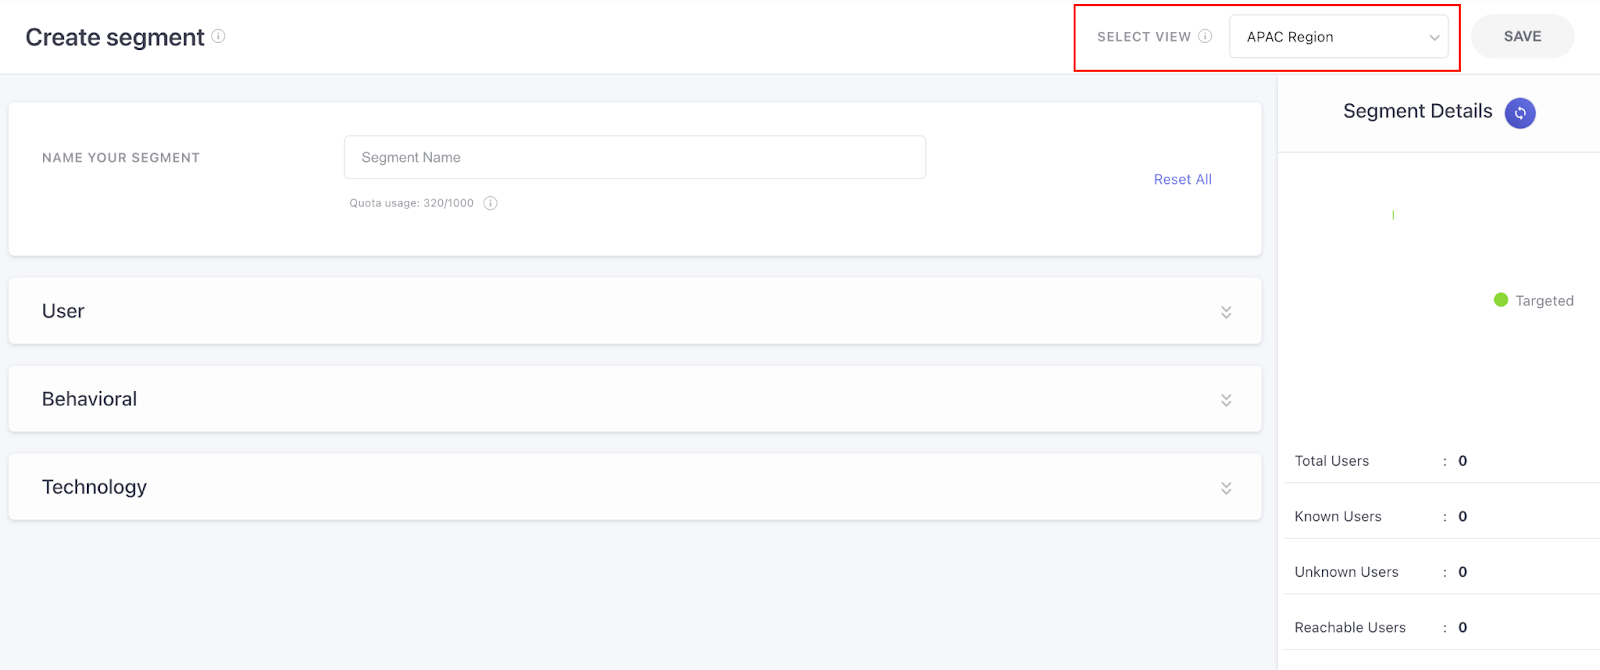
Segment Listing
The Segment Listing Page displays all segments created within the views assigned to a user. Since users can be associated with multiple views, the page includes an option to switch between views to explore different segment sets.
Accessing Segments for a Specific View:
- Navigate to the Segment Listing Page.
- Use the SELECT VIEW option to choose a specific view.
- The page will display segments based on the selected view.
- This ensures flexibility in organizing and managing segments while maintaining controlled access based on assigned views.
Segments Based on Assigned Views
When a user creates a segment within an assigned view, it automatically inherits an implicit filter that matches the view’s criteria. This ensures all segments remain aligned with predefined rules and restrictions.
Here's how you can create a segment with View:
- Go to the Segments section.
- Click Create Segment.
- Use the SELECT VIEW option to choose a view.
- Define additional segment criteria.
- The implicit filter from the assigned view is automatically applied.
- Click Save.
This safeguards data access by ensuring users can only create and manage segments within their assigned views.
List based on Assigned Views
You can also view this on the Lists page of your dashboard, by following the steps mentioned below:
- Navigate to 'Lists' on the left navigation panel under the Segments section.
- Use the SELECT VIEW option to choose a view.
- Define additional segment criteria.
- The implicit filter from the assigned view is automatically applied.

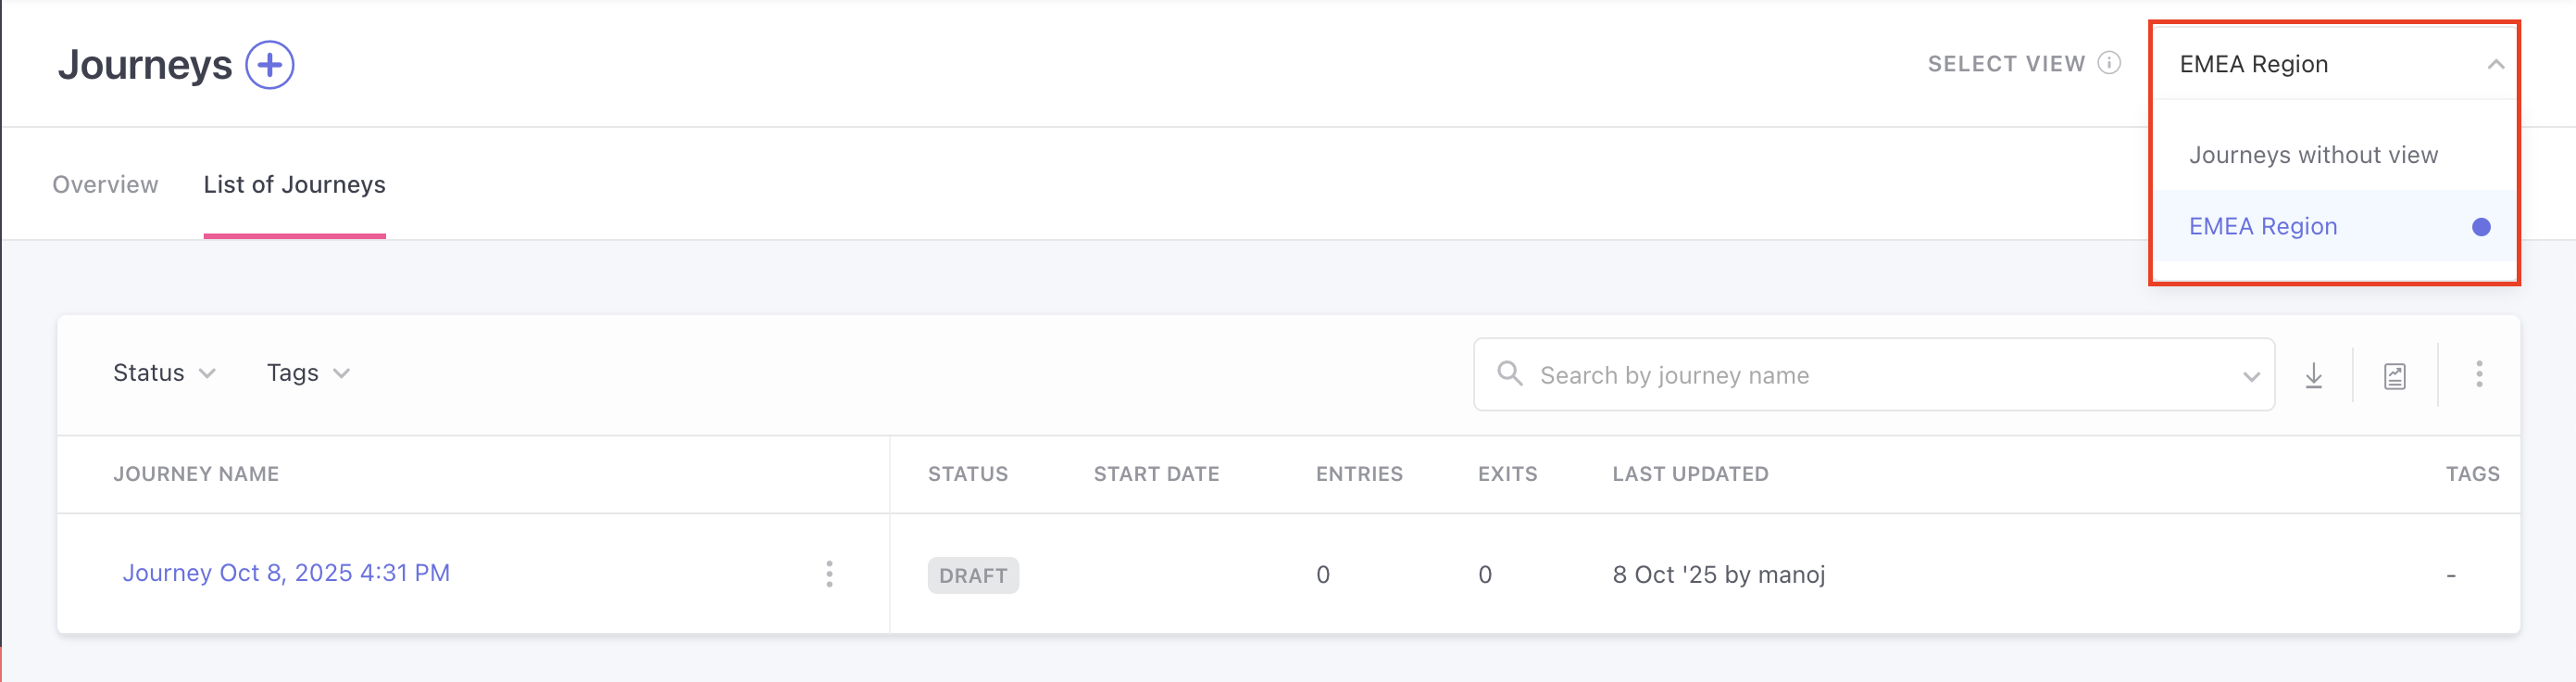
Journey Based on Assigned Views
When a user creates a journey within an assigned view, it automatically inherits an implicit filter that matches the view’s criteria. This ensures all journeys remain aligned with predefined rules and restrictions.
Relays Based on Assigned Views
You can now also select your view options within relays as well.

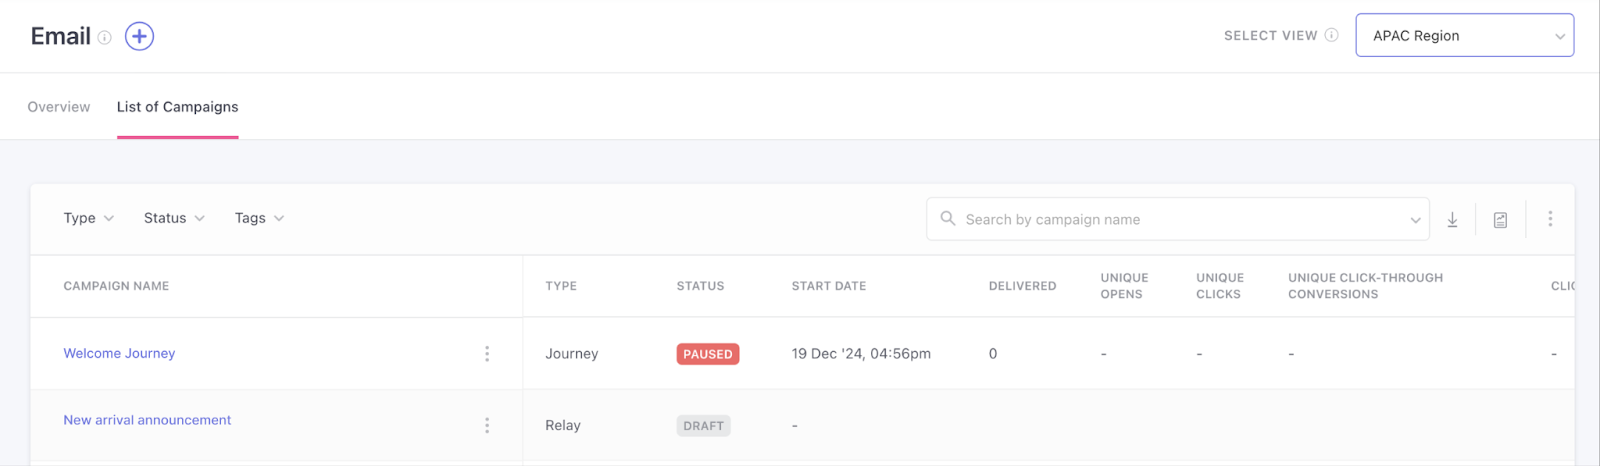
Campaign Listing Page & View-Based Access
The Campaign Listing Page displays all campaigns created within the views assigned to a user. Since users can be associated with multiple views, they can switch between views to explore different campaign sets.
Follow these steps to access campaigns for a Specific View:
- Navigate to the Campaign Listing Page.
- Use the SELECT VIEW option to choose a specific view.
- The campaign list will update based on the selected view.
- This feature ensures efficient campaign management, allowing users to organize and access campaigns while maintaining controlled visibility based on assigned views.
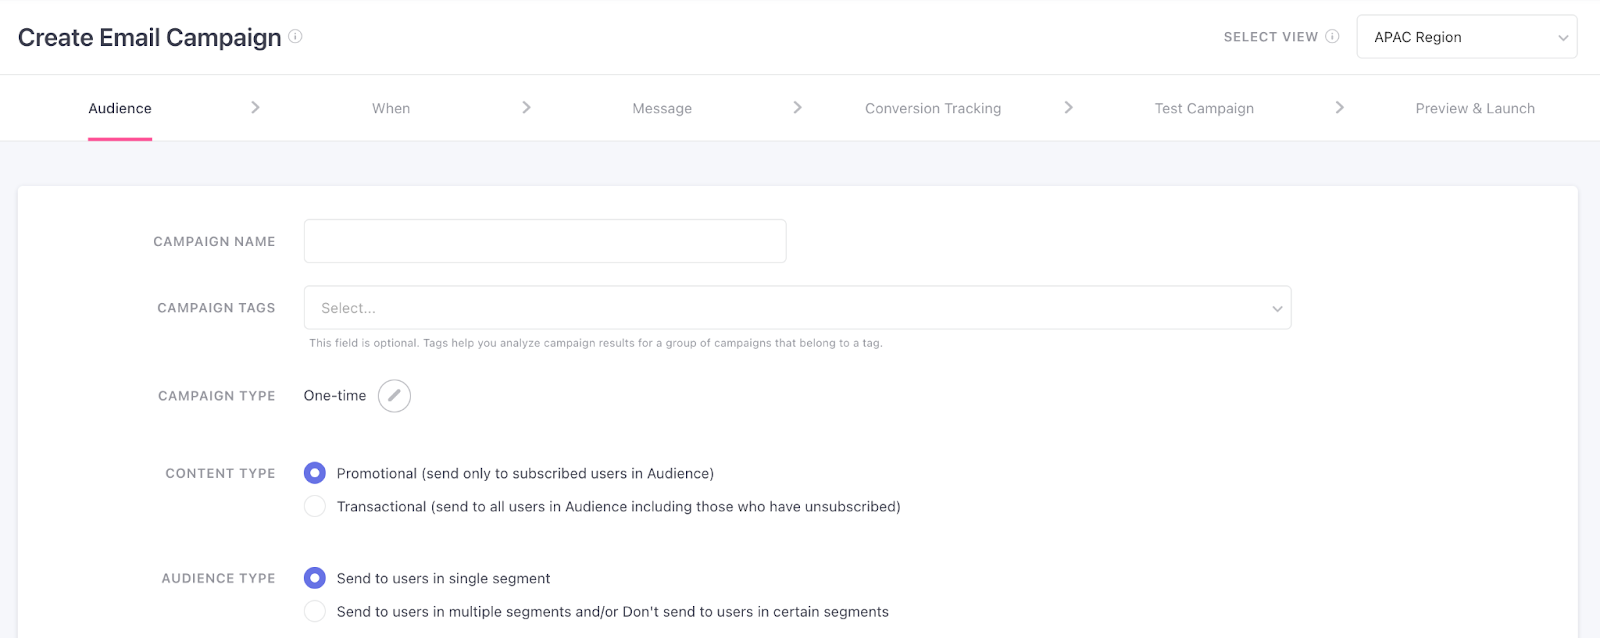
Campaigns Based on Assigned Views
When a user creates a campaign within an assigned view, it automatically inherits an implicit filter that aligns with the view’s criteria. This ensures all campaigns follow predefined rules and restrictions.
- Go to the Campaigns section.
- Click Create Campaign.
- Use the SELECT VIEW option to choose a view.
- Define additional campaign criteria (including segments in the audience section, if needed).
- The implicit filter from the assigned view is applied, restricting the audience accordingly.
- Click Save.
This safeguards data integrity and compliance, preventing users from accessing or targeting audiences outside their assigned views.
Excluded from OBAC Scope
- Dashboards - Dashboards do not come under OBAC, however, the cards that were pinned using specific teams will only show data to the users who are part of that team.
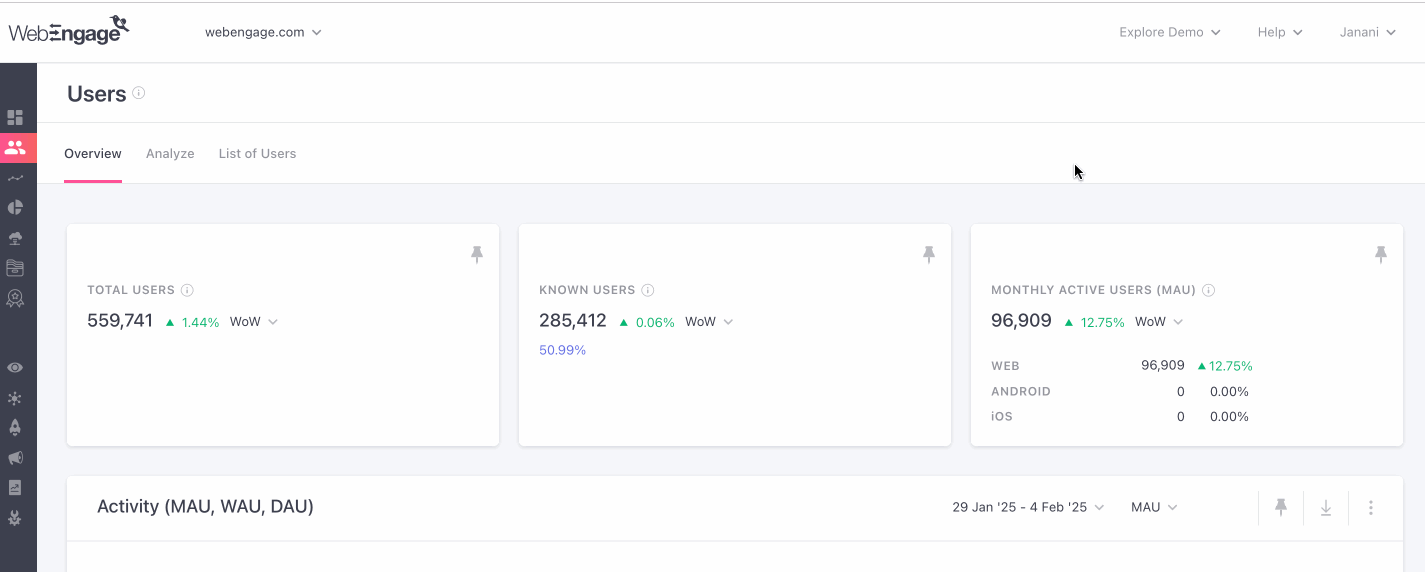
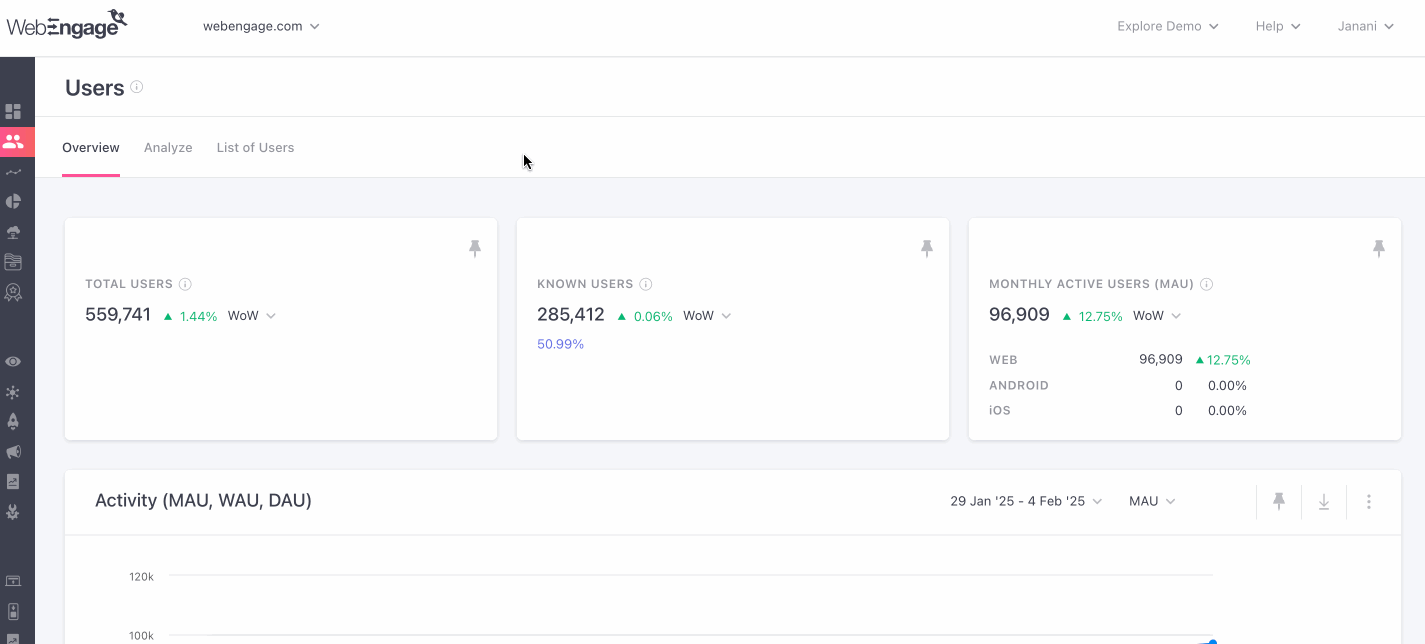
- Users - Overview and Analyze tabs.
- Analytics - Uninstalls & Live.
- Predictive segments.
- Alerts.
- Engagement scores.
- Catalog & Recommendations.
- Campaign Overview Dashboard.
- Individual Channel Overview Dashboard.
- Journey Overview Dashboard.
- Relay Overview Dashboard.
- Schedule Reports.
- Inbound channel's Overview Dashboard.
Updated 3 months ago