Edit Live Journey
Have you ever wished you could go back and fix a journey you already published because you spotted a mistake or learned something new after launch?
- Imagine realizing during a campaign that a connector is pointing the wrong way.
- Or discovering that you forgot to add a critical step, like sending an SMS.
- Sometimes you may simply want to try a new engagement strategy without pausing the entire journey.
Until now, published journeys were rigid. Making changes often meant creating a new journey, restarting users, or losing consolidated data.
Live Journey Editing changes that. It lets you make real-time updates such as adding, removing, or reconnecting nodes and paths while keeping your data intact and ensuring users continue without disruption.
What's New?
Earlier, you could only modify limited parts of a live journey, like updating settings within existing blocks. But as user needs evolved, the demand for more flexible and comprehensive editing capabilities grew. Some of the capabilities include:
- Add Blocks: Introduce new blocks into the ongoing journey to expand or adjust user flows as needed.
- Archived Blocks: Remove redundant or incorrect blocks without disrupting users already in those flows.
- Add Connectors: Create new pathways between blocks to modify or optimize engagement sequences in real-time.
- Archived Connectors: Remove outdated or incorrect nodes to clean up the journey logic while keeping transitions smooth for users.
How does it work?
Once you create a new pathway with new blocks and/or nodes, new users will follow these new pathways.
Whereas, already existing users who are in between the blocks of the original journey, will continue to complete the original path and not be redirected to the new path.
Data integrity is preserved by reporting remains consolidated within the same journey.
How to Edit a Journey?
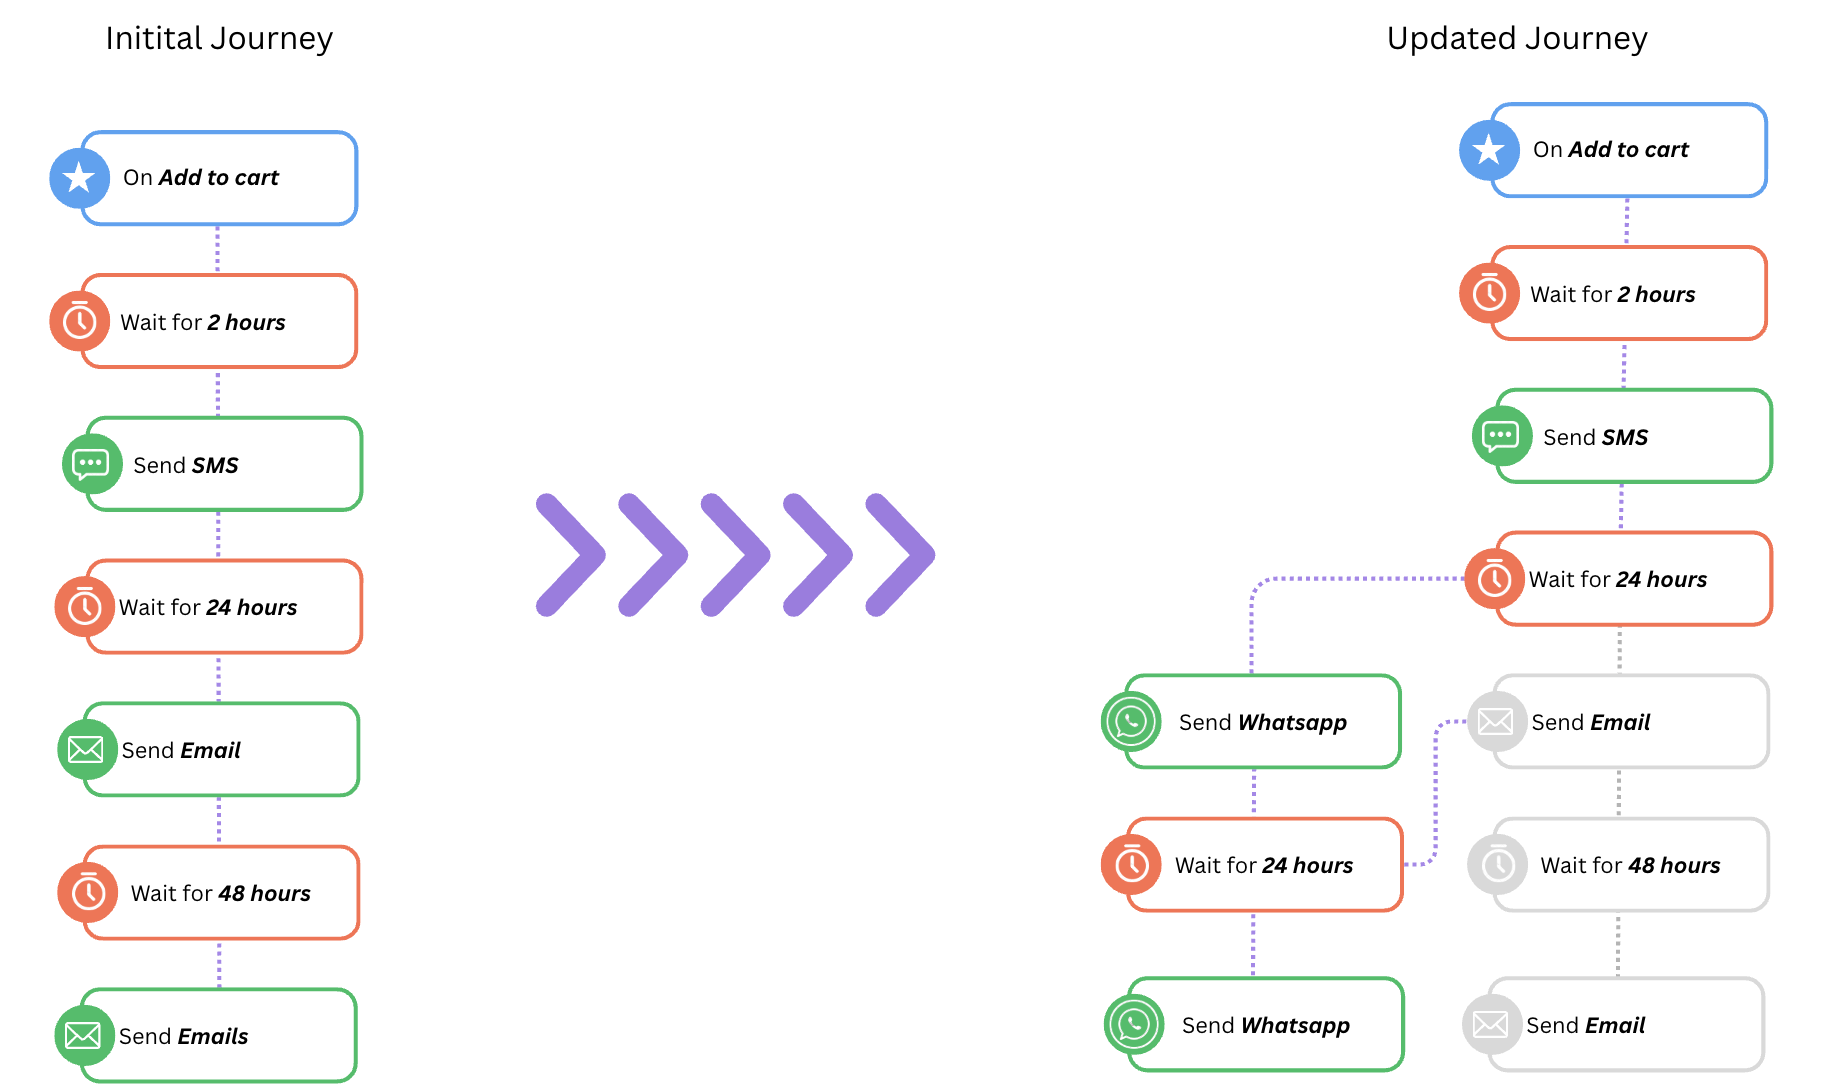
Here is an example of how the initial journey and how it can be edited.
On your dashboard, navigate to the Journeys section and choose a running Journey
- and either click on the edit option adjacent to the journey name on this page or
- go ahead and click on the journey and navigate to Live view and then click on edit on the upper right hand side of the screen.

- You will then be directed to the journey’s canvas page.
Adding a Block
Drag and drop a block from the left panel and connect it to an existing block pathway i.e. active or archived, and make sure that at least one outgoing connector leads to an Active block.
Example Use Case:
You launch a new campaign and want to add a SMS Campaign Node for users who recently purchased a product, without restarting the entire journey.
Archiving or Deleting a Block
To delete a block, simply click on the archive button when hovering on a block that you want to delete or archive. When a block is deleted, it along with all incoming connectors leading to it are also marked as archived/ deleted.
Be rest assured that the existing users in these archived blocks will follow the original journey pathway, and will not be lost.

Example Use Case:
You mistakenly included a Duplicate Email Step. Delete it, and ongoing users finish that flow via the Archive path, while new users skip it.
Note: Only new users entering the journey will take the new journey pathway i.e. new blocks.
Adding a Connector
New connectors can be added to both existing and newly created blocks, and they take effect immediately. However, for users already in a waiting state at a preceding block, the following applies:
- If the new connector is added after users have already entered the block, they will continue along the originally configured path.
- Users will not transition through the newly added connector if its condition was met before the connector existed.
Example Use Case:
You want to test a new SMS path from an Email node. Add a connector to redirect future users, while existing users continue down the original email-only route.
Archiving or Deleting a Connector
You can archive or delete a connector by simply hovering over the connector you want to delete and click on the ‘Archive’ button.
Similar to deleting a block, deleting a node will also allow existing users to follow the original path, whereas new users will be redirected to the new pathway.
Add Connectors between archive and active block
A connector from an archive block to an Active block is allowed, but it cannot be the sole connector leading to that Active block. While validation ensures all blocks are properly connected, Archive-to-Active connectors should be excluded from this check. At least one direct connector between Active nodes must exist for the journey block to be considered valid.
Note: We have updated the system to allow you to edit your journey. For those of your users on archived blocks, we have provided the option to follow the new paths via connectors. New users entering the system will be directed down the fresh journey path.
Here's a representation of how your new users in the active blocks will follow the latest paths
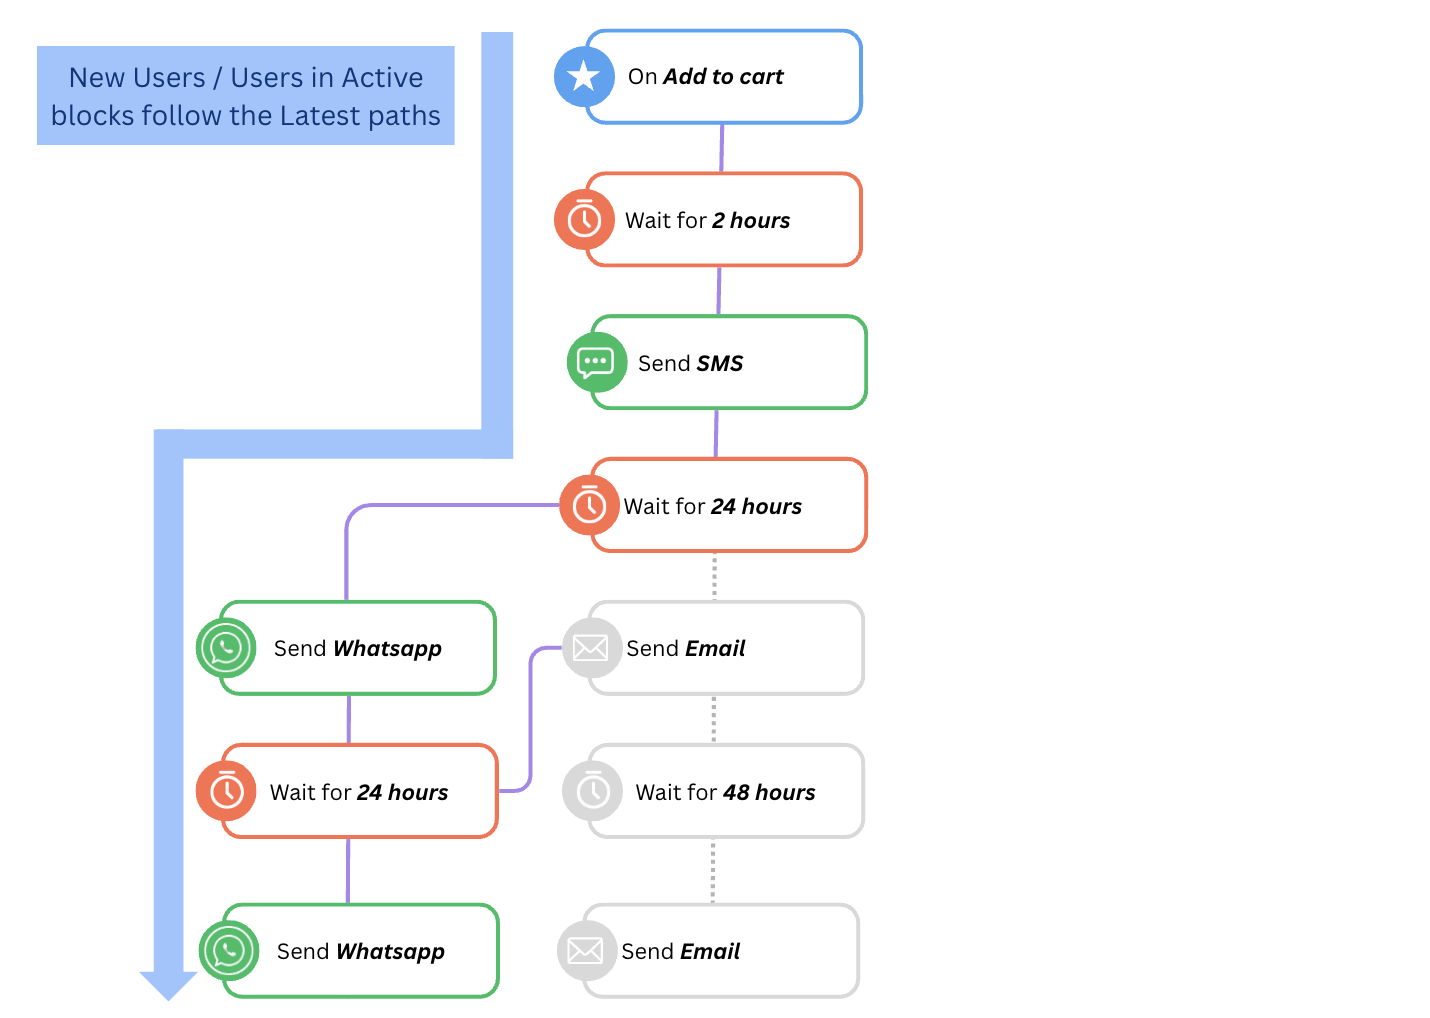
Users on the archived paths will follow the active paths as available.
Example Use Case
Suppose you want to gradually move users from a Legacy Offer block (Archive) to a new Updated Offer block (Active). In this case, you can add an Archive to Active connector to enable a seamless transition.
Other Use Cases
- Campaign Optimization: Keep the path that is performing better than other mid-campaign without restarting.
- Error Correction: Archive incorrect nodes (like a wrong audience filter) while letting existing users finish.
- Feature Rollout: Add a new communication channel (e.g., WhatsApp) for new users, while existing users continue email-only flows.
- Gradual Migration: Redirect Archive paths into new Active flows to phase out legacy steps.
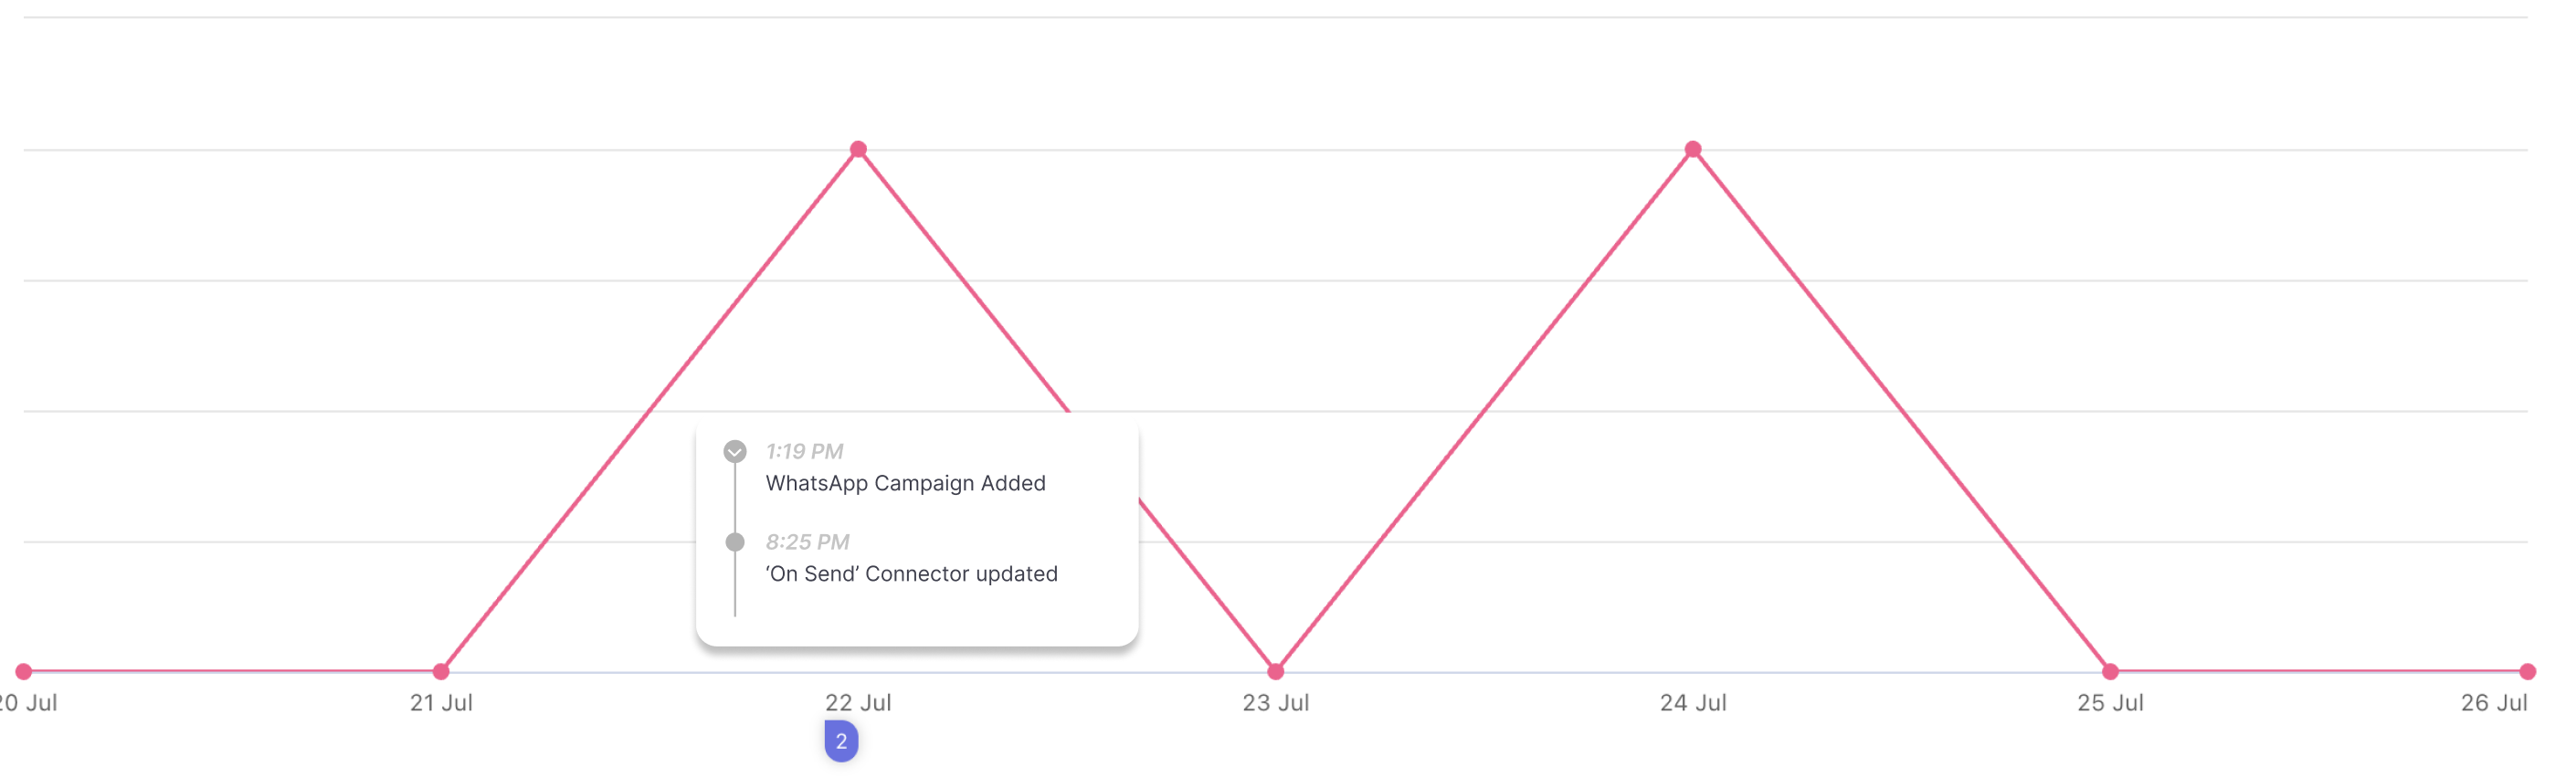
Statistics
You can also check how your edit has affected the journey statistics. You can navigate back to the overview page of the journey you edited a few days after the edit was made and scroll down to the Detailed statistics section and observe the changes.